Taille
THE PROTECTION AFFORDED BY THIS HEARING PROTECTION WILL BE SEVERELY IMPAIRED IF
THE FOLLOWING WARNINGS & INSTRUCTIONS ARE NOT ADHERED TO.
Improper fit of this device will reduce its effectiveness in attenuating noise. The level of noise entering a
person’s ear, when hearing protector is worn as directed, is closely approximated by the difference
between the A-weighted environmental noise level and the NRR. Example: 1. The environmental noise
level as measured at the ear is 92 dB(A). 2. The NRR is 25 decibels (dB). 3. The level of noise entering
the ear is approximately equal to [92dB(A)-25] 67 dB(A).
Store in sealed packaging until ready to use. Keep in a dry, clean area away
from direct sunlight and chemicals or vapors, which may cause damage to the product.
CAUTION: 1. Ensure that the earmuffs are fitted, adjusted and maintained in accordance with the
manufacturer’s instructions. 2. Earmuffs should be worn at all times in noisy surroundings.
3. Earmuffs should be inspected regularly for serviceability. 4. The fitting of hygiene covers to
the cushions may affect the acoustic performance of the earmuffs. 5. Earmuffs, and in particular
cushions, may deteriorate with use and should be examined at frequent intervals for cracking
and leakage, for example. 6. If the cushions become hard, damaged or deteriorated, the
earmuffs should be replaced promptly. The cushions are not replaceable.
CAUTION:
For noise environments dominated by frequencies below 500 Hz the C-weighted environmental noise
level should be used. Although hearing protectors can be recommended for protection against the harmful effects of
impulsive noise, the Noise Reduction Rating (NRR) is based on the attenuation of continuous noise and may not be an
accurate indicator of the protection attainable against impulsive noise such as gunfire.
FITTING INSTRUCTIONS:
1. Place the earmuff on your head. 2. Fit earcups comfortably over your ears. 3. Adjust the
earcups by sliding them up or down on the headband to achieve optimal fit. 4. Earmuff can also
be collapsed for easy storage by holding earmuffs in one hand and pressing the headband wires
towards the earcups.
Cleaning and Disinfection Instructions: Clean with warm water and mild anti-bacterial soap.
Air dry thoroughly. To disinfect, wipe gently with 3% hydrogen peroxide on a clean cloth and let
dry before use.
Storage: Keep in a dry, clean area away from direct sunlight and chemicals or vapors, which
may cause damage to the band or ear cups.
CAUTION: Do not allow foam in ear cups to become wet. This product may be adversely affected
by certain chemical substances. Further information should be sought from the manufacturer.
This device may increase electrical hazards.
EN CASO DE NO CUMPLIRSE CON LOS AVISOS E INSTRUCCIONES DETALLADOS A
CONTINUACIÓN, LA PROTECCIÓN QUE OFRECE ESTE PROTECTOR AUDITIVO SE VERÁ
SERIAMENTE DISMINUIDA.
El ajuste incorrecto de este producto reducirá su efectividad en el nivel de atenuación de ruido. La
cantidad de ruido que entra al canal auricular de una persona, cuando el protector auditivo se coloca
correctamente, es calculado de manera aproximada tomando la diferencia entre el nivel de ruido
ambiental Ponderado-A y el nivel de reducción de ruido (NRR). Ejemplo: 1. El nivel de ruido ambiental
se mide en el oído en 92dB (A). 2. El nivel de reducción de ruido (NRR) es de 25 decibeles (dB).
3. El nivel de ruido que entra al oído es aproximadamente igual a [92dB(A)-25] 67 dB. Basado
en pruebas de laboratorio con ambientes controlados.
Conservar en el envase cerrado hasta el momento de su uso. Mantener en un lugar limpio y seco
fuera del alcance de la luz solar y productos o vapores químicos que pudieran dañar el producto.
PRECAUCION: 1. Asegúrese que las orejeras embonen, estén ajustadas, y se cuiden de acuerdo a
las instrucciones del fabricante. 2. Las orejeras deben de usarse todo el tiempo mientras se
permanezca en ambientes ruidosos. 3. El funcionamiento adecuando de las orejeras debe
inspeccionarse regularmente. 4. El uso de cubiertas higiénicas en las almohadillas puede
afectar el desempeño acústico de las orejeras. 5. Las orejeras, en particular las almohadillas,
pueden deteriorarse con el uso y deben de examinarse frecuentemente para identificar fisuras y
filtraciones, por ejemplo. 6. Si las almohadillas se dañan, deterioran o se endurecen, la unidad
debe de reemplazarse de inmediato ya que las almohadillas no son reemplazables.
PRECAUCION:
Para ambientes ruidosos dominados por frecuencias por debajo de 500 Hz, debe utilizarse la ponderación-C
(C-Weighted) para el nivel de ruido ambiental. Aun cuando los protectores auditivos se recomiendan para proteger contra los
efectos dañinos de un ruido intenso, el nivel de reducción de ruido (NRR)
está basado en la atenuación de ruidos continuos y
puede no ser una medida exacta para la protección que se requiere alcanzar cuando hay un ruido demasiado fuerte, como el
disparo de un arma de fuego.
INSTRUCCIONES PARA SU COLOCACIÓN:
1. Coloca las orejeras por arriba de la cabeza 2. Coloque las copas sobre los oídos de manera
que queden cómodas. 3. Ajuste la altura de las orejeras deslizando las mismas hacia arriba o
hacia abajo hasta obtener un ajuste óptimo. 4. Las orejeras pueden plegarse para su fácil
almacenamiento; para hacer esto, presione la banda superior hacia las copas.
INSTRUCCIONES DE LAVADO Y DESINFECTADO: Limpie las orejeras con agua tibia y jabón
anti-bacterial. Espere a que sequen por completo. Para desinfectarlas, límpielas con peróxido
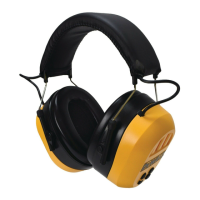
PARTS AND FUNCTIONS:
1. Antenna
2. Padded Headband
3. Adjustable headband brace
4. Padded (and covered) foam ear cushion
5. Size adjustment guide
6. LCD Screen
7. Up or Advance Scan and Seek Button
8. AM / FM Toggle Switch Button
9. Station Memory and Preset Button
10. Stereo Input Jack
(compatible with included accessory cable)
11. Down or Reverse Scan and Seek Button
12. On / Off Control Dial
BATTERY INSTALLATION: This unit requires 2 AA Alkaline1.5v batteries. (not included)
1. Locate the cover and open using a coin or screwdriver.
2. Ensure proper placement of batteries. Positive pole is down for left hand battery and up for
right hand battery.
3. Close tray and gently tighten screw.
Operation:
DISPLAY/CLOCK: Push the Station Preset Button. The unit will default to 'TIME' mode(24 Hour
Clock). LCD should indicate AM 00:00. Press 'Preset' Button to select Hours, Minutes as needed.
Use Up and Down arrows (buttons 7 and 11) to move advance or retreat the indicator to the
desired time.
RADIO: Place earmuffs on head. Use the On / Off Control Dial to turn on radio. Use dial to
insure that volume is set at low to intermediate level. Use Scan / Seek (7 and 11) buttons to
locate radio stations on either the AF or FM band. When a desired station is identified, press and
hold the Memory Preset Button, for approximately 3 Seconds until channel number flashes.
Select desired memory location, then push Preset Button to set the station (There are 8 memory
presets in each band)
AUXILIARY INPUT: The accessory cable included will allow input from an external audio device.
Turn OFF the Radio using the twist dial. Radio controls do not operate or effect the audio input
from an external device. Ensure both plugs on the accessory cable are properly seated in the
device jack and earmuffs. Turn on the external device, and ensure volume is at low to moderate
levels. Use volume controls on external device to increase or decrease sound level within
earmuffs.
WHEN NOT IN USE: If device will not be used, or will be stored for long periods, remove batteries
to avoid corrosion.
de hidrógeno al 3% (agua oxigenada) usando un paño limpio y déjelas que sequen antes de
usarlas. Almacenamiento: Manténgalas en un área limpia y sin humedad, y fuera del alcance la
de la luz directa del sol, químicos o vapores, los cuales pueden dañar la banda o las almohadillas.
PRECAUCIÓN: No permita que las almohadillas (espuma) permanezcan húmedas. Este producto
puede dañarse de forma permanente si se usan ciertas sustancias químicas. Si necesita más
información sobre este tema, contacte al fabricante.
Este dispositivo puede aumentar los peligros eléctricos.
PARTES Y FUNCIONES:
1. Antena
2. Banda de la cabeza acolchada
3. Soporte de la banda de la cabeza ajustable
4. Almohadilla auditiva acolchada (y cubierta)
con espuma
5. Guía de ajuste para el tamaño
6. Pantalla LCD
7. Botón de lectura y búsqueda avanzada
8. Interruptor de conmutación AM/FM
9. Memoria de emisora y botón de
ajuste predeterminado
10. Conector de entrada estéreo
(compatible con el cable auxiliar incluido)
11. Botón de lectura y búsqueda inversa
12. Dial de encendido/apagado
INSTALACIÓN DE LAS BATERÍAS: Esta unidad funciona
con baterías alcalinas AA de 1,5 V (no incluidas).
1. Buscar la tapa y abrir con una moneda o destornillador.
2. Asegurarse de la correcta colocación de las baterías. El polo positivo debe estar hacia abajo
en la pila de la izquierda y hacia arriba en la pila de la derecha.
3. Cerrar la tapa y atornillar con suavidad.
Funcionamiento:
PANTALLA/RELOJ: Presionar el botón de emisora predeterminada. La unidad presentará la
función 'TIME' de forma predeterminada (reloj de 24 horas). La pantalla LCD debería mostrar las
00:00 am. Presionar el botón 'Preset' para seleccionar las horas y los minutos deseados. Utilizar
las flechas arriba y abajo (botones 7 y 11) para mover hacia adelante o hacia atrás el indicador
hasta la hora deseada.
RADIO: Colocar las orejeras sobre la cabeza. Utilizar el dial de encendido/apagado para
encender la radio. Utilizar el dial para asegurarse de establecer el volumen entre los niveles bajo e
intermedio. Utilizar los botones Scan/Seek (7 y 11) para encontrar las emisoras de radio o la
banda AM o FM. Cuando se encuentre una emisora deseada, presionar el botón Memory Preset y
mantener apretado durante aproximadamente 3 segundos hasta que el número del canal
empiece a parpadear. Elegir la posición de memoria y presionar el botón Preset para fijar la
emisora . (Hay 8 memorias predeterminadas en cada banda).
ENTRADA AUXILIAR: El cable auxiliar incluido permitirá la entrada desde un dispositivo de audio
externo. APAGAR la radio con el dial. Los controles de la radio no manejan o afectan a la entrada
de audio del dispositivo externo. Asegurarse de que las dos clavijas del cable auxiliar están
colocadas de forma correcta en la clavija de entrada del dispositivo y de las orejeras. Encender el
dispositivo externo y asegurarse de establecer el volumen entre los niveles bajo e intermedio.
Utilizar los controles de volumen del dispositivo externo para subir y bajar el sonido en las orejeras.
CUANDO NO SE UTILIZA: Si el dispositivo no se va a usar, o si se va a guardar durante largos
periodos de tiempo, quitar las pilas para evitar la corrosión.
DPG15
WARNINGS & INSTRUCTIONS
AVISOS E INSTRUCCIONES
EN GARDE ET INSTRUCTIONS
EN
ES
Tested according to ANSI S3.19-1974 Standard, Michael & Associates, Inc.
Probado de Acuerdo a las Especificaciones ANSI S3.19-1974, Michael & Associates, Inc.
Tests Conformes aux Spécs ANSI S3.19-1974, Michael & Associates, Inc.
ATTENUATION DATA • TABLA DE ATENUACIÓN • DONNÉES D’ATTÉNUATION NRR 25
125 250 500 1000 2000 3150 4000 6300 8000
22.3 21.5 28.1 33.4 35.9 41.5 42.5 36.3 36.2
4.3 2.2 2.2 2.7 3.3 2.5 2.5 4.2 3.8
Frequency (Hz)
Frecuencia (Hz)
Fréquence (Hz)
Mean Attenuation (dB)
Atenuación Media (dB)
Atténuation Moyenne (dB)
Standard Deviation (dB)
Desviación Standard (dB)
Éscart Standard (dB)
HEADBAND FORCE : 12.1 N
FUERZA DE DIADEMA : 12.1 N
FORCE DE BANDEAU : 12.1 N
CSA Z94.2 Class B