47
ENGLISH
Wall Set-up (Fig. C1)
The keyhole
13
in the pivot bracket
8
is used for mounting to wall constructions.
Alternatively, the tool can be attached to metal studs directly using the magnets
14
.
• Drive a screw or nail into the wall.
• Hang the tool onto the fastener by the keyhole.
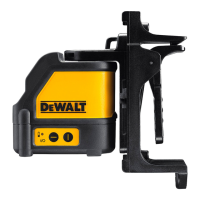
Fitting the Tool to the Wall Mount (Fig. C2 - C4)
The tool has been equipped with a wall mount
9
for mounting to wall track to aid in drop
ceiling installation and other specialty leveling projects. The pivot bracket
8
has magnets
to attach the tool to the wall mount.
• Align the magnets
14
with the metal plate on the wall mount
9
.
• To remove the wall mount, pull the wall mount from the tool applying sufficient force.
To fit the wall mount to wall track, proceed as follows (Fig. C3):
• Open the clamp jaws
15
.
• Place the clamp jaw around the wall track and release the clamp to close the clamp
jaws shut on the track.
To mount the wall mount to a wall, proceed as follows (Fig. C4):
• Hold the tool at the desired position against the wall and mark the location of the
mounting hole on the wall.
• Drill a hole at the marked location.
• Insert a corresponding plug into the hole.
• Hold the tool in front of the plug.
• Turn a screw into the mounting hole
16
.
Adjusting the Tool
• To initiate the leveling procedure, switch on the tool. The level and/or plumb orientation
is correctly adjusted as long as the laser beams remain on.
• The laser beams start flashing to indicate that the tool has been set up at a slope that is
beyond the self-leveling range of 4°. Switch the tool off, re-adjust the tool set-up within
the self-leveling range and switch the tool on again.
Aligning the Laser Line (Fig. D)
• Align the laser line of either one of the laser beams with the position mark. Move the
tool as required.
 Loading...