Do you have a question about the DeWalt DW933 and is the answer not in the manual?
Ensures a safe working environment by keeping the area clean, well-lit, and free from hazards.
Covers safe handling of cords, battery packs, and chargers to prevent shock and fire hazards.
Emphasizes staying alert, dressing properly, and avoiding distractions for safe tool operation.
Provides guidelines on proper tool handling, maintenance, and accessory use for safe operation.
Tool service must be performed by qualified personnel using identical replacement parts only.
Handle tools carefully when contacting hidden wiring to prevent electrical shock.
Covers safe handling, storage, and disposal of battery packs to prevent damage, fire, or injury.
Provides instructions for safely managing battery pack leakage, including skin contact and eye exposure.
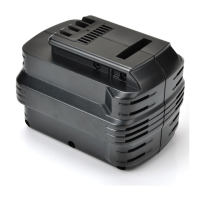
Details tool compatibility with 14.4V/18.0V packs and extended run-time options.
Explains the RBRC™ seal for battery recycling and environmentally conscious disposal.
Your battery can be charged in DEWALT 1 Hour or 15 Minute Chargers.
Steps for plugging in the charger, inserting the battery pack, and the charging indicator lights.
Information on error codes and indicators for battery pack or charger issues.
Covers specific issues like power line problems and hot pack delays during charging.
Details the charging process and indicators for the 15-minute charger model.
Explains how the charger identifies and indicates weak battery pack conditions.
Describes 'equalize charge' and 'maintenance charge' modes for optimal battery performance.
Recommends charging batteries within a specific temperature range for longevity and performance.
Provides steps to resolve common charging problems, including checking power and location.
Utilizes automatic equalization of battery cells for optimal capacity and performance.
Allows manual equalization of battery cells for peak performance and extended lifespan.
Align battery pack with handle notch and slide firmly until it snaps into place.
Press release buttons and pull the battery pack out of the tool handle.
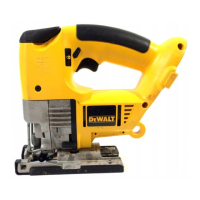
Operates the saw using the trigger switch; safety lock button prevents accidental starts.
Adjust the lever to choose between straight line or orbital cutting for various materials.
Modify the shoe angle from 0° to 45° for making bevel cuts.
Use the switch to activate the dust blower for clearing the cutting area of debris.
Install the plastic cover to protect sensitive surfaces from scratches during cutting.
Unplug the tool, lift the knob, rotate counterclockwise to open the clamp and remove the blade.
Insert blade, ensuring it fits the support roller, and tighten the clamp clockwise until it clicks.
Method for making internal cuts by inserting the saw directly into a panel without a pilot hole.
Ensure the board is positioned correctly and avoid starting the blade against the material.
Use higher speed, let the blade cut, clamp work, and allow the blade to stop before removal.
Utilize the accessory for ripping and circle cutting without a pencil line.
Position the saw, use the rip fence as a pivot, and cut circles accurately.
Annual service for cleaning, inspection, and lubrication of the gear case is recommended.
Use recommended accessories for safety and performance; non-recommended ones may be hazardous.
Repairs, maintenance, and adjustments should be performed by authorized service centers.
Covers defects in materials or workmanship for one year from purchase date.
Offers a full refund within 30 days if the tool does not meet performance expectations.
Provides free replacement of damaged or missing warning labels upon request.
| Brand | DeWalt |
|---|---|
| Model | DW933 |
| Category | Cordless Saw |
| Language | English |