9
ENGLISH
C
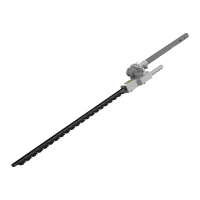
Lubrication (Fig.A)
Blades
1. After use, carefully clean the blade
1
with a resinsolvent.
2. After cleaning, apply a light film of lubrication to the
exposedblade.
3. Turn the trimmer vertical with the blades toward the
ground and run the trimmer for a few seconds to fully
disperse thelubrication.
Maintaining Blade (Fig.J, K)
The cutting blades are made from high quality, hardened
steel and with normal usage, they will not require
resharpening. However, if you accidentally hit a wire fence,
stones, glass, or other hard objects as shown in Fig. J you
may put a nick in the blade. There is no need to remove this
nick as long as it does not interfere with the movement of
the blade. If it does interfere, remove the battery and use a
fine toothed file or sharpening stone to remove the nick. If
you drop the trimmer, carefully inspect it for damage. If the
blade is bent, housing cracked, handles broken or if you see
any other condition that may affect the trimmer’s operation
contact your local
authorised service centre for
repairs before putting it back intouse.
Fertilizers and other garden chemicals contain agents which
greatly accelerate the corrosion of metals. Do not store the
unit on or adjacent to fertilizers orchemicals.
With the battery removed, use only mild soap and a damp
cloth to clean the unit. Never let any liquid get inside the
unit; never immerse any part of the unit into a liquid. Prevent
the blades from rusting by applying a film of light machine
oil aftercleaning.
Accessories
WARNING: Since accessories, other than those offered
by
, have not been tested with this product, use
of such accessories with this tool could be hazardous.
To reduce the risk of injury, only
recommended
accessories should be used with thisproduct.
Recommended accessories for use with your tool are available
at extra cost from your local dealer or authorized service
center. If you need assistance in locating any accessory, please
contact
call 1‑800‑4‑
(1-800-433-9258) or
visit our website: www.dewalt.com.
Cleaning
WARNING: Blow dirt and dust out of all air vents with
clean, dry air at least once a week. To minimize the risk
of eye injury, always wear ANSI Z87.1approved eye
protection when performingthisprocedure.
WARNING: Never use solvents or other harsh
chemicals for cleaning the non‑metallic parts of the
tool. These chemicals may weaken the plastic materials
used in these parts. Use a cloth dampened only with
water and mild soap. Never let any liquid get inside the
tool; never immerse any part of the tool into aliquid.
MAINTENANCE
WARNING: To reduce the risk of serious personal
injury, turn unit off and remove the battery pack
before making any adjustments or removing/
installing attachments or accessories. An
accidental start‑up can causeinjury.
Your D
WALT power tool has been designed to operate
over a long period of time with a minimum of maintenance.
Continuous satisfactory operation depends upon proper tool
care and regularcleaning.
• where highly flammable liquids or gases are present
• if unit is damaged, adjusted wrong, or not fully and
securelyassembled
• if trigger does not turn unit on and off. Blades must stop
moving when you release trigger. Have faulty switch
replaced by an authorised servicecenter.
• while in a hurry
• while in tree or on a ladder
• while on aerial booms, buckets or platforms
• during high wind or storming weather
Trimming Instructions (Fig.A, E–I)
DANGER: KEEP HANDS AWAY FROMBLADES.
WARNING: To guard against injury, observe
thefollowing:
• READ INSTRUCTION MANUAL BEFORE USING. SAVE
INSTRUCTIONMANUAL.
• Check the hedge for foreign objects such as wires or
fences before eachuse.
• KEEP HANDS ON HANDLES. DON’TOVERREACH.
• DO NOT USE UNDER WETCONDITIONS.
CAUTION: BLADE MAY COAST AFTER TURNOFF.
NOTE: Jamming the blade on large branches can
causedamage.
WORKING POSITIONS (Fig.E, F) – Maintain proper footing
and balance and do not overreach. Wear safety goggles,
non‑skid footwear when trimming. Hold the unit firmly in
both hands and turn the unit on. Always hold the trimmer as
shown in Fig.E and Fig. F, with one hand on the powerhead
handle
17
and one hand on the auxiliary handle
18
. Never
hold the unit by the trimmer head
2
orpoles.
TRIMMING NEW GROWTH (Fig.G) – Using a wide,
sweeping motion, feeding the blade teeth through the twigs,
is most effective. A slight downward tilt of the blade in the
direction of motion gives the bestcutting.
LEVEL HEDGES (Fig.H) – To obtain exceptionally level
hedges a piece of string can be stretched along the length
of the hedge as aguide.
SIDE TRIMMING HEDGES (Fig.I) – Orient the trimmer as
shown and begin at the bottom and sweepup.

 Loading...