14
ENGLISH
on the saw (23°). Likewise follow the vertical intersecting line to the top
or bottom to get the bevel angle setting on the saw (40°). Always try
cuts on a few scrap pieces of wood to verify the settings on thesaw.
WARNING: Never exceed the compound mitre limits of 45° bevel with
45° left or rightmitre.
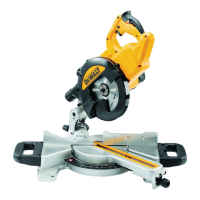
Dust Extraction (Fig.A, U)
WARNING: To reduce the risk of serious personal injury, turn
tool off and disconnect tool from power source before making
any adjustments or removing/installing attachments or
accessories. An accidental start-up can causeinjury.
WARNING: Certain dust, such as oak or beech dust, is considered
carcinogenic, especially in connection with wood-treatmentadditives.
• Always use dustextraction.
• Provide for good ventilation of the workspace.
• It is recommended to wear an appropriaterespirator.
CAUTION: Never operate this saw for cutting wood unless the
dust bag or
dust extractor is in place. Wood dust may
create a breathinghazard.
CAUTION: Check and clean the dust bag each time afterusing.
WARNING: When sawing aluminium, remove the dust bag, or
disconnect the dust extractor to avoid the risk offire.
Your mitre saw has a built-in dust port
16
that allows connection to
either a dust bag (33mm nozzles) or direct attachment to the
AirLock(DWV9000-XJ)
34
.
Observe the relevant regulations in your country for the materials to
beworked.
To Attach the Dust Bag
1. Fit a dust bag to the dust port
16
.
To Empty the Dust Bag
1. Remove dust bag from the saw and gently shake or tap the dust bag
toempty.
2. Reattach the dust bag back onto the dustport.
You may notice that all the dust will not come free from the bag. This will
not affect cutting performance but will reduce the saw's dust collection
efficiency. To restore your saw's dust collection efficiency, depress the
spring inside the dust bag when you are emptying it and tap it on the side
of the waste bin or dustreceptacle.
External Dust Extraction
When vacuuming dry dust that is especially detrimental to health or
carcinogenic, use a special dust Class M vacuumcleaner.
Connecting to an AirLock Compatable Dust Extractor (Fig.U)
The dust port
16
on your mitre saw is compatable with the D
WALT
AirLock connection system. The AirLock allows for a fast, secure connection
between the dust extractor hose and the mitresaw.
1. Ensure the collar on the AirLock connector
34
is in the unlock position.
Align notches on collar and AirLock connector as shown for unlock and
lockpositions.
2. Push the AirLock connector onto the dust port
16
.
3. Rotate the collar to the lockedposition.
NOTE: The ball bearings inside collar lock into slot and secure
the connection.The mitre saw is now securely connected to the
dustextractor.
MAINTENANCE
Your D
WALT power tool has been designed to operate over a long period
of time with a minimum of maintenance. Continuous satisfactory operation
depends upon proper tool care and regularcleaning.
WARNING: To reduce the risk of injury, turn unit off and
disconnect machine from power source before installing and
removing accessories, before adjusting or changing set-ups
or when making repairs. Be sure the trigger switch is in the OFF
position. An accidental start-up can causeinjury.
WARNING: If the saw blade is worn, replace it with a new sharpblade.
Lubrication
Your power tool requires no additionallubrication.)
Cleaning
Before use, carefully check the upper blade guard, movable lower blade
guard as well as the dust extraction tube to determine that it will operate
properly. Ensure that chips, dust or workpiece particle cannot lead to
blockage of one of thefunctions.
In case of workpiece fragments jammed between the saw blade and
guards, disconnect the machine from the power supply and follow the
instructions given in the section Changing or Installing a New Saw Blade.
Remove the jammed parts and reassemble the sawblade.
WARNING: Blow dirt and dust out of the main housing with dry air
as often as dirt is seen collecting in and around the air vents. Wear
approved eye protection and approved dust mask when performing
thisprocedure.
WARNING: Never use solvents or other harsh chemicals for cleaning
the non-metallic parts of the tool. These chemicals may weaken the
materials used in these parts. Use a cloth dampened only with water
and mild soap. Never let any liquid get inside the tool; never immerse
any part of the tool into aliquid.
WARNING: To reduce the risk of injury, regularly clean the tabletop.
WARNING: To reduce the risk of injury, regularly clean the dust
collectionsystem.
Optional Accessories
WARNING: Since accessories, other than those offered by
,
have not been tested with this product, use of such accessories with
this tool could be hazardous. To reduce the risk of injury, only
,
recommended accessories should be used with thisproduct.
Support for Long Pieces
• Always support longpieces.
• For best results, use the extension work support (DE7023) to extend
the table width of your saw (available from your dealer as an option).
Support long workpieces using any convenient means such as saw-
horses or similar devices to keep the ends fromdropping.
Range of Saw Blades Available (Recommended Blades)
Type of blade Blade dimensions Usage
DT1158 series 30 250 mm For general purpose, ripping and cross-cutting
of wood and plastics
DT4282 series 40 250 mm TCG for use with aluminum
DT4226 series 40 250 mm ATB for fine cutting of manmade and natural
wood
DT4287 series 40 250 mm TCG for extra fine cutting of manmade and
natural wood
DT4282 series 40 250 mm Aluminium cutting
Consult your dealer for further information on the appropriateaccessories.

 Loading...