13
ENGLISH
Nozzle Types Suitable Applications
Adjustable Nozzle For gentle wide angle cleaning
Turbo Nozzle For abrasive cleaning
NOTE: The turbo nozzle
22
is suitable for cleaning concrete
and masonry. It is not recommended to use this nozzle for
vehicle cleaning as it can cause damage to the surface.
Adjusting Spray Pattern of the Adjustable Nozzle
(Fig.J)
The angle of spray coming out of the nozzle may be adjusted
by rotating the nozzle. This will vary the spray pattern from
approximately a 0 ° narrow high impact stream to a 60° wide
fan spray.
• A narrow pencil jet stream distributes the impact of the
water in a concentrated area, resulting in a high impact
force on the cleaning surface. Use a narrow pencil jet stream
for deep cleaning in a concentrated area. However, use it
cautiously, as it may damage some surfaces.
Attaching Nozzles (Fig.J)
DANGER: Risk of fluid injection. Do not direct discharge
stream toward persons, unprotected skin, eyes or any pets
or animals. Serious injury willoccur.
WARNING: Flying objects could cause risk of serious
injury. DO NOT attempt to change nozzles while pressure
washer is running. Turn pressure washer unit OFF before
changingnozzles.
1. To connect a nozzle to the spray wand
2
depress the
nozzle button
3
on the spray wand and insert the
appropriatenozzle.
2. Release the
nozzle button
3
to lock the nozzle in place.
3. Give the nozzle a firm tug to ensure the nozzle is locked
into place.
Attaching Garden Hose (Fig.I)
NOTE: Before connecting the garden hose to the pressure
washer unit, run water through the garden hose for thirty
seconds to clear any debris from inside thegardenhose.
1. To connect the garden hose
38
to the pressure washer
8
, first
screw the water inlet filter
24
onto the water intake
17
.
2. Unscrew the base of the quick connect hose adapter
25
and slide the base over the hose. Push the hose into the
quick connect hose adapter until it stops. Screw the base
onto the quick connect hose adapter
25
to clamp the hose
into the quick connect hose adapter
25
.
3. Push the quick connect hose adapter
25
into the water
inlet filter
24
until it "clicks".
NOTE: Always disconnect the garden hose afterusage.
NOTE: Avoid cross threading when installing the hose. Cross
threading will causeleaks.
1. To connect the high pressure hose
1
to the handle grip
5
,
thread the hose collar
39
onto the inlet coupler
40
.
2. To connect the high pressure hose to the pressure washer
unit
8
, thread the hose collar
40
onto the high pressure
water outlet
18
.
Attaching High Pressure Hose (Fig.H)
CAUTION: NEVER PULL WATER SUPPLY HOSE TO
MOVE pressure washer. This could damage hose and/or
pumpinlet.
NOTE: Uncoil the high pressure hose
1
before installation to
preventkinks.
High Pressure and Suction Hose Storage (Fig.G)
This pressure washer has a built in storage area to carry the high
pressure hose. The coiled hose is secured between the hose
storage brace
32
and the pressurewasherunit
8
.
1. To access the high pressure hose
1
or the suction hose
28
,
unlock the hose storage latch
33
and swing the hose
storage brace
32
away from the pressurewasherunit
8
.
2. Unwrap the hose storage strap
34
and remove the hose
from the pressurewasherunit
8
.
3. Swing the hose storage brace
32
closed and lock the hose
storage latch
33
securing the hose storage brace
32
to the
pressurewasherunit
8
.
Assembling Spray Wand (Fig.F)
1. To connect the spray handle
4
to the handle grip
5
, insert
the threaded end of the spray handle onto the threaded end
of the handle grip. Rotate the spray handle
4
clockwise until
fullytightened.
2. To connect the spray wand
2
to the sprayhandle
4
,insert the
threaded end of the spray wand into the threaded collar
42
of the spray handle. Rotate the threaded collar
42
clockwise
until fullytightened.
Accessory Storage Compartment (Fig.E)
This pressure washer has a built in accessory storage
compartment
41
to carry the spray wand, spray handle, handle
grip and nozzles.
1. To unlock the storage door
10
, rotate the door latch
11
counterclockwise and flip the door open to access the
spray wand
2
, spray handle
4
, handle grip
5
, turbo
nozzle
22
and adjustable spray nozzle
23
.
2. To lock the storage door
10
, place the storage door in the
closed position. Rotate the door latch
11
clockwise to lock
the storage door into position.
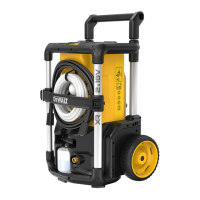
Telescoping Handle (Fig.A, D)
This pressure washer has a convenient, built in telescoping
handle and transportwheels.
1. To unlock the telescoping handle
12
, press the handle
release button
13
and slide the handle upwards. You will hear
an auidible click when it snaps intoposition.
2. To store the telescoping handle
12
, press the handle release
button
13
and slide the telescoping handle down and into
the pressure washer body. You will hear an auidible click when
it snaps intoposition.
3. To move the pressure washer
8
, tilt the unit so the transport
wheels
15
are touching the ground and pull the unit by the
telescopinghandle.
 Loading...