27
ENGLISH
battery performance and life, store battery packs at room
temperature when not inuse.
2. For long storage, it is recommended to store a fully charged
battery pack in a cool, dry place out of the charger for
optimalresults.
NOTE: Battery packs should not be stored completely
depleted of charge. The battery pack will need to be recharged
beforeuse.
Battery Cap (Fig. B)
A protective battery cap is supplied to cover the contacts of
a detached battery pack. Without the protective cap in place,
loose metal objects could short circuit the contacts, causing a
fire hazard and damaging the batterypack.
1. Take off the protective battery cap before placing the
battery pack in the charger ortool.
2. Place the protective cap over the contacts immediately after
removing the battery pack from the charger ortool.
WARNING: Make sure the protective battery cap is in
place before storing or carrying a detached batterypack.
Labels on Charger and Battery Pack
In addition to the pictographs used in this manual, the labels
on the charger and the battery pack may show the following
pictographs:
Read instruction manual beforeuse.
See Technical Data for chargingtime.
100%
Batterycharging.
100%
Batterycharged.
Batterydefective.
Hot/cold packdelay.
Do not probe with conductiveobjects.
Do not charge damaged batterypacks.
Do not expose to water.
Have defective cords replacedimmediately.
Charge only between 4 ˚C and 40 ˚C.
Only for indooruse.
Discard the battery pack with due care for
theenvironment.
Charge
battery packs only with designated
chargers. Charging battery packs other
than the designated
batteries with a
charger may make them burst or lead to
other dangeroussituations.
Do not incinerate the batterypack.
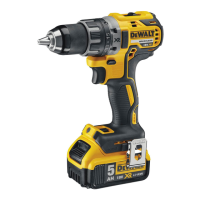
Battery Type
The DCF680 and DCF682 operate on a 7.2 volt battery pack.
These battery packs may be used: DCB080. Refer to Technical
Data for moreinformation.
Package Contents
The package contains:
1 Cordless Screwdriver
1 Charger
1 Battery pack (G1 model)
2 Battery packs (G2 model)
1 Kitbag (G1 model)
1 Kitbox (G2 model)
1 Instruction manual
• Check for damage to the tool, parts or accessories which may
have occurred duringtransport.
• Take the time to thoroughly read and understand this manual
prior tooperation.
Markings on Tool
The following pictograms are shown on the tool:
Read instruction manual beforeuse.
Date Code Position
The date code, which also includes the year of manufacture, is
printed into the housing surface that forms the mounting joint
between tool andbattery.
Example:
2017 XX XX
Year of Manufacture
 Loading...