This document describes the DEXTON pH regulator, a device designed to monitor and regulate the pH level in a pool or similar water system. The manual provides instructions for installation, operation, calibration, and maintenance, ensuring optimal pH control.
Function Description
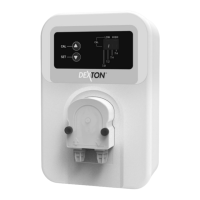
The DEXTON pH regulator automatically adjusts the pH of the water by controlling the injection of a pH corrector (acid or basic). It continuously measures the pH level using a dedicated probe and activates a pump to dispense the appropriate corrector when the pH deviates from the user-defined setpoint. This ensures stable and optimal pH conditions, which are crucial for water quality and the effectiveness of other chemical treatments. The device features an electronic control unit that manages the pH regulation process, displays current pH measurements, and provides alarms for various operational issues.
Important Technical Specifications
Electronic Control Unit:
- Power Supply: Not explicitly stated, but implied to be an electrical connection.
- Display: Features a "MinipH" screen with indicators for "LOW," "HIGH," "CAL," and "SET," along with numerical pH display.
- Controls: "CAL" and "SET" buttons for configuration and calibration.
- Setpoints: Adjustable pH setpoints (7.0, 7.2, 7.4, 7.6). Default setpoint is 7.2.
- pH Corrector Type: Configurable for "LOW" (acidic) or "7.0" (basic) correctors. Default is "LOW."
- Alarms and Displays:
- LOW flashing (pH < 6.6): pH regulation stopped.
- 7.0 flashing (6.6 ≤ pH < 6.9): pH regulation stopped.
- 7.0 switched on (6.9 ≤ pH < 7.1): Normal operation.
- 7.2 switched on (7.1 ≤ pH < 7.3): Normal operation.
- 7.4 switched on (7.3 ≤ pH < 7.5): Normal operation.
- 7.6 switched on (7.5 ≤ pH < 7.7): Normal operation.
- 7.6 flashing (7.7 ≤ pH < 8): pH regulation stopped.
- HIGH flashing (pH > 8): pH regulation stopped, only if the type of pH corrector selected is set at 7.0 (acid).
- LOW + HIGH flashing (Series of unsuccessful attempts to correct the pH OR Daily injection time of pH corrector equal to or greater than 2H (3.6L)): pH regulation stopped.
pH Probe:
- Type: pH probe (specific model not detailed).
- Installation: Connects to the electronic control unit and is inserted into a probe holder in the water circulation system.
pH Corrector Container:
- Type: Designed to hold pH corrector solution (acid or basic).
- Placement: Must be installed at least 2 meters away from any electrical device or other chemicals.
- Compatibility: Only use pH corrector products recommended by a professional. Never use hydrochloric acid, as it can irreversibly damage the device and void the warranty.
Installation Diagram Components:
- Elements supplied: Electronic unit, filter with ballast, probe holder, injection connector, pH probe, bracket, semi-flexible tubing.
- Elements NOT supplied: Electrical power supply, pH corrector container, chlorinator cell, filter, heat pump, filtration pump.
Usage Features
Starting and Stopping the Device:
- To switch on or off, press and hold both "CAL" and "SET" buttons simultaneously.
- Upon startup, the indicators will cycle for 6 seconds before displaying the pH measurement (default display). pH regulation starts automatically.
Setting the pH Setpoint:
- Available Setpoints: 7.0, 7.2, 7.4, 7.6.
- Default Setpoint: 7.2.
- Procedure:
- Press and hold "SET" until the flashing digit corresponds to the saved setpoint.
- Select a value using "SET" or "CAL" buttons.
- Press and hold "SET" to confirm. The setpoint digit will momentarily freeze, then the pH measurement will reappear.
Calibrating the pH Probe:
- Importance: Essential for optimal pH regulation, especially during initial setup, at the beginning of each season, and after probe replacement.
- Procedure:
- Turn off filtration (and the electronic unit).
- Open the "pH 7 calibration solution" sachet (use only single-use calibration solutions).
- If the probe is already installed: Remove the probe from its holder without disconnecting it. Remove the probe holder nut and replace it with the provided cap.
- If the probe is not yet installed: Connect the probe to the electronic unit.
- Turn on the electronic unit.
- Press and hold "CAL" until "7.0" flashes.
- Insert the probe into the pH 7 calibration solution. Wait a few minutes.
- Press "CAL." The digits will scroll for 20 seconds. Do not touch the probe during this time. Wait until one of the following displays appears:
- Successful Calibration: Only "7.0" lights up for an instant, then the pH measurement reappears.
- Failed Calibration: Only the "LOW" indicator flashes. To clear this, press and hold "SET." If calibration fails, visually inspect the probe, reattempt calibration, and if necessary, replace the probe.
Specifying the Type of pH Corrector:
- Possible Settings: "LOW" (acid) or "7.0" (basic).
- Default Setting: "LOW."
- Procedure:
- Press and hold "SET" until the LED corresponding to the pH setpoint flashes.
- Press and hold both "SET" and "CAL" simultaneously.
- Select a value using "SET" or "CAL" buttons.
- Validate the selected value by pressing and holding "SET."
Maintenance Features
General Maintenance:
- Regular Cleaning: The manual implies regular checks of the probe and corrector container.
- Probe Replacement: The pH probe has a limited lifespan (1 year warranty) and needs to be replaced periodically. Calibration is required after each replacement.
- Corrector Solution: Ensure the pH corrector container is not empty.
- Filter Check: Regularly check the condition of the filter with ballast and the injection connector.
Troubleshooting and Remedies (Alarms):
- LOW flashing (pH < 6.6):
- Manually measure pH.
- If pH is close to 6.6: Switch off electronics unit, pour basic pH corrector (pH+) into the pool near the flow out nozzles to obtain pH of approximately 7.2, wait 30 minutes, switch on electronics unit. Check pH measured by electronics unit is approximately 7.2.
- If pH is far from 6.6: Carry out a calibration of the pH probe.
- HIGH flashing (pH > 8):
- Manually measure pH.
- If pH is close to 8: Switch off electronics unit, pour acid pH corrector (pH-) into the pool near the flow out nozzles to obtain pH of approximately 7.2, wait 30 minutes, switch on electronics unit. Check pH measured by electronics unit is approximately 7.2.
- If pH is far from 8: Carry out a calibration of the pH probe.
- LOW + HIGH flashing (Unsuccessful pH correction or excessive injection time):
- Ensure the pH corrector container is not empty.
- Check the condition of the filter with ballast and injection connector.
- Carry out a calibration of the pH probe.
Warranty:
- Electronic Unit: 2 years.
- pH Probe: 1 year.
- Repairs and Spare Parts: 3 months.
- Conditions: Warranty applies to manufacturing defects under normal use. Excludes wear and tear parts.
- Voiding the Warranty: Using hydrochloric acid, non-conforming installation, alterations, accidents, abuse, negligence, unauthorized repairs, or damage from external factors (fire, flood, lightning, freezing, armed conflict).
- Professional Installation: Installation and maintenance must be performed by qualified professionals according to current standards. Using non-original parts voids the warranty.
- Claim Procedure: Contact your dealer or After-Sales Service. Provide a copy of the purchase invoice, serial number, installation date, and pool parameters (salinity, pH, chlorine, water temperature, stabilizer, volume, filtration time).