20
capstan to its home position at the front.
4. Press the RESET again to send the capstan to its rear position. This is the initial wiring
position.
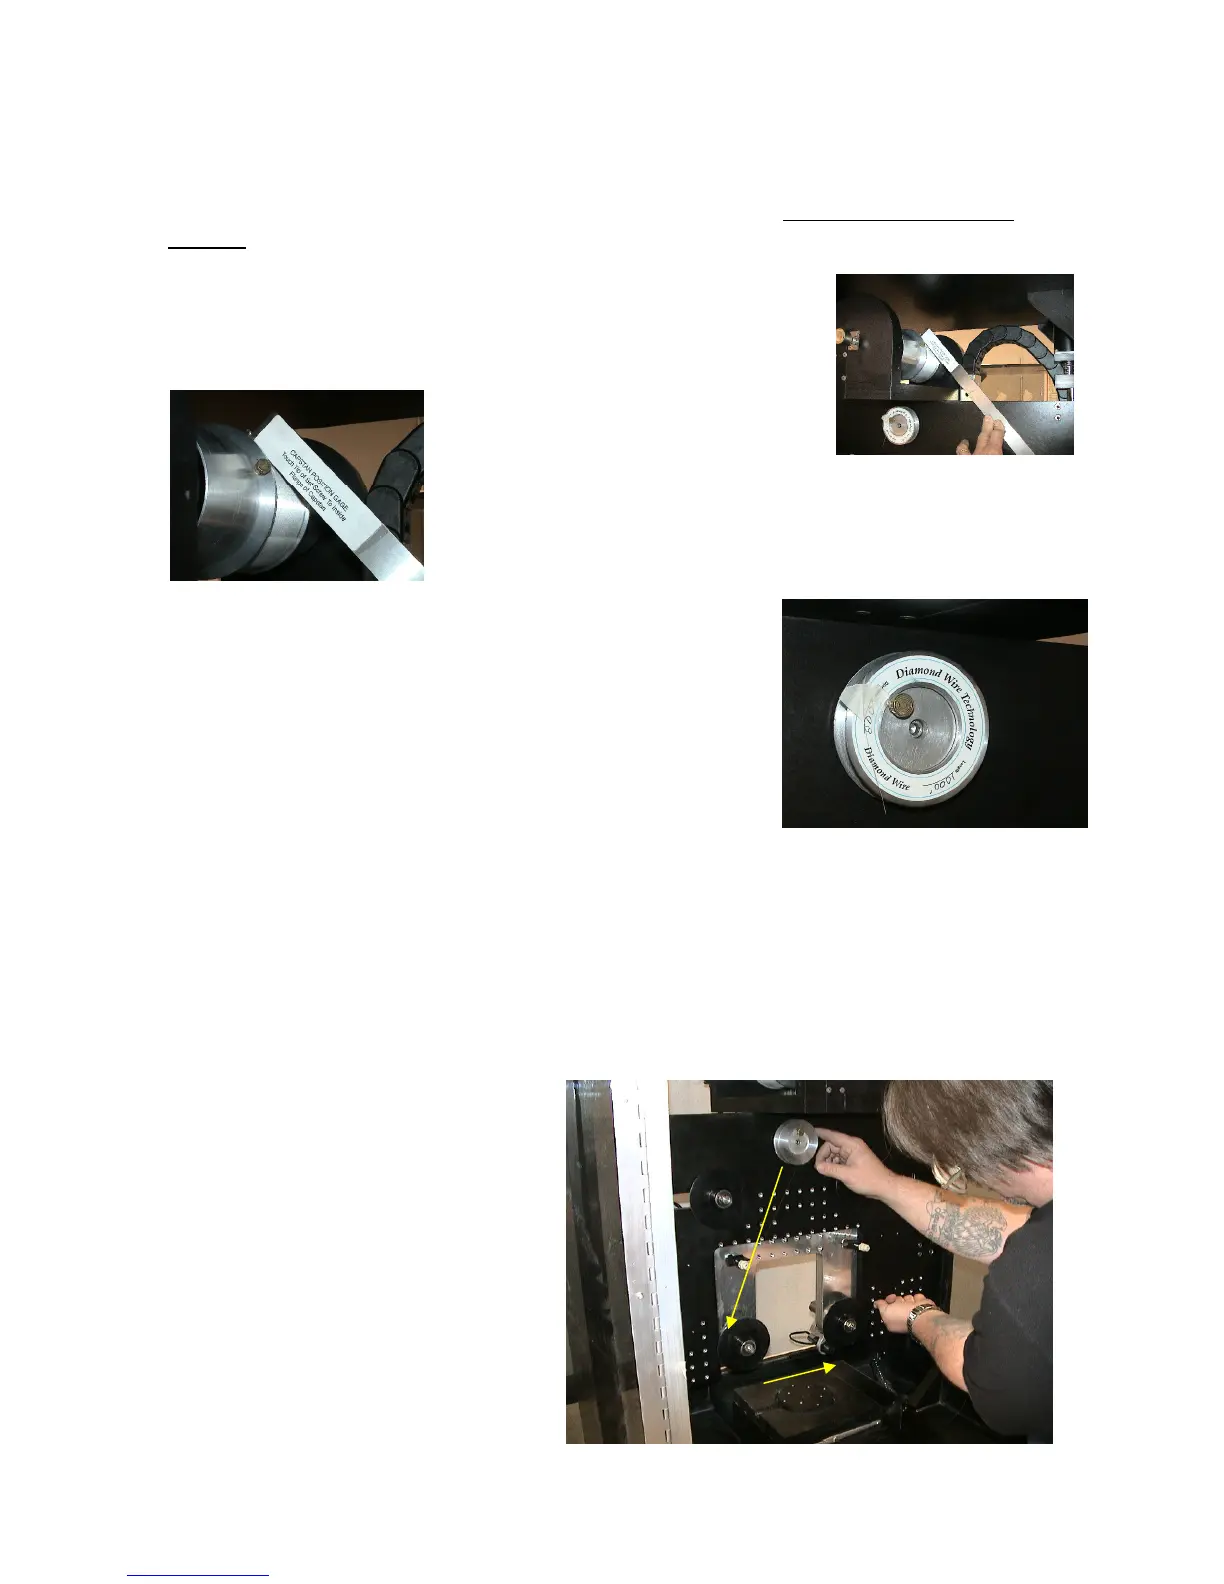
5. Verify that the capstan stopped in the proper position. Use the
capstan alignment gage to set the capstan in the proper position.
Lay the capstan gage flat on the face of the yoke plate; slide it
behind the upper right tensioner pulley with the tip of the setscrew
on the gage facing the front of the
machine. Touch the tip of the set
screw to the inside flange of the
capstan (The setscrew tip should just make slight contact as
you rotate the capstan by hand clockwise or counterclockwise
as necessary. This also assumes that the capstan is in its
“closest to the motor end” position.) On rare occasions the two
micro controllers inside the control box lose synchronicity.
This manifests as short or variable capstan moves in wire
Mode. Turn power off for a few seconds, and then back on.
Assuming there is no wire on the saw, place a metallic object
near the face of the bow sensor to defeat wire break
detection. Turn power on, and from Manual mode, Run the
capstan back and forth a couple of cycles to resynchronize.
Then switch to wire Mode and proceed to rewire the saw.
6. Remove the thumbscrew in the supply spool spindle, slip on
a spool of wire, and replace the thumbscrew so the spool is held firmly on the spindle. If
necessary, adjust the spindle tension using a 3/16” hex key and a 7/16” wrench. The spool
should rotate with enough resistance to impart maximum tension on the wire yet easily enough
for you to pull wire from it by hand.
7. Grasp the end of the wire in your right hand and remove the tape holding it to the spool with
your left hand. Save the tape in a convenient location.
8. Pull wire downward and in a
counterclockwise direction around the
lower left guide pulley, the right guide
pulley, upward around the right
tension pulley, and to the front flange
of the capstan.
9. Rotate the capstan clockwise up to
one-half revolution, if necessary, so
that a retaining hole is accessible on
the right side of the forward capstan
flange. Verify that the capstan stopped
in the proper position. A thin score