Dickson TH8P Manual V14 052418
DICK
DICKDICK
DICKSON
SON SON
SON
TH8P0/2/3/5
TH8P0/2/3/5TH8P0/2/3/5
TH8P0/2/3/5
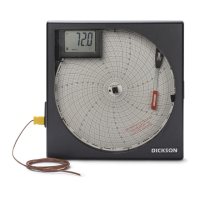
Temperature & Humidity Recorder
Temperature & Humidity RecorderTemperature & Humidity Recorder
Temperature & Humidity Recorder
GETTING STARTED
GETTING STARTEDGETTING STARTED
GETTING STARTED
7-day chart rotation
+32 to 120
o
F (TH8P0/2)
-20 to +120
o
F (TH8P3/5)
QUICK START
QUICK STARTQUICK START
QUICK START
1.
1.1.
1. Remove the protective pen caps.
2.
2.2.
2. Check to make sure the Replaceable Sensor is connected firmly to the recorder. If using
model TH8P3/5 make sure the extension cord is connected firmly to the recorder and
that the Replaceable Sensor is plugged in firmly to the extension cable.
3.
3.3.
3. Insert batteries and plug in AC adapter (See Figure 3). TH8P0:4 AA batteries required;
TH8P2/3/5: 4 AA batteries backup power only (See Power section for backup life). Unit
will power on.
4.
4.4.
4. The instrument will move pens to the appropriate readings.
5.
5.5.
5. Install the chart that matches the Dip Switch settings (See Dip Switch Setup).
Press the PEN HOME
PEN HOMEPEN HOME
PEN HOME key to move the pens to the outside of the chart. The pen is
automatically raised off the chart.
Remove the old chart, place the new chart on the Chart Hub being certain that the edge
of the chart slides under the Chart Guide Clips located at the outside of the chart.
6.
6.6.
6. Set the appropriate time. There are two ways to adjust the chart and set the appropriate
time:
a. Set the chart time manually by inserting a coin into the groove in the chart hub
and turning clockwise until the correct hour (and day if applicable) on the chart is
referenced to the timing arrow (just to the right of the pen tip on the dial). Press
Pen Home
Pen HomePen Home
Pen Home to move the pens back onto the chart.
The following feature should be used for fine adjustments only.
b. To adjust the chart time, press and hold Adjust
AdjustAdjust
Adjust-
--
-Up
UpUp
Up and Adjust
AdjustAdjust
Adjust-
--
-Down
DownDown
Down buttons
located on the back of the unit next to the dip switch (see Figure 3).
The green LED will blink rapidly for about five seconds, then the LED will remain
solid green. While in this state the Adjust
AdjustAdjust
Adjust-
--
-Up
UpUp
Up button will move the chart
backward (counter clockwise) and the Adjust
AdjustAdjust
Adjust-
--
-Down
DownDown
Down button will move the chart
forward (clockwise).
Rotate the chart until the correct hour (and day if applicable) on the chart is
referenced to the timing arrow. Once you have set your chart, press the Pen
Pen Pen
Pen
Home
Home Home
Home button to exit Chart Adjust Mode. The unit will take one minute to exit the
Chart Adjust Mode once Pen Home
Pen HomePen Home
Pen Home is pressed. Press Pen Home
Pen HomePen Home
Pen Home to move the pens
back onto the chart.
c. Place the TH8recorder on a flat vibration-free surface. Be sure it is in a vertical
position and level. For best performance and longevity, the location should be a
clean environment, free from dust and corrosive fumes. Do not exceed
temperature specifications. Wall Mount: Keyhole slots are provided on the
TH8recorder for wall mounting.