INSTALLATION
Step 1: Faucet (Hose End)
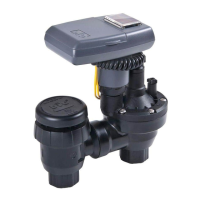
Begin the installation at the water source by attaching the 3/4″ FHT
backow device to the faucet (Model FM01AS). If automating the
system, connect the hose end timer (not included) into the faucet and
connect the backow device to the hose end timer. To the backow
device, connect the 3/4″, 25-PSI preset pressure regulator and then
thread the 3/4″ FHT x 1/4″ compression adapter with screen.
Note: This Kit is intended for outdoor use only, do not install indoors.
Maximum incoming pressure is 80 PSI. Tighten threaded ttings by
hand only. No wrench or teon tape are required.
Step 2: Microtubing Placement & Connection
Unroll the 1/4″ micro tubing and lay it out in the area of the planters,
containers or baskets to be watered. Connect the micro tubing to the adapter by
forcing the micro tubing end directly into the compression side
of the adapter while moving the micro tubing from side to side.
No barb is needed.
Step 3: Connecting the 1/4″ Tees
The micro tubing serves as the primary line that runs water to all
the plants. Near each planter, container or basket cut the 1/4″ micro
tubing and insert a 1/4″ tee (soaking the micro tubing in hot water
will ease installation). Leave the end of the 1/4″ micro tubing open
so you can ush the line before completion. Run a piece of 1/4″ micro
tubing from the center of each pot, container or basket and connect
each to the 1/4″ tee. Use a 1/4″ barbed elbow or connector as needed.
Step 4: Connect 1/4″ Ball Valve (optional)
To control the ow rate, 2″-4″ from a large container or basket, cut
the feeder line (micro tubing) and attach a 1/4″ ball valve to allow
ow adjustment for individual containers or baskets.
Note: if containers of similar sizes are grouped on one section of line,
a single valve can be placed at the head of the micro tubing feeder-line
section to control the ow to multiple baskets.
Step 5: Flush the Line
Turn the water on, and ush the line for 10-20 seconds to ush out
any debris inside the system.
Step 6: Installing the Drip Emitters
For small containers and near the plant, insert a drip emitter into the
end of the micro tubing. Attach a holder stake to the micro tubing and
secure it to the pot. For larger planters and containers, see option 2 in
the planning suggestion section.
Step 7: Secure Micro tubing
Secure the micro tubing to the patio, containers or planters using the 1/4″ C-clamps.
Step 8: System Start Up
Begin by turning the water on. If used, adjust the ow of the 1/4″ ball valve as needed by turning the knob.
NOTE: If each pot drains at different times (probably because they are different sized pots) you may want to
consider using a 1/4″ valve on each line. This will help control the ow so that each pot drains at the same
time regardless of size.
When watering on a regular basis, it is ideal to allow very little water to drain out of the pots. This helps
conserve water and generally keeps the area cleaner. After initial start up, determine how long the system
should run each time to sufciently irrigate the pots without excess runoff. To do this, run the system
checking to see how long it takes all the pots to drain. Set the irrigation schedules 1-2 minutes less then it
takes for the pots to drain. For example, if it initially took the pots 5 minutes to all begin draining, set the
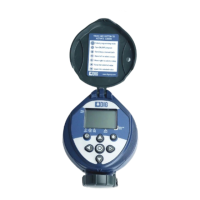
system to run for about 3-4 minutes each time. The watering can be automated by using a battery- or solar-
powered timer such as our BO9D or EVO100. After a week, check the soil and the health of the plants and
adjust the watering time as needed.
KIT CONTAINS
3/4″ FHT x MHT Backow Device 1
3/4″ FHT x MHT 25-PSI Preset Pressure Regulator 1
3/4″ FHT x MHT Compression Adapter 1
1-GPH PC Dripper 10
60′ of 1/4″ Micro Tubing 1
1/4″ Barbed Connector 2
1/4″ Barbed Elbow 10
1/4″ Barbed Tee 9
1/4″ Holder Stake 10
1/4″ Tubing C-Clamps 10
1/4″ Barbed Ball Valve 2
Instruction Manual 1
Product Description FM01AS Quantity
All parts are also sold seperatley at DIG retailers.
 Loading...