Quick Start Guide
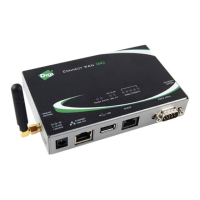
ConnectPort X2e ZB
Power Supply
Ethernet Cable
ConnectPort X2e ZB
1 Verify Contents
2 Write Down the Serial Number
®
Model: ConnectPort X2e ZB
Part Number: 50X2E-Z1C-001-01
Serial Number: 00409D50E9BB
Model: ConnectPort X2e ZB
Part Number: 50X2E-Z1C-001-01
Serial Number: 00409D 50E9BB
Write down the following located on the back of the
ConnectPort X2e ZB :
NOTE: The Serial Number is
also the Ethernet MAC
address.
Wi-Fi
Serial Number:
________________________________
(1P):
90001296-88
B
3 Connect Hardware
Power
XBee
Network
Button
a
Connect the power supply.
b
Startup Sequence -
After plugging in the device, the
Power LED will turn solid green, and the Network LED
will gradually turn solid green if it can connect to iDigi.
NOTE: This product requires a DHCP server to
assign its IP address. If you do not have a DHCP
server, see the
ConnectPort X2e ZB User’s Guide
.
b
a
4 Congure Your Device Using the Wi-Fi interface
c
Enable Access Point mode on your device by pressing
the button.
NOTE:
If the ConnectPort X2e ZB has already been congured
to connect to an access point, it will need to be set back
to factory defaults to use the following procedure.
See the troubleshooting section below to return the
gateway to its initial state.
Congure the Wi-Fi interface of your laptop to
connect to the ConnectPort X2e ZB gateway’s access
point. The name (SSID) of the access point will be
cpx2e-zb-xxxxxxxxxx, where xxxxxxxxxxxx is the
serial number of the gateway.
a
b
a
b
c
c
Go to your web browser, and enter the URL of the
ConnectPort X2e ZB gateway: http://192.168.100.1
Navigate to Configuration > Wireless Wizard.
Follow the steps in the wizard to congure your device.
e
Once the conguration is complete, your device will
reboot and connect to your home access point and
then attempt to connect to iDigi. You can track its
progress by observing the Network LED behavior.
It may take up to 5 minutes for the gateway to
connect to iDigi. After your gateway is connected to
iDigi, the network LED will be solid green.
d
d