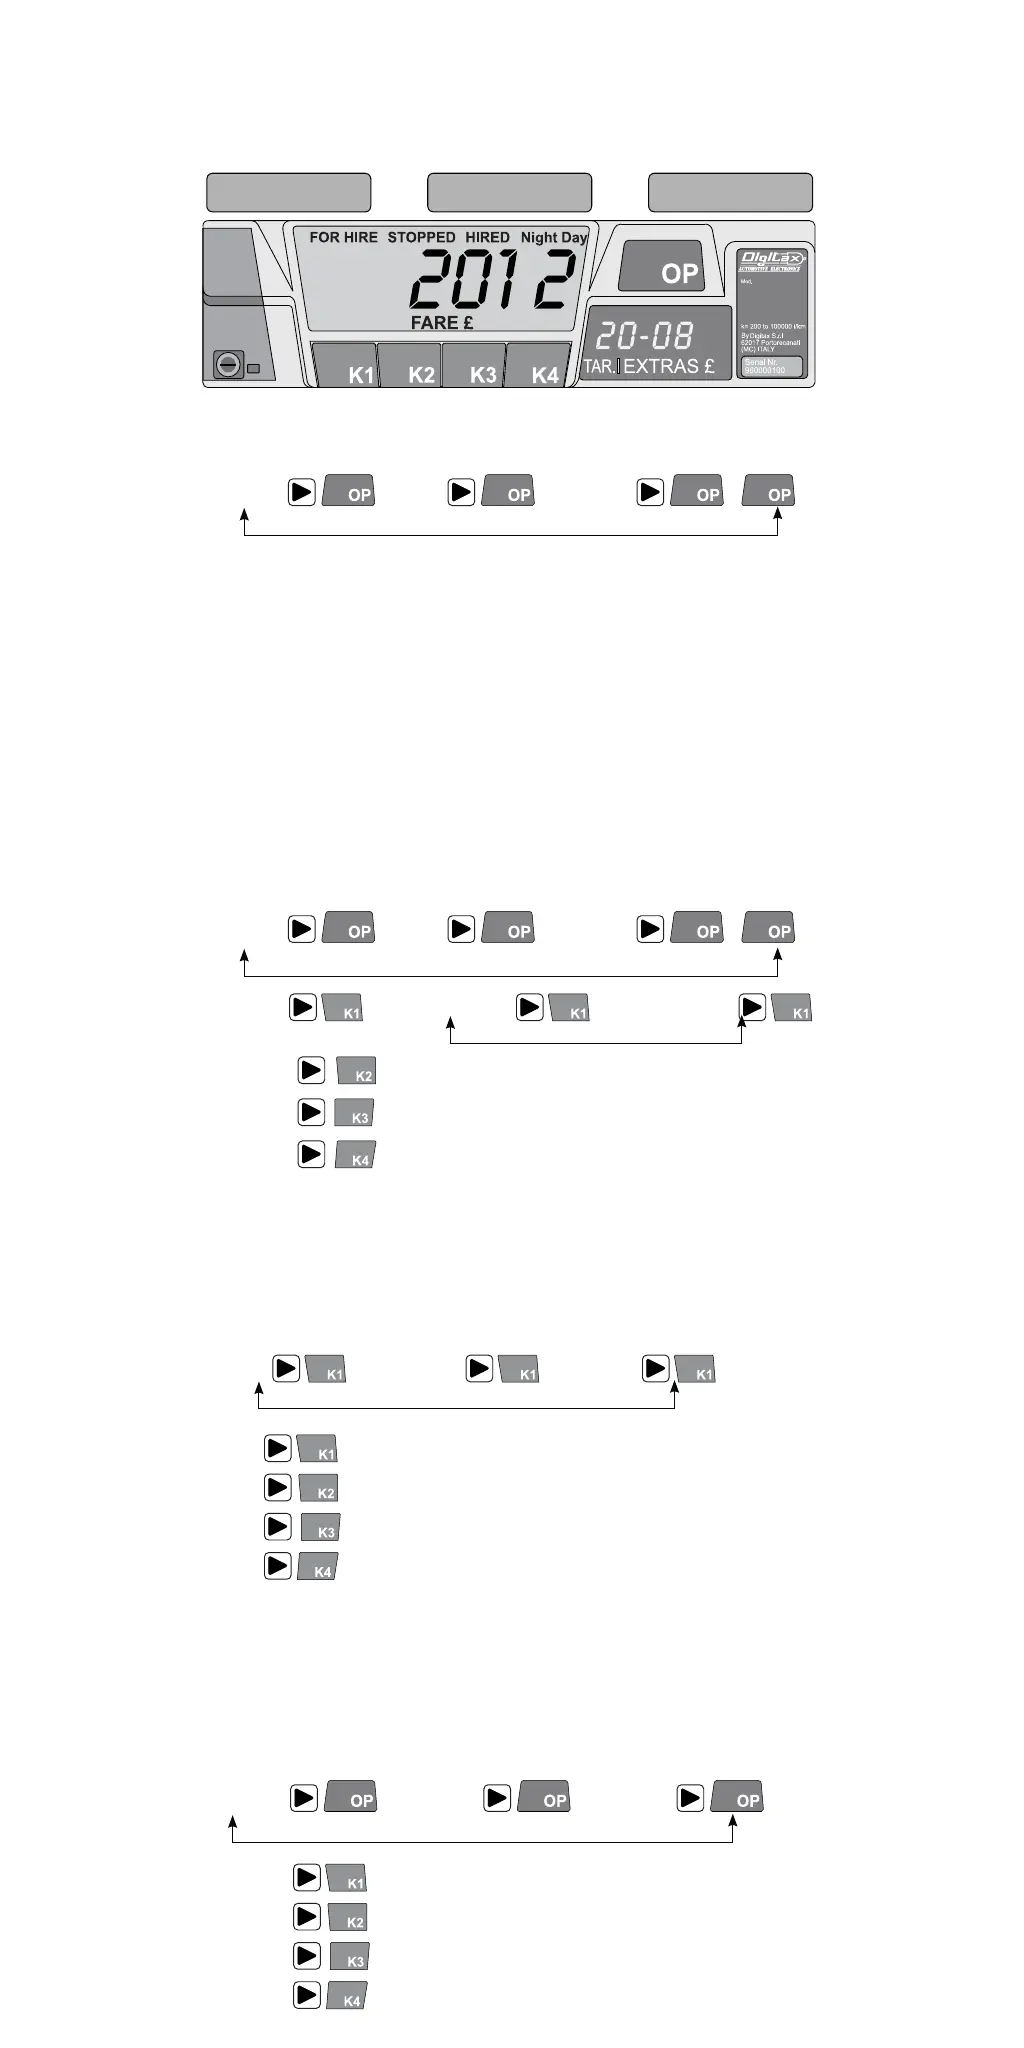
The taximeter has, in its front side, 5 keys (or buttons)
called: OP, K1, K2, K3, K4.
The taximeter has three working modes called:
The taximeter’s working modes are selectable by
pressing the OP button in the following sequence:
For Hire Hired Stopped
In any of the above taximeter’s working mode (FOR HIRE,
HIRED, STOPPED), the other four buttons K1, K2, K3, K4
will exploit a different function, as below described.
A) Taxi in “For Hire”
When the Taxi is parked or it moves without any pas-
senger on board, the taxi driver selects the For Hire
position by OP. The clock is displayed and the keys will
have the following functions:
For Hire Hired Stopped
For Hire Chrono Start Chrono Stop
For Hire Go back from Chrono to Clock
For Hire Shows calendar Day and Month
For Hire Shows Year
B) Taxi in “Hired”
Once the taxi starts the trip, the taxi driver selects the Hired
position by OP. The “Taxi” roof sign will turn off and the taxi-
meter starts the fare calculation by distance or time.
Hired Stopped For Hire
Hired Selects Rate Nr (if inabled)
Hired Insert Extra Nr 1 (If enabled)
Hired Insert Extra Nr 2 (If enabled)
Hired Reset Extras
C) Taxi in “Stopped”
At the end of the trip, the taxi driver has to select the
Stopped position by OP.
The waiting time counting is thus blocked.
Stopped For Hire Stopped
Stopped Insert Special Extras
Stopped Insert Extra Nr 3 (If enabled)
Stopped Insert Extra Nr 4 (If enabled)
Stopped Reset Extras
FOR HIRE STOPPED HIRED