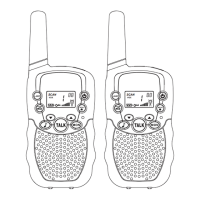
The DILISS T-388 Kids Walkie Talkie is a two-way radio designed for children, offering a fun and easy way to communicate. Each unit takes 4 AAA batteries (not included), and high-quality AAA Alkaline batteries are recommended for optimal performance.
Function Description
The walkie-talkie allows for communication between two or more users over a distance using radio frequency (RF) energy. It features various controls and indicators to facilitate ease of use.
Important Technical Specifications
Product Number: T-388
Frequency Range: FRS
Channel Number: 22
Channel Spacing: 12.5KHz
Working Voltage: 4.8V
Frequency Stability: ±2.5ppm
Operating Temperature Range: -20 °C ~ 50 °C
Antenna Impedance: 50Ω
Overall Dimensions: 140 x 55 x 28 mm
Weight: 79g
Transmitter:
- RF Power: 0.5W
- Modulation Method: 11kF3E
- Noise and Harmonic: <-40dB
- Residual Radiation: ≤-35dB
- Modulation Distortion: ≤7%
- Maximum Deviation: ≤±5KHz
Receiver:
- Sensitivity: ≤0.2uV
- Modulation Receiver Bandwidth: ±5KHz
- Adjacent Selective: ≥40dB
- Intermodulation Interference Resistance: ≥35dB
- Spurious Response Inhibition: ≥70dB
- Audio Output Power: ≥300mW
- Audio Distortion: ≤8%
Available Channels and Frequencies:
- Channel 1: 462.5625 MHz
- Channel 2: 462.5875 MHz
- Channel 3: 462.6125 MHz
- Channel 4: 462.6375 MHz
- Channel 5: 462.6625 MHz
- Channel 6: 462.6875 MHz
- Channel 7: 462.7125 MHz
- Channel 8: 467.5625 MHz
- Channel 9: 467.5875 MHz
- Channel 10: 467.6125 MHz
- Channel 11: 467.6375 MHz
- Channel 12: 467.6625 MHz
- Channel 13: 467.6875 MHz
- Channel 14: 467.7125 MHz
- Channel 15: 462.5500 MHz
- Channel 16: 462.5750 MHz
- Channel 17: 462.6000 MHz
- Channel 18: 462.6250 MHz
- Channel 19: 462.6500 MHz
- Channel 20: 462.6750 MHz
- Channel 21: 462.7000 MHz
- Channel 22: 462.7250 MHz
Usage Features
Product Inspection: Before initial use, check for damage or missing parts.
Battery Installation: Ensure the radio is off. Remove the belt clip, slide and lift the battery compartment cover, insert 4 AAA batteries with correct polarity, then close the cover and attach the belt clip. Remove batteries if not used for a long time.
Belt Clip: Allows users to clip the units to their pocket or elsewhere. To assemble, slide the clip into the slot until it snaps. To remove, gently pull the lock tab and push up the belt clip.
Strap Attachment: Thread the strap through the belt clip hole, then through the string, and pull to secure.
Turning On/Off: Press and hold the power button for three seconds. An audible beep and LCD display confirm activation. To turn off, press and hold until an audible beep is heard and the screen disappears.
Adjusting Volume: Use the up/down keys to increase or decrease volume. The volume level indicator is shown on the LCD.
Receiving: The radio receives signals when tuned to the same channel and CTCSS code as the transmitting unit. The RX icon appears when signals are received.
Transmitting: Press and hold the "TALK" button to speak, release to listen. The TX icon appears when transmitting. For clarity, speak directly into the microphone, 2 inches from your mouth. Both units must be on the same channel and CTCSS code to communicate.
Channel Lock: Press and hold the MENU button until the lock icon appears, preventing channel changes. Press MENU again for about 2 seconds to unlock.
Flashlight: Press the "LAMP" button to turn the flashlight on/off.
Selecting Channel: Press MENU once, and the channel number will blink. Use up/down keys to select the desired channel. Press TALK to confirm and return to normal mode, or MENU to confirm and set CTCSS code.
CTCSS Code: Press MENU twice, and the CTCSS code will blink. Use up/down keys to select a code (01-38) or 00 for no privacy code. Press TALK to confirm. Both units must have the same CTCSS code.
VOX (Voice Operated Exchange): For hands-free operation. Press MENU three times to display "VOX" and sensitivity levels (OF, 01, 02, 03). Use up/down keys to adjust sensitivity. "OF" inactivates VOX. Level 03 is highest sensitivity (quiet surroundings), 01 is lowest (noisy environment).
Call Tone: Press the call tone button to transmit a tone, informing other users you wish to speak.
Selecting Call Tone: Press MENU four times, "CA" and call tone number (01-10) will blink. Use up/down keys to select a tone. Press TALK to confirm.
Channel Scan: Press the scan button to detect active channels. Scanning stops when activity is found, and the radio plays the detected audio. Press the scan button again to continue scanning. Press TALK to join a conversation and exit scan mode.
Monitor Button: Press to continuously monitor weak signals. Press again for 3 seconds to stop.
Battery Level Indicator: Displays battery power on the LCD. A blinking indicator means batteries need changing (for regular AAA) or charging (for NiMH rechargeable).
External Headset/Microphone Jack: Supports external headsets. Remove the rubber cap, insert the headphone plug, and put on the earpiece.
Charging (Optional): If using rechargeable AAA batteries (not included), plug the charger (not included) into the accessory jack and connect to a power source.
Maintenance Features
Simple Maintenance Tips:
- Wipe dust and dirt with a dry, soft, clean cloth.
- Do not use cleaning chemicals.
- If dropped in water, turn off immediately, dry the exterior and remove batteries to dry them. Place in a cool, dry place to remove all moisture.
- Do not disassemble the radio's circuit or hardware. Contact customer service for help.
Safety and Compliance:
- RF Energy Exposure: Read the operating instructions for product safety and RF energy exposure compliance. The device complies with government-established RF exposure levels.
- Operating Instructions: Transmit no more than 50% of the time. Hold the radio vertically with the microphone at least 2.5 cm (one inch) from the nose or lips. Keep the antenna away from eyes.
- Body-Worn Operation: When worn on the body, use a DILISS-approved clip, holder, holster, case, or body harness. If not using a body-worn accessory, keep the antenna and radio 2.5 cm (one inch) from the body when transmitting.
- Electromagnetic Interference/Compatibility: Most electronic devices are susceptible to EMI. Turn off the radio in hospitals, aircraft, or near blasting caps, explosive atmospheres, or gasoline service stations.
- Pacemakers: Keep the radio more than 15cm from pacemakers. Consult physicians regarding potential interference.
- Hearing Aids: Digital wireless radios may interfere with some hearing aids. Consult the hearing aid manufacturer for alternatives.
- Other Medical Devices: Consult the manufacturer of any personal medical device to determine if it is shielded from RF energy.
- Protect Hearing: Use the lowest necessary volume. Turn down volume before adding headsets. Limit high-volume headset use. Do not place the radio's speaker directly against the ear.
- Avoid Burns: Do not use the charger outdoors or in moist environments. Do not disassemble or operate a damaged charger. Do not place a portable radio over an air bag.
- Reduce Risk: Pull by the plug, not the cord, when disconnecting the charger. Unplug before maintenance.
- Driving: Check laws regarding radio use while driving. Give full attention to driving. Use hands-free facility if available. Pull off the road if conditions require.
- Approved Accessories: Use only DILISS-supplied or designated accessories to ensure compliance with RF exposure guidelines.
Warranty:
- A two-year manufacturer's warranty is provided from the date of purchase.
- Warranty exclusions include accidental damage, misuse, unauthorized alterations, or removed/defaced serial numbers.
- For warranty service, provide proof of purchase from the seller.
Troubleshooting:
- Units not turning on: Check battery installation and if batteries need changing/charging.
- Poor reception/transmission: Increase volume, press MON button for weak signals, check battery level.