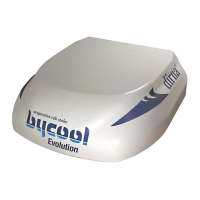
Do you have a question about the Dirna bycool blue line REVOLUTION 12 V. ADR and is the answer not in the manual?
| Brand | Dirna |
|---|---|
| Model | bycool blue line REVOLUTION 12 V. ADR |
| Category | Air Conditioner |
| Language | English |
Main title of the installation manual, indicating its purpose.
Lists the languages in which the mounting instructions are provided.
Guidance on preparation, tools, and documentation for assembly.
Safety advice and warnings for the installation process.
Step 1: Remove the hatch cover and fastening items.
Step 1a: Cut the roof if no hatch is present, following dimensions.
Step 2: Clean the roof surface before applying the seal.
Step 3: Stick the EPDM seal around the hatch gap, check cutting.
Method to cut EPDM seal to avoid water leakage into the cabin.
Step 4: Assemble hatch plates based on roof condition.
Step 5: Place protection lids and fit central studs on hatch.
Step 6: Place waterproof joints for short or long hatch.
Step 7: Assemble unit base, secure with screws and sealer.
Step 8: Tighten screws from sides to center for perfect joint adjustment.
Step 9: Position the Bycool unit in the outer cab hatch gap.
Step 10: Thread stud bolts inside the cabin for fastening.
Step 11: Place washers, bolts, and flange on the stud bolts.
Step 11a: Fit fastening supports with washers and nuts.
Step 12: Thread M6 stud bolts according to height.
Step 13: Place rubber washer, washer, and M6 nut on M6 stud bolts.
Step 13a: Place M6 nuts on stud bolts, do not tighten.
Step 13b: Stick channellers on the front for cold air flow.
Step 13c: Connect four-way and two-way electrical boxes.
Step 14: Place front panel on stud bolts and tighten nuts.
Step 15: Tighten nuts until channellers meet the upper rubber.
Step 16: Place and centre the console on the cab roof.
Step 17: Tighten supports to adjust EPDM seal compression.
Step 18: Screw M8 nuts to supports and the base of the Bycool.
Step 19: Adjust M6 nuts against hexagons for console fastening.
Step 20: Fix the console using Allen screws.
Step 20a: Cover the console screws with plastic covers.
Diagram showing support fastening with a long or short hatch plate.
Diagram showing support fastening without a hatch plate.
Fastening console using M6 pins for specific vehicle types.
Specific console fastening procedure for Scania lorries.
Diagram showing console assembly components and connections.
Steps 21-22: Mount and fix the tank support using screws and rivet nuts.
Step 23: Secure the tank pump unit with sheet metal screws.
Step 24: Connect the pump pipe to the tank and fasten.
Step 25: Assemble the filter and connect to the return pipe.
Step 26: Place filler plug, insert 'T', and connect pipe.
Step 27: Connect wiring to evaporative boxes and water inlet.
Step 28: Connect the unit's battery wiring as indicated.
Step 29: Install the drain pipe with a slope to avoid constrictions.
Notes on ensuring proper ventilation within the vehicle cab.
Instructions for running the power cable to the vehicle battery.
Procedure for safely connecting the unit to the battery.
Schematic of electrical connections, including conventional signs.
Explanation of the color coding used for electrical components.
Catalog of different Bycool air conditioning models available.