EasyManua.ls Logo

Dirt Devil CE6600 User Manual

Dirt Devil CE6600
36 pages
To Next Page IconTo Next Page
Page #1 background imageLoading...
Page #1 background image
OWNER'SMANUAL
Operating and Servicing Instructions
Please read these instructions
carefully before using your
Shampooer.
Let us help youput your vacuum
together or answer any questions,
call:
1-800-321-1134
(USA& Canada)
www.dirtdevil.com
WARNING:
Cleaner assembly may include small pads.
Small parts can present a choking hazard.
Warranty Registration
Onlineat; vccwvdirtdeviLcom
e Mail: RoyalApplianceMfg
7005 CochranRd,
Glenwitlow,Ohio4.4t39
Forquickreference,pleaserecordyour
vacuuminformationbelow,
Model #:
Mfg. Code:
(Mlg codelocatedon 1helower backsideof cleaner)
Espafiol - p_gina E1
©2004 All rightsreserved #1-113176-000
5t06
Question and Answer IconNeed help?

Do you have a question about the Dirt Devil CE6600 and is the answer not in the manual?

Dirt Devil CE6600 Specifications

General IconGeneral
BrandDirt Devil
ModelCE6600
CategoryVacuum Cleaner
LanguageEnglish

Summary

Important Safety Instructions

Grounding Instructions

Limited Warranty

Features

Front View

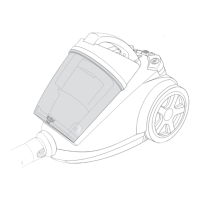
Identifies and labels components visible from the front of the cleaner.

Back View

Identifies and labels components visible from the back of the cleaner.

Attachments

Lists and illustrates the different attachments for the cleaner.

Parts Needed

Specifies the hardware required for assembly.

How to Assemble

Tool Caddy

Instructions for attaching the tool caddy for storage.

Cord Storage

Guidance on wrapping and securing the power cord.

Tool Storage

Instructions for storing hose and attachments on the tool caddy.

Preparing the Carpet

How to Operate

Carpet Cleaning

Detailed steps for cleaning carpeted areas with the shampooer.

Above Floor Cleaning/Attachments

Instructions for using attachments on surfaces other than floors.

Attachment Usage

Emptying & Cleaning the Dirty Water Tank & Filter

Emptying Dirty Water Tank

Procedure for removing and emptying the dirty water tank.

Replacing Dirty Water Tank in Base

Steps for correctly reinserting the dirty water tank.

Transporting & Storing Shampooer

Troubleshooting Guide

Related product manuals