5
STEP 1. SECURING DISC TO SWAGED SIDE RAIL
PASSO 1. ENCAIXE DO DISCO NA BARRA LATERAL COMPRIMIDA
SCHRITT 1. EINRASTEN DER DISC AN DER GESTAUCHTEN SEITENSTANGE
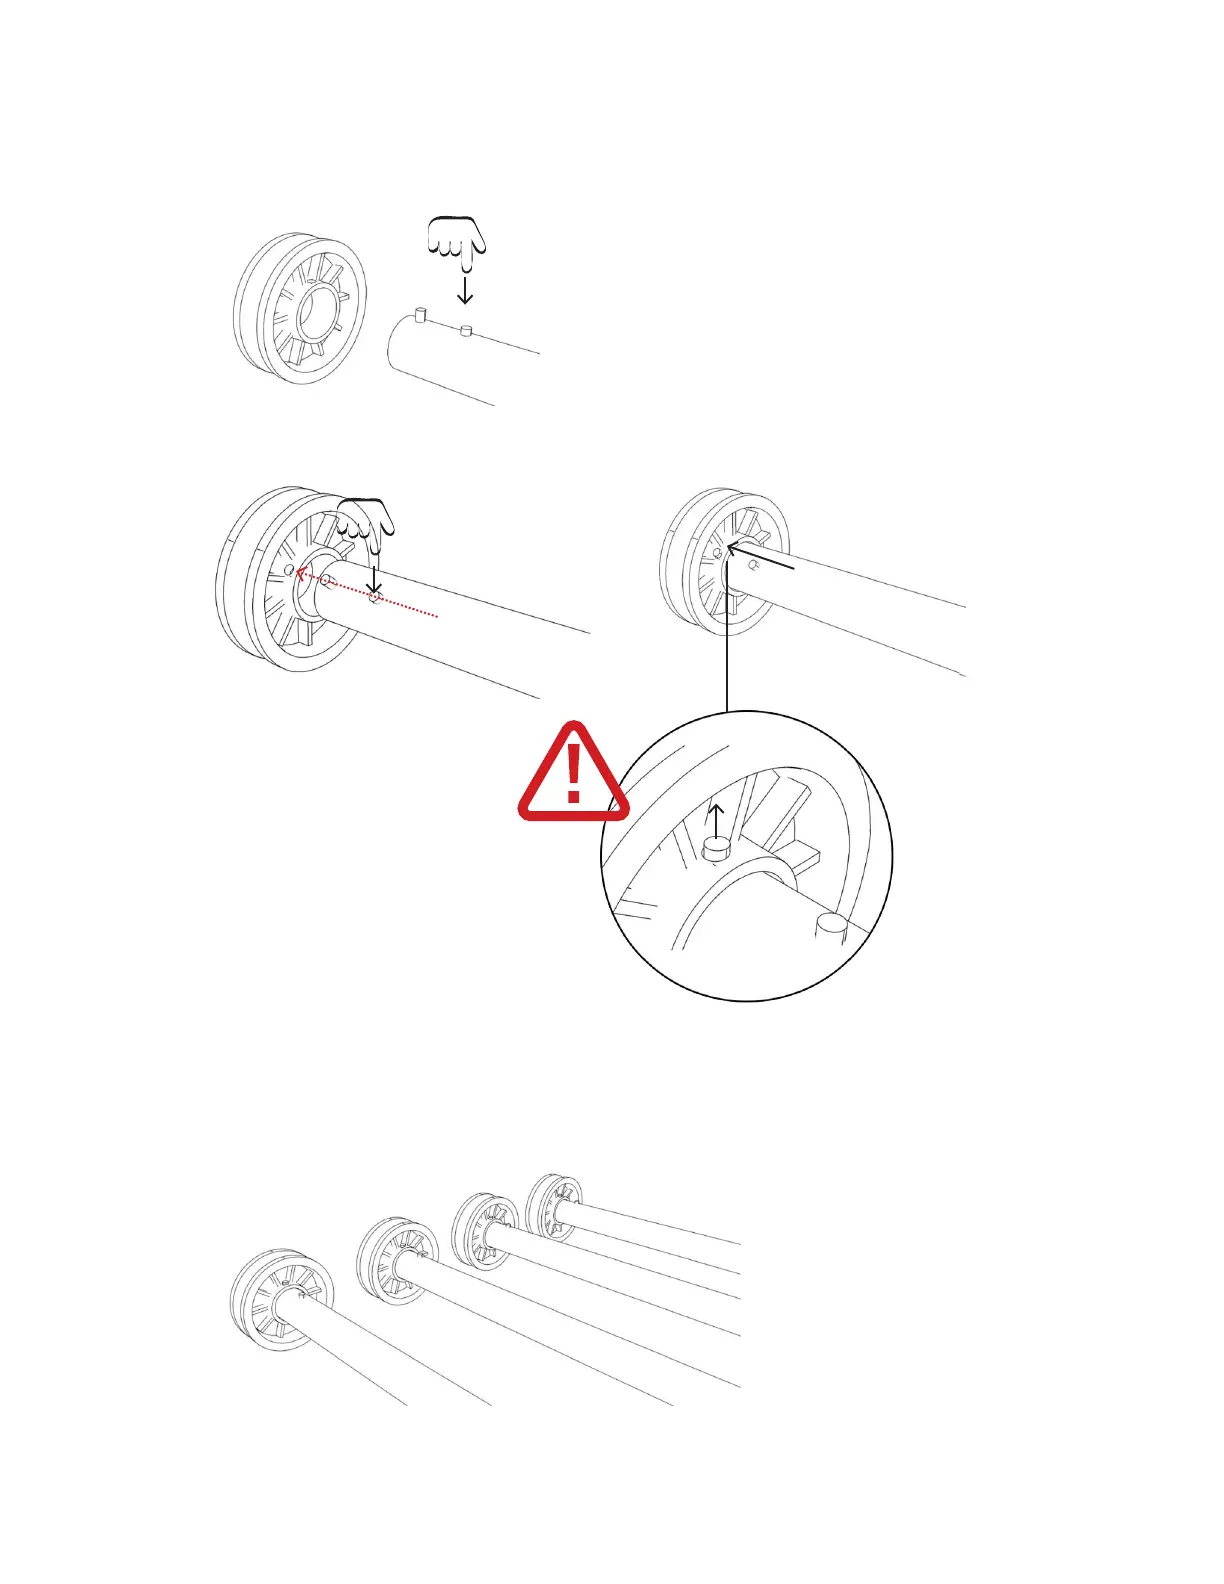
1.1. Holding swaged rail, press pin (A) down and hold.
1.1. Mantenha pressionada a barra lateral comprimida e pressione e segure o pino A.
1.1. Halten Sie die gestauchte Seitenstange und drücken Sie auf Pin A und halten Sie ihn gedrückt.
A
B
A
B
Pin (B) is only securely locked in when you hear
a ‘click’ sound. Make sure pin (B) has popped up
before moving on.
O pino (B) só é encaixado com segurança quando
ouve um som de “clique”. Certique-se de que o
pino (B) saiu antes de prosseguir.
Pin (B) ist nur sicher eingerastet, wenn Sie ein
„Klick”-Geräusch hören. Stellen Sie sicher, dass
Pin (B) herausgekommen ist, bevor Sie weiter-
machen.
A
B
1.3. Repeat steps 1.1 and 1.2 four times with each of the swaged side rails.
1.3. Repita os passos 1.1 e 1.2. para todas as 4 barras laterais comprimidas.
1.3. Wiederholen Sie die Schritte 1.1 und 1.2. für alle 4 gestauchten Seitenstangen.
A
B
1.2. Line up pin (B) with hole in disc, insert rail into disc. Let pin (A) go.
1.2. Deslize o disco na barra lateral de forma que o pino B encaixe no orifício do disco. Solte o pino (A).
1.2. Schieben Sie die Disc auf die Seitenstange, sodass Pin B mit dem Loch in der Disc einrasten kann. Lassen Sie Pin (A) los.
4x
 Loading...