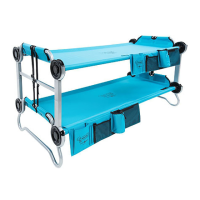
STEP 2. CONNECTING SWAGED SIDE RAIL TO STRAIGHT SIDE RAIL
ÉTAPE 2. RACCORDEZ LA BARRE LATÉRALE EMBOUTIE À LA BARRE LATÉRALE DROITE
2.1. Attach a swaged side rail (completed in step 1) to a straight rail.
2.1. Attachez une barre latérale emboutie (voir étape 1) à une barre droite.
3.2
3.2
3.3
3.3
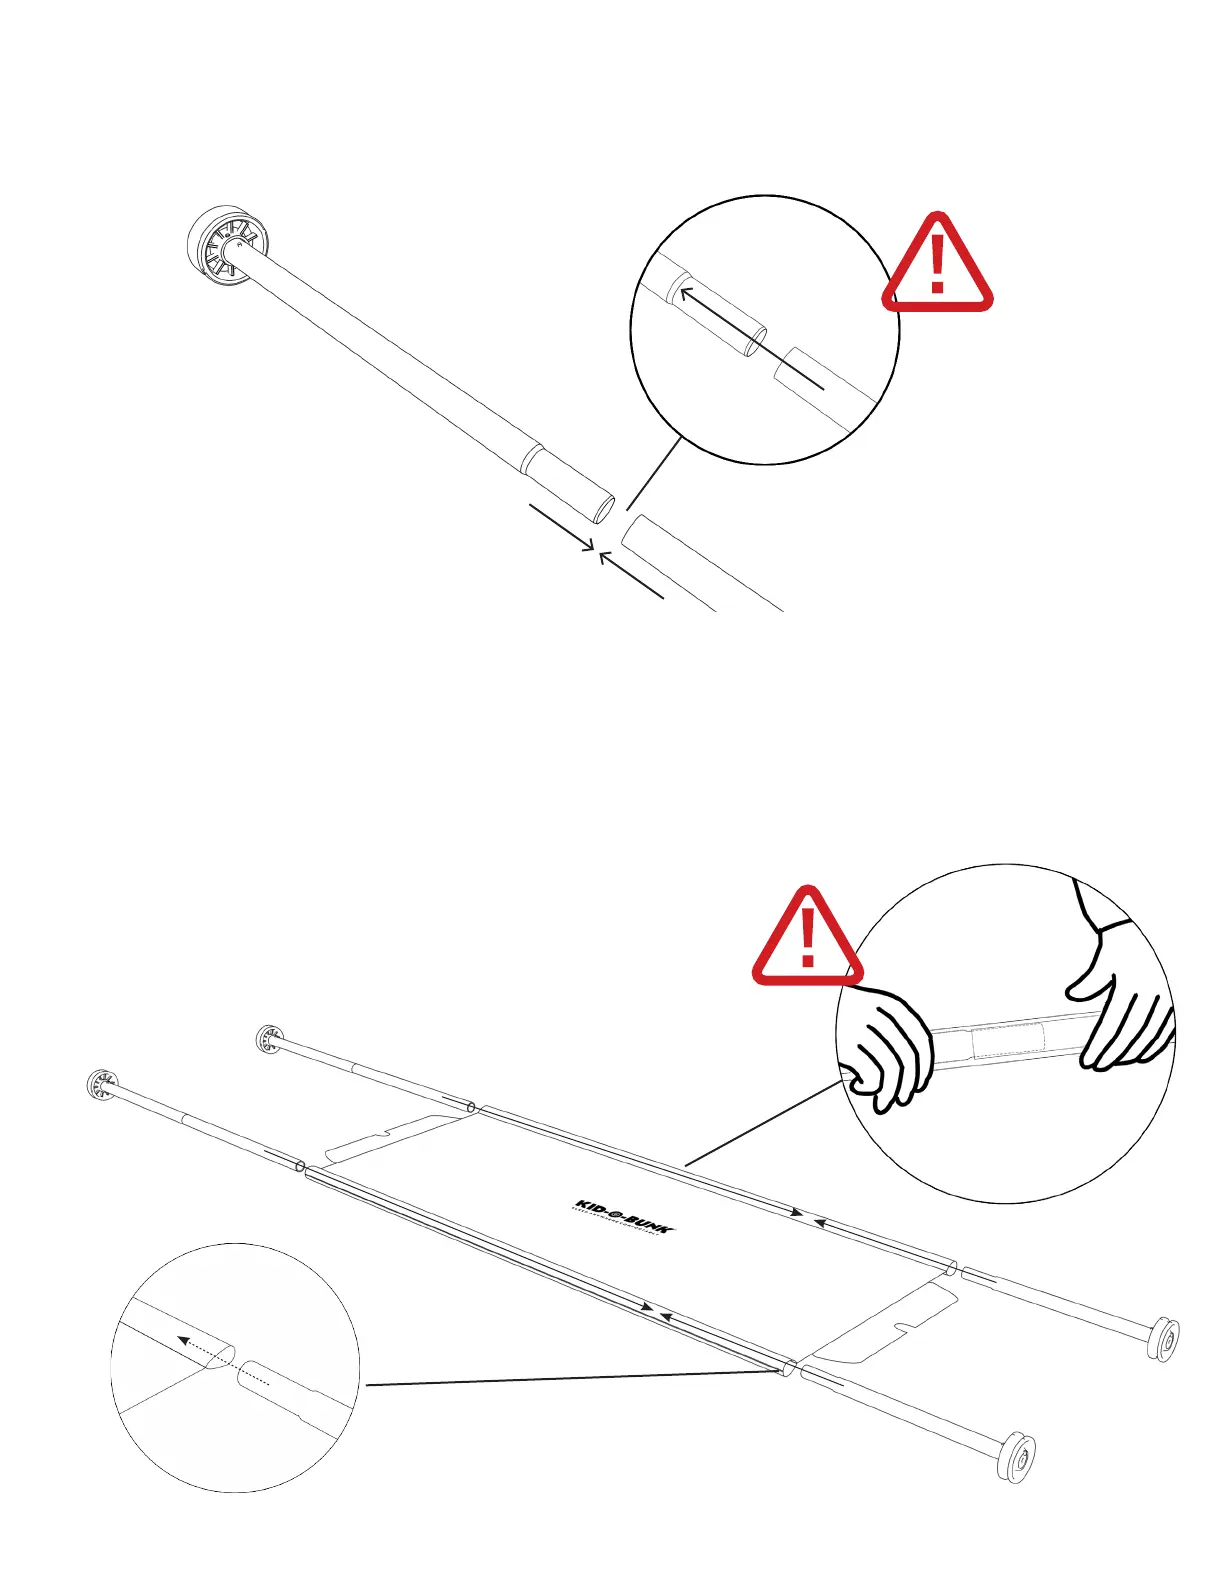
STEP 3. ATTACHING SLEEPING MAT TO SIDE RAILS
ÉTAPE 3. ATTACHEZ LE MATELAS AUX BARRES LATÉRALES
3.1. Open out sleeping mat with the correct (logo) side up.
3.2. At one end, slide the 2 rails (completed in step 2) into the sleeves of the mat.
3.3. On the other end slide the remaining 2 rails (completed in step 1) into the sleeves of the mat.
3.1. Dépliez le matelas avec le bon côté sur le dessus (logo).
3.2. À une extrémité du matelas, faites glisser les 2 barres (montées à l’étape 2) dans les manchons
3.3. À l’autre extrémité faites glisser les 2 autres barres (montée à l’étape 1) dans les manchons.
6
Make sure they slide into one
another completely.
Assurez-vous que les barres
soient complèment enfon-
cées l’une dans l’autre.
2.2. Repeat step 2.1 two times.
2.2. Répétez l’étape 2.1. deux fois.
Make sure that the rails slide into one another
completely. Do this by running your ngers
over the side rails where the connections are.
It should feel smooth to the touch.
Assurez-vous que les barres soient complète-
ment enfoncées l’une dans l’autre. Vous pou-
vez vérier en passant vos doigts au dessus des
jonctions, elles devraient être lisse au touché.
2x