Do you have a question about the Discovery Spark EQ Series and is the answer not in the manual?
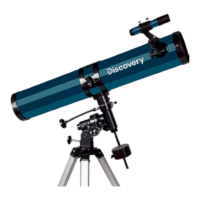
The Discovery Spark EQ telescope series comprises modern telescopes designed for both entry-level and amateur astronomers. This series includes both reflector and refractor telescopes mounted on equatorial mounts, suitable for various astronomical observations. Reflector telescopes are ideal for studying the solar system and bright deep-sky objects, while refractor telescopes are well-suited for planetary observations and terrestrial viewing.
Never look directly at the Sun through the telescope or finderscope without a professionally made solar filter that completely covers the front of the instrument, as this can cause permanent eye damage. To prevent damage to internal telescope parts, ensure the finderscope's front end is covered with aluminum foil or another non-transparent material. Children should only use the telescope under adult supervision.
The telescope arrives in one box, and care should be taken during unpacking. It's recommended to retain the original shipping containers for potential future transport. All screws should be securely tightened to prevent flexing and wobbling, but avoid overtightening to prevent stripping threads. Optical surfaces should not be touched with bare fingers due to delicate coatings. Lenses or mirrors should not be removed from their housing, as this will void the product warranty.
The telescope can be equipped with various accessories like eyepieces, diagonal mirrors/prisms, or Barlow lenses, which should be installed in a specific order.
Unthread two screws on the back of the telescope tube. Place the finderscope base above the holes on the tube and secure it with the screws. Optical finderscopes are useful for locating objects. To align the finderscope, choose a distant object (at least 550 yards / 500 meters away) and center it in the main telescope's eyepiece. Then, adjust the finderscope's screws until the object is centered on its crosshairs.
Slowly rotate the focus knobs one way or the other until the image in the eyepiece is sharp. The image quality can be affected by small variations due to temperature, flexures, etc. Refocusing is often necessary when changing an eyepiece or adding a Barlow lens.
Proper balancing is crucial for smooth operation.
The mount has controls for both conventional altitude (up-down) and azimuth (left-right) directions of motion. These two adjustments are used for large direction changes and for terrestrial viewing. To adjust azimuth, loosen the big knob under the mount base and rotate the mount head about the azimuth axis. Use the altitude adjustment T-bolts to set the required altitude. For astronomical observing, loosen the lock knobs to make large direction changes. Use the slow-motion controls for fine adjustment.
For Northern Hemisphere observers, Polaris is near the North Celestial Pole. For casual observing, rough polar alignment is adequate. Make sure your equatorial mount is leveled and the finderscope is aligned with the telescope. Look up your latitude on a map. Loosen the mount latch, slightly rotating the lock handle counterclockwise. Tighten the screw until the mount head pushes up the latch plate, thus changing the angle. Turn the screw until the pointer on the latitude scale is set at the latitude of your observation site. Loosen the lock knob and rotate the telescope until the pointer on the setting circle reads 90°. Retighten the Dec. lock knob. Loosen the azimuth lock knob and move the mount so that the R.A. axis points roughly at Polaris. Use the two azimuth adjustment knobs above the "N" to make fine adjustments in azimuth if needed.
When observing through a telescope, astronomical objects appear to move slowly through the telescope's field of view. When the mount is correctly polar aligned, you can use the R.A. slow-motion control to track objects. The R.A. motor can be added to automatically track celestial objects. Setting circles allow you to locate celestial objects whose celestial coordinates have been determined from star charts. The telescope's R.A. setting circle is scaled in hours, from 1 to 24, with small lines representing 10-minute increments. The upper set of numbers applies to observations in the Northern Hemisphere, while the numbers below them apply to observations in the Southern Hemisphere.
| Feature | Discovery Spark 769 EQ | Discovery Spark 114 EQ | Discovery Spark 709 EQ | Discovery Spark 809 EQ |
|---|---|---|---|---|
| Optical design | Newtonian reflector | Newtonian reflector | Refractor | Refractor |
| Optical materials | Optical glass with anti-reflective coating | Optical glass with anti-reflective coating | Optical glass with anti-reflective coating | Optical glass with anti-reflective coating |
| Aperture, mm | 76 | 114 | 70 | 80 |
| Focal length, mm | 900 | 900 | 900 | 900 |
| Highest practical power, x | 152 | 228 | 140 | 160 |
| Focal ratio | f/9 | f/7.9 | f/12.8 | f/11 |
| Tube material | Metal | Metal | Metal | Metal |
| Mount | EQ2 | EQ3 | EQ2 | EQ1 |
| Eyepiece barrel diameter | 0.965" | 1.25" | 1.25" | 0.965" |
| Tripod | Aluminum, 670–1230 mm | Aluminum, 610–1040 mm | Aluminum, 670–1230 mm | Aluminum, 670–1230 mm |
| Accessory tray | + | + | + | + |
| Finderscope | 5x24, optical | 6x30, optical | 5x24, optical | 5x24, optical |
| Eyepieces | 4mm, 12.5mm, 20mm | 10mm, 25mm | 4mm, 12.5mm, 20mm | 4mm, 12.5mm, 20mm |
| Diagonal mirror | – | – | 90° | 90° |
| Barlow lens | 2x | 2x | 3x | 3x |
| Erecting eyepiece | – | – | 1.5x | 1.5x |
| Moon filter | – | + | – | – |
Levenhuk products, excluding accessories, come with a 10-year warranty against material and workmanship defects. All Levenhuk accessories are warranted for six months from the purchase date. The warranty covers free repair or replacement in any country where a Levenhuk office is located, provided all warranty conditions are met. For more details, visit www.levenhuk.com/warranty. For warranty issues or assistance, contact your local Levenhuk branch.