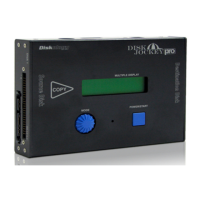
Disk Jockey PRO IT Quick Start Guide
Welcome to the Diskology Disk Jockey PRO (DJ) Quick Start guide for the new, Disk Jockey PRO IT!
This quick start guide was designed to get you up and running as quickly as possible. The DJ PRO is a very
intuitive, easy-to-use device. Regardless of the task that you want to accomplish with the DJ, a quick
understanding of how the DJ works both attached to the computer and as a stand alone unit should help. If
you are interested in more of the theory behind the different “modes” of the DJ (mount drives, copy,
verify, test and erase x1, erase NSA x3) you can download the full user’s guide located in the support
section of our webpage.
Overview
Let’s first provide you with a basic overview of the DJ. When you press the POWER/START button for the
first time, the DJ LCD screen will become active. At this point you can use the MODE dial to scroll
between the various modes supported by the DJ. The DJ will automatically recognize if you have the DJ
connected to a computer via USB or eSATA. If you do, only the mode settings that you can use with the DJ
connected to the computer are visible. These include the following: STANDARD, COMBINE and
MIRROR. If you do not have the DJ connected to a computer, the STANDALONE modes are visible.
These include: DISK COPY, PARTITION COPY, DISK COMPARE, PARTITION COMPARE,
VERIFY CHECK, DISK CHECK, SEEK TEST, DATA ERASE X1, DATA ERASE NSA (3X
ERASE) AND OPTIONS.
As with ALL modes, the first press of the POWER/START button will turn on the DJ. The second press,
after a particular operation is selected, will begin the operation.
MODE Descriptions:
DISK COPY – Copies every sector from Disk 1 HDD to Disk 2. If the Disk 2 HDD is smaller than the
Disk 1 HDD only the amount of data that can fit onto Disk 2 will be copied. If Disk 2 is larger than Disk 1,
the extra space may be recovered using WinXP, a 3
rd
Party Utility, or in the case of a Mac HDD, our Disk
Jockey Expander Software.
PARTITION COPY – Reads the Master Boot Record (MBR) from Disk 1 HDD and only copies the
amount of info as designated in the MBR to Disk 2. Example, partition a 40 GB drive into one 10 GB
partition and leave the remaining 30 GB unallocated. Instead of copying all sectors, PARTITION COPY
will only copy the 10 GB partition taking just minutes.
DISK COMPARE – Compares all sectors after a copy from Disk 1 to Disk 2 HDD to ensure data
integrity. Any errors in disk compare mode will be visible via the LCD screen.