2
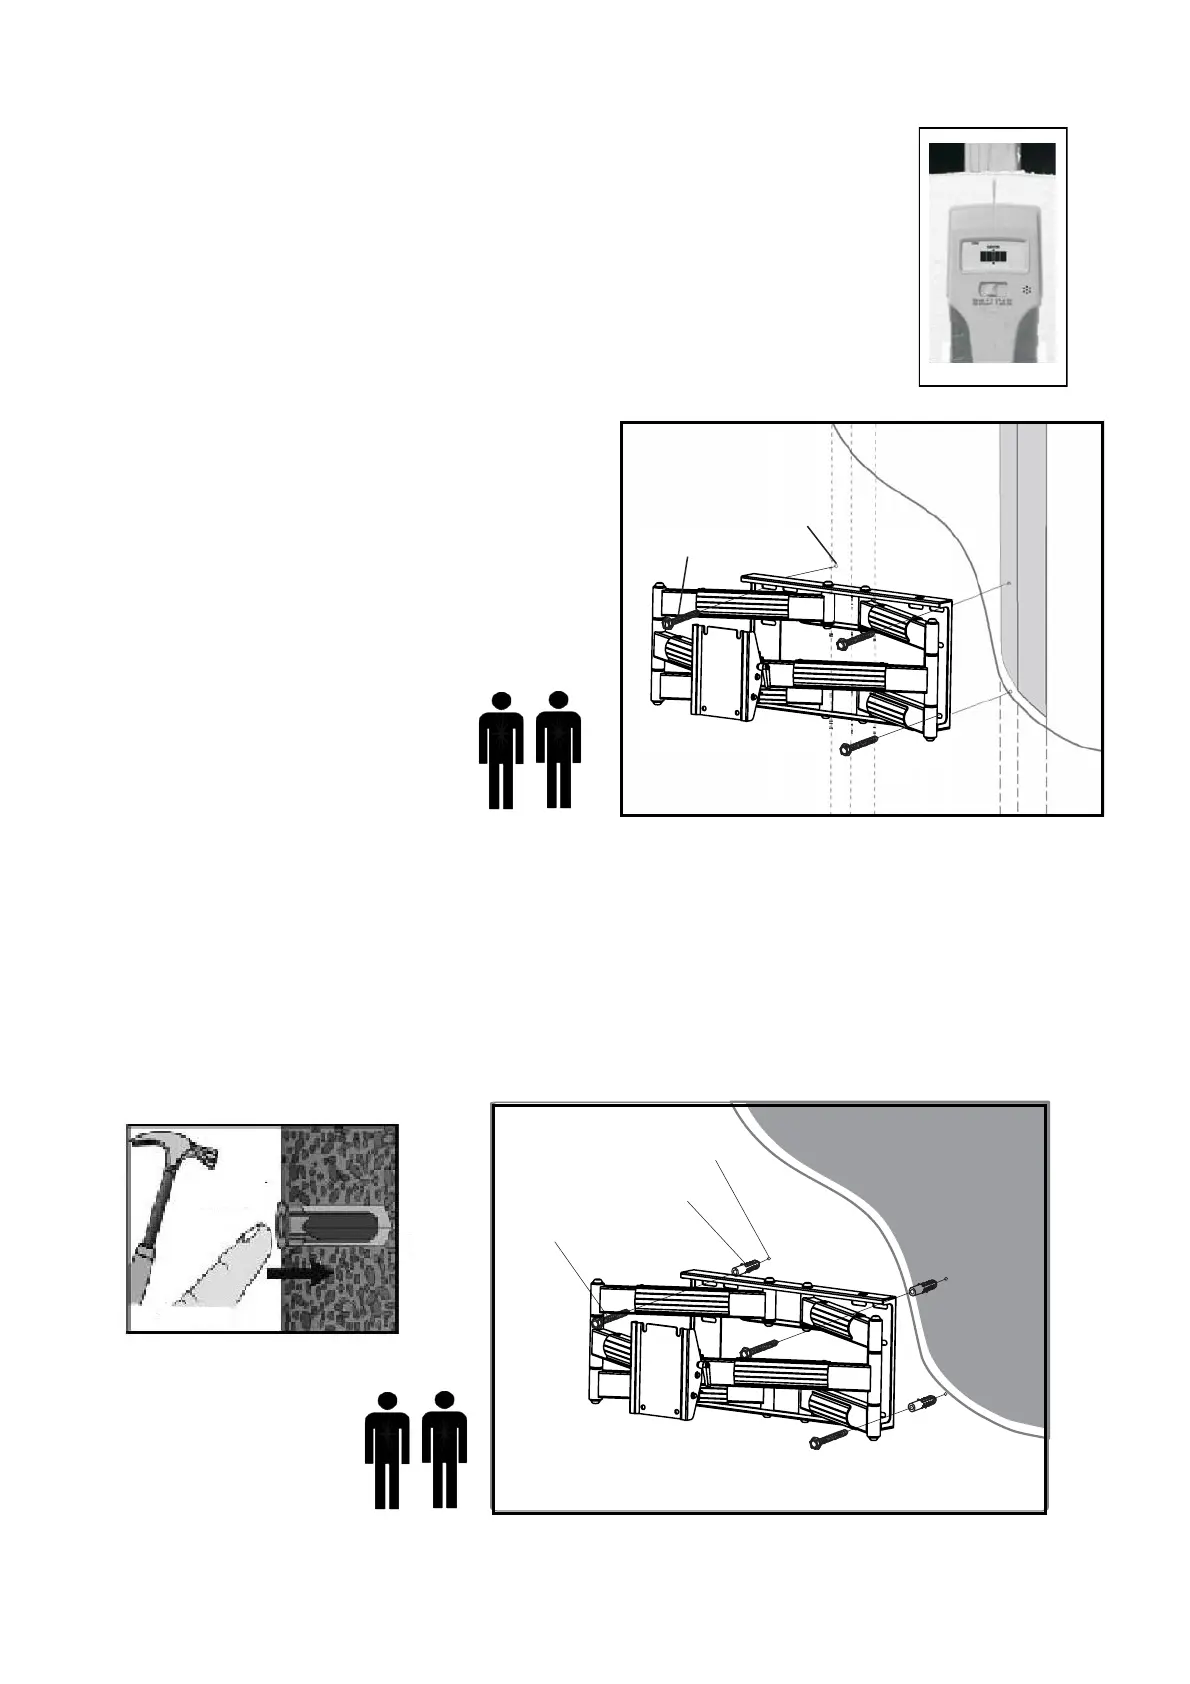
Step 1A - Mounting the wall plate to wooden studs (Fig. 1)
The HVAWM4290L can be mounted onto two wooden studs, with center
to center istances between 16" (406mm).
Using an electronic stud finder, locate the center of the two wooden studs at the
desired mounting location. Mark the stud center positions directly on the wall.
Connect the stud marks with a horizontal line and find the center between them
to represent where you wish the center of the scree
n to be located. Be sure to
measure and mark the center of this horizontal line.
Place the wall plate on the wall. Pin the wall plate to the center mark on the wall.
Using a level (bubble or laser ), level the guide, and
then press the adhesive backi
ng against the wall to
hold the guide in place. Using a 1/4" (6mm) drill bit,
drill 4 pilot holes into the center of the studs (through
the mounting hole cut-out sections of the template),
down to a depth of 3" (76mm).
NOTE: It is not recommended to use a drill driver or impact
wrench to tighten bolts. Tighten lag bolts so that wall plate
is firmly attached to wall, but DO NOT over-tighten. The lag
bolts can be damaged by over-tightening which will strip
their threading. Final tightening of lag bolts
should be done by hand using a ratchet
wrench and socket.
Fig. 1
Step 1B - Mounting the wall plate to concrete (Fig. 2)
Place the wall plate on the wall. Pin the wall plate to the center mark on the wall. Using a level (bubble or
laser), level the guide, and then press the adhesive backing against the wall to hold the guide in place.
Using a 3/8" (10mm) masonry drill bit, drill 4 mounting holes 3-1/8" (80mm) deep into the concrete/masonry
surface.
NOTE: It is not recommended to use a drill driver or impact wrench to tighten bolts. Tighten lag bolts so that wall plate is
firmly attached to wall, but DO NOT over-tighten. The lag bolts can be damaged by over-tightening which will strip their
threading. Final tightening of lag bolts should be done by hand using a ratchet wrench and socket.
Lag Bolt
8*70mm
6mm (1/4”)
Hole
Wood Stud
Fig. 2
Lag Bolt
8*70mm
Wall Anchor
10mm (3/8”)
Hole
CAUTION: Two people recommended
for lifting
CAUTION: Two people recommended
for lifting
 Loading...