3
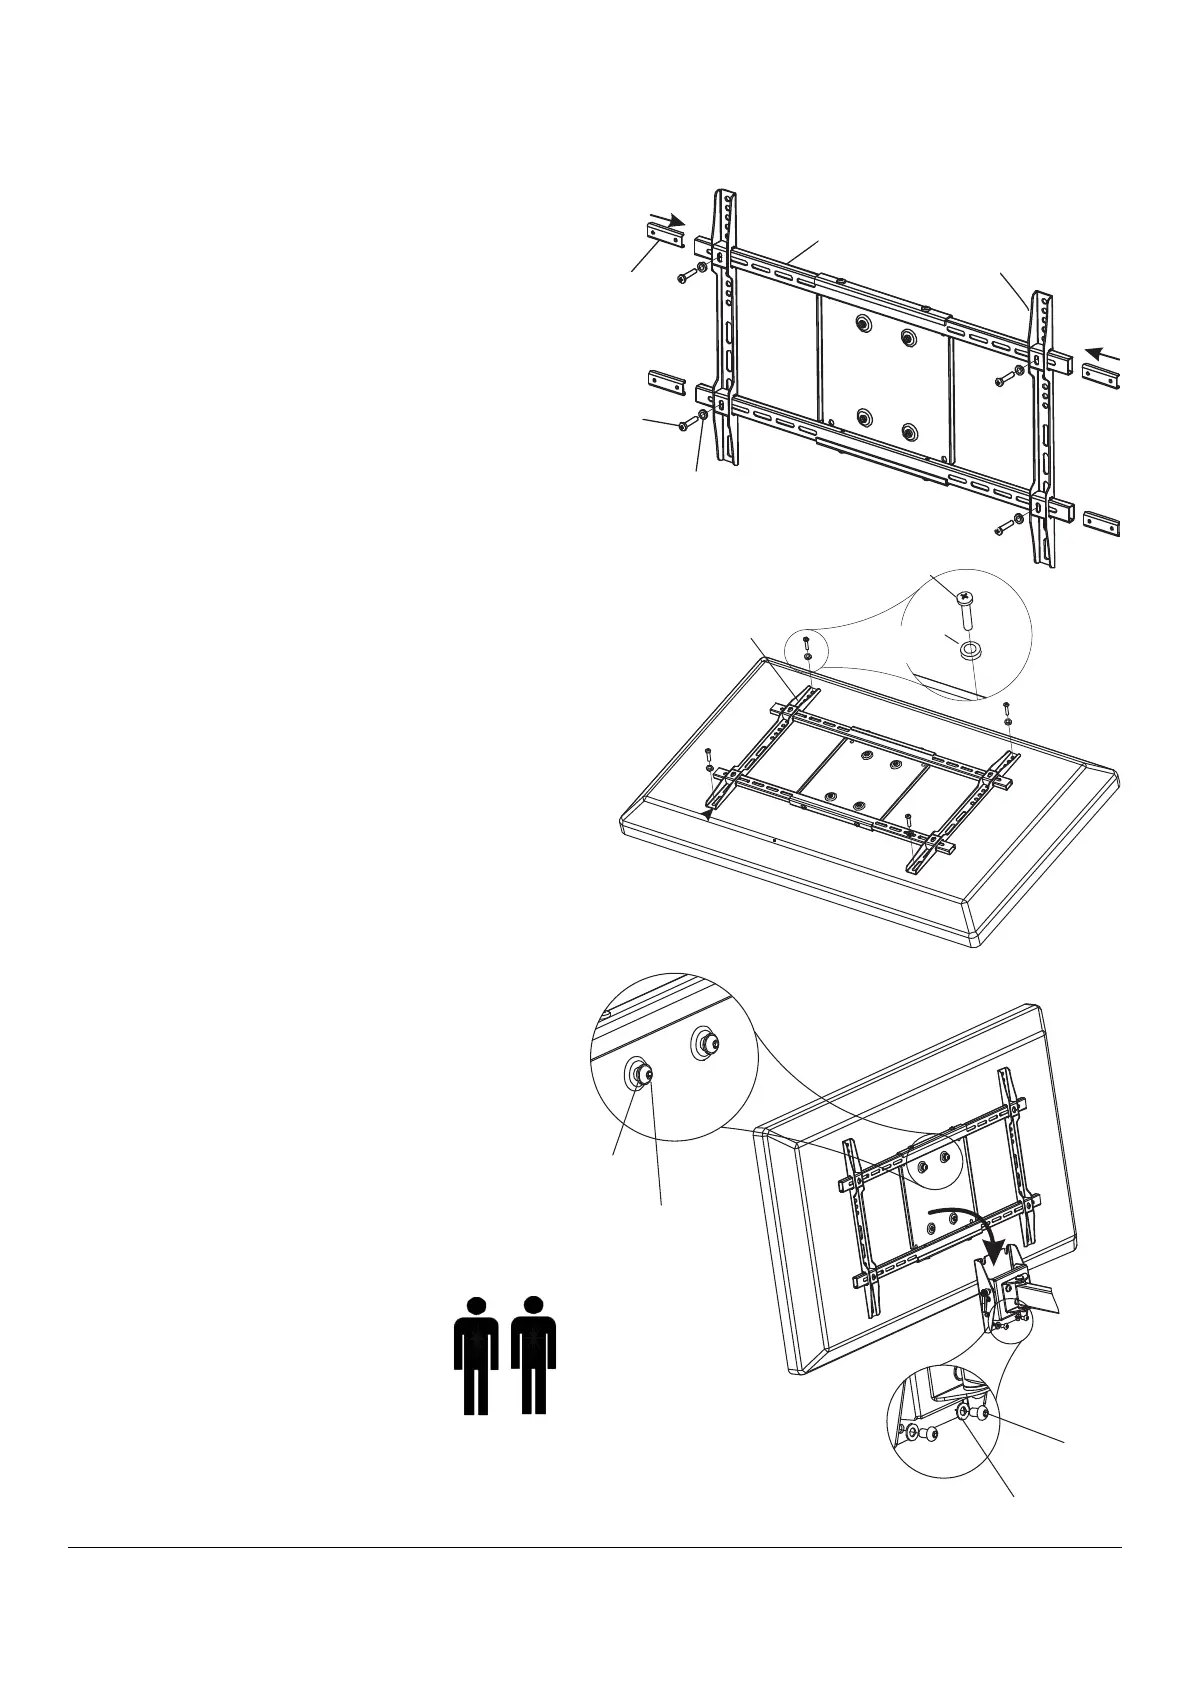
Step 2 - Assembling the Adaptor Plate (Fig.3)
Insert slider plates (x4) into the adaptor rails, then
insert the adaptor brackets into the adaptor rails.
Attach the adaptor bracket and slider plates with four
M6*12mm screws and four
φ6mm metal washers
using a Phillips screw driver.
Attach the adaptor bracket onto the panel using
the provided M5, M6, M8 screws.
NOTE: Determine the correct diameter of screw to use by
checking your panel’s user manual, or by testing the
screws provided. Make sure n
ot to force any of the screws
into the panel.
NOTE: If the back of your panel is flat and the mounting
holes are flush with the surface, use the shorter panel
screws. If the back of your panel is curved, protruded, or
recessed, use the longer screws. You may also need to
use spacers with the longer screws.
Now slide the opposite mounting rail into position,
align i
t with the mounting holes, and secure using the
mounting hardware.
Adaptor rail
Slider plate
M6*12mm
screw
Adaptor bracket
φ6mm metal
washers
Fig. 3
Mounting screws
φ6mm metal
washers
Adaptor brackets
Step 3 - Attaching the flat panel to the
mount
By hand, insert two M8*15mm screws and
φ8mm
metal washers into threaded holes on the adaptor
panel as shown in Fig.4. Leave approximately 3/8”
of exposed thread.
With the help of an assistant, carefully lift the
panel and attach it to the mount head cautiously.
Tighten the screws as shown in Fig.5.
Fig. 4
Fig. 5
φ8mm metal
washer
M8*15mm
screw
φ8mm metal
washer
M8*15mm
screw
CAUTION: Two people recommended
for lifting
 Loading...