EasyManua.ls Logo

Distech Allure EC-Smart-Vue Series - User Manual

Distech Allure EC-Smart-Vue Series
10 pages
Print Icon
To Next Page IconTo Next Page
Loading...
www.distech-controls.com
1/10
1. Product Description
The Allure
EC-Smart-Vue series sensors are designed to interface
with any ECB or ECL-Series controller to provide precision local
temperature sensing, information display of system status, and a
variety of control functions that can be accessed by room occupants.
Through its user-friendly interface, occupants can view and adjust
environmental settings to their liking, for example, view the space
temperature, adjust the setpoint, and apply occupancy overrides with
the Allure EC-Smart-Vue room temperature sensor. In addition to this,
the Allure EC-Smart-Vue-H sensor can measure the room’s humidity
level, the Allure EC-Smart-Vue-M sensor has a motion activated
occupancy sensor, the Allure EC-Smart-Vue-C sensor has a CO
2
sensor to measure air-quality, the Allure EC-Smart-Vue-CM sensor
has both an occupancy and CO
2
sensor, the Allure EC-Smart-Vue-CH
sensor has both a humidity and CO
2
sensor, the Allure
EC-Smart-Vue-HM sensor has a humidity sensor with a built-in motion
detector, and the Allure EC-Smart-Vue-CHM sensor has a humidity
and CO
2
sensor with a built-in motion detector.
With the EC-gfxProgram programming tool, you can create your own
tailor-made display control features that make full use of all Allure
EC-Smart-Vue’s capabilities. For example, you can program the
display to give users feedback on their setpoint selection with the
ECO-Vue
icon that shows more leaves for a setting that not only
cares for the environment, but one that also reduces operating costs. A
five-character alphanumeric display is available for showing messages.
A password protected technician mode allows an installer to perform
commissioning and troubleshooting. When connected with the
ECB-VAV or ECL-VAV series, commissioning can start immediately
after installation, as the Allure EC-Smart-Vue sensor can be used as a
hand-held tool to select the appropriate controller application for the
type of HVAC equipment to be controlled, to perform air balancing of
the system without requiring an onsite controls engineer, and to
troubleshoot the system.
Mounting hardware with a separate sub-base is provided with the
device for installation on dry wall or on an electrical junction box.
Electrical connection is made through standard Category 5e (Cat 5e)
structured cabling.
This cable also brings power and BAS Local Area Network (LAN)
signals to the sensor. The LAN is made available at the externally-
accessible communications jack, when enabled. By connecting a
BACnet MS/TP portable router or a L
ONWORKS
®
Network Interface, it
is possible to access the LAN for installation and maintenance
purposes.
This document describes the hardware installation procedures for the
following device models: Allure EC-Smart-Vue, EC-Smart-Vue-H,
EC-Smart-Vue-C, EC-Smart-Vue-CH, EC-Smart-Vue-M,
EC-Smart-Vue-CM, EC-Smart-Vue-HM, and EC-Smart-Vue-CHM.
Unless otherwise indicated, the term Allure EC-Smart-Vue
is used in this document to represent all Allure
EC-Smart-Vue models.
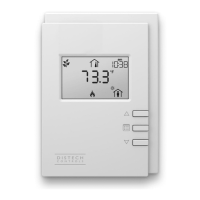
Figure 1-1: Allure EC-Smart-Vue, Allure EC-Smart-Vue-H/-C/-CH
sensors
Figure 1-2: Models equipped with a motion sensing window in the
upper left corner: Allure EC-Smart-Vue-M/-CM/-HM/-
CHM sensors
2. Cleaning
Clean the Allure EC-Smart-Vue sensors by polishing with a soft dry
cloth.
3. General Installation Requirements
For proper installation and subsequent operation of the Allure
EC-Smart-Vue sensors, pay special attention to the following
recommendations:
It is recommended that the sensor(s) be kept at room temperature
for at least 24 hours before installation to allow any condensation
that may have accumulated due to low temperature during
shipping/storage, to evaporate.
Upon unpacking the product, inspect the contents of the carton for
shipping damages. Do not install damaged sensors.
The device is designed to operate under environmental conditions
that are specified in its datasheet.
Hardware Installation Guide
Allure
EC-Smart-Vue Series:
Communicating Space temperature sensors with a communication jack, setpoint
adjustment, occupancy override, and fan speed selection

Questions and Answers

  • T
    Thomas GriffinAug 17, 2025
    Why CO sensor readings are too high on Distech Allure EC-Smart-Vue Temperature Controller?
    • K
      kevinreidAug 17, 2025
      If the CO sensor readings on your Distech Temperature Controller are too high, too low, or inconsistent between sensors, allow the sensor to calibrate itself to its new environment for up to 14 days of operation without any power interruptions.
  • A
    Alexandra DrakeAug 19, 2025
    What to do if Allure EC-Smart-Vue motion detector is always on in Distech Allure EC-Smart-Vue Temperature Controller?
    • K
      kleinjamesAug 20, 2025
      If the Allure EC-Smart-Vue motion detector window indicator is always ON and the Motion output of the associated ComSensor block always reads NULL in EC-gfxProgram, this indicates that the controller has an earlier version of Allure EC-Smart-Vue firmware that does not support the motion sensor. To resolve this, upgrade to the latest Allure EC-Smart-Vue firmware.
  • J
    Jacob TaylorAug 22, 2025
    What does error code 3 mean on Distech Temperature Controller?
    • R
      Rachel RichardsAug 22, 2025
      If your Distech Temperature Controller displays a flashing error code 3 with a bell icon, it means the Allure EC-Smart-Vue sensor is not properly configured in the controller. Use EC-gfxProgram to check the sensor's configuration and ensure it is enabled.
  • S
    stephanie76Aug 25, 2025
    What to do if Distech Allure EC-Smart-Vue Temperature Controller shows flashing error code 2?
    • M
      Mary TerryAug 26, 2025
      If your Distech Temperature Controller displays a flashing error code 2 with a bell icon, it indicates an invalid configuration. Resynchronize the code with the controller using EC-gfxProgram.
  • C
    Carol BarberAug 27, 2025
    What to do if CO output always reads NULL in Distech Allure EC-Smart-Vue?
    • E
      Erica NovakAug 27, 2025
      If the CO output of the associated ComSensor block always reads NULL in EC-gfxProgram, it means the controller has an earlier version of Allure EC-Smart-Vue firmware that does not support the CO2 sensor. To resolve this, upgrade to the latest Allure EC-Smart-Vue firmware.
  • E
    Eric WigginsAug 30, 2025
    How to fix LONWORKS network communication issues on Distech Temperature Controller?
    • H
      huntanthonyAug 31, 2025
      If the Distech Temperature Controller cannot communicate on the LONWORKS network, disable the Net to Subnet Port Settings jumpers on all controllers. If communications are re-established, re-enable only a few Allure EC-Smart-Vue sensors to have network access.
  • A
    Angela DavenportSep 2, 2025
    How to fix a blank screen on Distech Allure EC-Smart-Vue?
    • B
      brettgraySep 2, 2025
      If the Allure EC-Smart-Vue screen is blank and the backlight is off on your Distech Temperature Controller, take the following steps: * Verify the Allure EC-Smart-Vue sensor is connected to the controller and the patch cables are plugged in. * Check if the controller has power or if the controller’s internal fuses have blown or tripped. * Verify the wiring. * Ensure the RJ-45 crimp connectors were installed correctly on the cable.
  • C
    Chad MartinezSep 5, 2025
    What does error code 1 mean on Distech Temperature Controller?
    • R
      rogerslanceSep 5, 2025
      If the Distech Temperature Controller displays a flashing error code 1 with a bell icon, verify the wiring and ensure that all Allure EC-Smart-Vue’s Subnet IDs are unique for this controller.
  • P
    patrickgarciaSep 7, 2025
    Why clock icon is flashing on Distech Allure EC-Smart-Vue Temperature Controller?
    • J
      John GordonSep 7, 2025
      If the Allure EC-Smart-Vue displays a clock icon flashing for 15 seconds, it means that it cannot communicate with the controller. Wait for the communication link to the controller to be established.
  • K
    Kimberly ValentineSep 12, 2025
    What to do if Distech Allure EC-Smart-Vue is not communicating?
    • C
      Christopher SteinSep 12, 2025
      If your Distech Temperature Controller device is not communicating with the controller, ensure each Allure EC-Smart-Vue sensor is set to a unique address for each controller. Also, verify the distance between the device and the controller. With EC-gfxProgram, check the configuration of the sensor to see if it is enabled. Ensure that only the last Allure EC-Smart-Vue sensor has its EOL termination set to ON.

Summary

Product Description

General Installation Requirements

Device Dimensions

General Wiring Recommendations

Mounting Instructions

Device Components

Supported Quantity

About the Allure EC-Smart-Vue CO2 Sensors

Connector and Configuration Jumper Location and Identification

Setting Up the Allure EC-Smart-Vue with Motion Sensors

About the Subnetwork Bus

Subnetwork Bus Total Length

Connection Cable

Subnetwork Bus Topology and EOL Terminations

Setting the Allure EC-Smart-Vue Subnet ID

Commissioning Controllers

Setting the BAUD Rate

Set the LAN Type

BACnet Network Access from the Sensor

LONWORKS Network Access from the Sensor

Troubleshooting Guide

Distech Allure EC-Smart-Vue Series Specifications

General IconGeneral
ModelEC-Smart-Vue Series
Power Supply24 VAC/VDC
Communication ProtocolBACnet MS/TP
Mounting TypeWall-mounted
Control AlgorithmPID
Display TypeLCD
Operating Temperature0 to 50 °C
Input TypeAnalog
Output TypeAnalog/Digital
Humidity Range0 to 100 %RH
InputsUniversal inputs (depending on model)