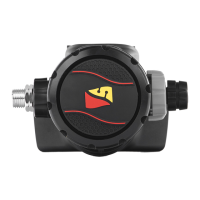
Do you have a question about the Dive Rite RG1208-5 and is the answer not in the manual?
Screw port tool into high pressure port and secure first stage in vise.
Loosen and remove the adjustment screw using a 6mm Allen wrench.
Use spanner wrench to loosen diaphragm cap with steady pressure.
Remove intermediate pressure spring, spring carrier, and plastic washer.
Remove diaphragm and thrust washer, avoiding damage to sealing surfaces.
Carefully remove the valve lifter.
Remove regulator from vise and invert with turret side facing up.
Remove turret retainer (HP valve module) using a 6mm Allen wrench.
Remove the high pressure valve and spring.
Remove O-rings and thrust washer from the turret using a pick.
Remove the large O-ring and the turret logo ring.
Remove exterior O-ring from DIN lockdown screw.
Remove DIN lockdown screw and the O-ring from its base.
Remove the DIN hand wheel and the dust cap.
Loosen and remove DIN connector and saddle using a 19mm socket wrench.
Remove O-ring and cone-shaped filter from the DIN connector.
Lubricate and install O-ring RG1241 into DIN connector; install saddle with thread lock.
Screw and tighten DIN connector into the first stage body using a 19mm socket wrench.
Install filter O-ring RG1243 on filter; install filter into DIN Connector.
Install dust cap assembly and hand wheel over the DIN connector.
Lubricate and install O-ring RG1242 on DIN lockdown screw; tighten with 6mm Allen wrench.
Mount first stage with turret side up; lubricate and install O-ring RG1232.
Install the turret logo ring.
Install the turret.
Install thrust washer RG1237 and O-ring RG1238.
Lubricate and install O-rings RG1235 and RG1236 onto the HP valve module.
Place spring RG1280 and install HP valve seat RG1234 onto the valve module.
Install the completed HP valve module into the first stage by passing it through the turret.
Tighten the turret with 6mm Allen wrench, avoiding pinching O-ring RG1238.
Turn the first stage over so that the balance chamber is facing upwards.
Install valve lifter and verify contact/resistance with HP valve seat.
Install diaphragm RG1230-05 and thrust washer RG1265, ensuring proper seating.
Place spring carrier on diaphragm center and plastic washer on the spring carrier.
Place intermediate pressure spring on carrier; install adjustment screw into diaphragm cap.
Install and completely screw down diaphragm cap; tighten firmly with spanner wrench.
| Brand | Dive Rite |
|---|---|
| Model | RG1208-5 |
| Category | Diving Instrument |
| Language | English |