EasyManua.ls Logo

Dixon ZTR 428 User Manual

Dixon ZTR 428
6 pages
To Next Page IconTo Next Page
Page #1 background imageLoading...
Page #1 background image
TECHNICAL DATA BROCHURE - ZTR 428 & 429
DATE 8/89 (Rev.)
PAGE 1 of 11
MPORTANT -- READ OPERATOR’S MANUAL BEFORE OPERATING OR MAKING ADJUSTMENTS.
Deluxe Seat Adjustment
Easy hand lever action allows forward and backward movement, of seat.
No bolts to loosen or tighten.
Mower Blade Operation
1. To start mower blades, pull up slightly on blade drive switch handle
and move it forward to the "ON" position.
2. To stop mower blades, move switch handle to the "OFF" position.
Body Removal
1. Disconnect throttle cable from engine.
2. Disconnect rear wiring loon from the body-by turning the threaded collar
on connector in a counterclockwise direction. This plug is located at
the right rear of body.
3. Remove the four control lever bolts and remove upper control levers
(P/N 9079 A 9080).
4. Remove the two acorn nuts on floor of body and release latches on
the rear of body near each side.
5. Place height adjustment lever in the vertical position, engage the
parking brake and carefully lift body off the chassis.
6. Reverse above procedures to install body.
Safety Checks -- "Important"
1. After reassembly of body onto chassis and while seated on the mower,
attempt to start the engine with mower deck engaged. The engine should
not start. If engine does start, return mower to an Authorized Dixon Dealer
for adjustment or repair.
2. Disengage mower deck and start engine with the operator in a normal seated
position on the mower. Engage mower deck and remove weight from the
seat. The engine should stop. If engine does not stop when operator rises
from seat, return mower to an Authorized Dixon Dealer for adjustment or
repair.
Parking Brake Adjustment
1. Remove body as described above.
2.
Adjustment points are located at rear of transaxle on each side.
Remove roll pins from swivel fitting (P/N 2172). Turn swivel fitting on
brake rod (P/N 6100) in, to tighten. Just enough to prevent brake from
slipping when engaged. 3. Reinstall roll pin.
CAUTION: Over tightening may cause premature wear, on brake band
(P/N 6085).
Dixon Industries, INC
.
Box 1569 Coffeyville, Kansas 67337-0945 (316)251-2000 Airport Industrial Park
TELEX: 417109
Question and Answer IconNeed help?

Do you have a question about the Dixon ZTR 428 and is the answer not in the manual?
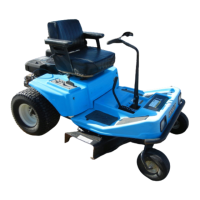
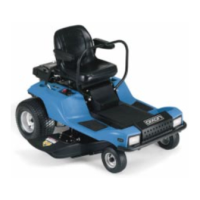
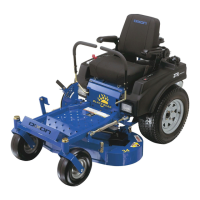
Dixon ZTR 428 Specifications

General IconGeneral
Engine Type4-Cycle
Number of Blades2
Transmission TypeHydrostatic
Zero TurnYes
Cutting Height1.5-4.5 inches
Drive TypeRear Wheel Drive

Summary

Deluxe Seat Adjustment

Seat Movement

Easy hand lever action allows forward and backward seat movement without tools.

Mower Blade Operation

Starting Mower Blades

Pull up on blade drive switch handle and move it forward to the "ON" position.

Stopping Mower Blades

Move the switch handle to the "OFF" position to stop mower blades.

Body Removal and Installation

Disconnecting Connections

Disconnect throttle cable and rear wiring loom connector before body removal.

Removing Fasteners and Latches

Remove control lever bolts and body latches to release the chassis.

Lifting and Reinstalling Body

Lift body off chassis after adjusting height lever and engaging parking brake.

Important Safety Checks

Engine Start Safety Check

Engine should not start with mower deck engaged after reassembly.

Engine Stop Safety Check

Engine should stop when operator rises from seat with deck engaged.

Parking Brake Adjustment

Accessing Adjustment Points

Remove body to access adjustment points located at the rear of the transaxle.

Adjusting Brake Rod

Turn swivel fitting on brake rod to tighten, preventing brake from slipping.

Finalizing Adjustment

Reinstall roll pin, avoiding over-tightening to prevent premature wear.

Mower Deck Adjustment Procedure

Belt Installation and Tire Pressure

Install drive belt and check/adjust tire pressures to specified levels.

Cutter Blade Alignment (Side-to-Side)

Align outer mower deck blades side-to-side, ensuring tip-to-tip variation is within 1/8 inch.

Cutter Blade Alignment (Front-to-Rear)

Align outer mower deck blades front-to-rear for a slight rearward tilt.

Electric Blade Clutch Burnishing

Burnish the electric blade clutch by performing multiple engagements at high throttle.

Adjustment Outcome

Completed adjustment ensures mower deck provides a quality cut.

Related product manuals