E-7
4. GETTING START
4.1 INSTALLATION
• Unpack all parts and remove protective material.
• Insert the batteries (CR2025) into the remote control transmitter as shown in the
battery compartment.
• Do not connect the unit to the mains before checking the main voltage or before all
other connections have been made.
• Do not cover any vents and make sure that there is a space of 10 centimeters
around the unit for ventilation.
4.2 CONNECTIONS
A. LINE-IN input. For connection of other sound sources. (e.g. TV or VCR audio output).
B. LINE-OUT. For connection to other amplifier as sound sources.
4.3 POWER ON/OFF
When you first plug the unit into the mains, the unit will go into standby mode.
• You can press POWER (main unit) or STANDBY/ON (Remote Control) to switch
on the unit.
• The unit will remain standby it is switched on.
• Pull the main plug out of the wall socket if you want to switch off the main voltage
completely.
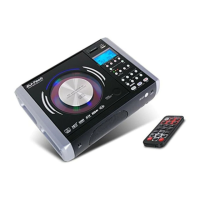
5. OPERATION: COMPACT DISC/MP3/WMA
Press SD-USB-CD key to select CD/MP3 mode.
5.1 INSERTING THE MP3/WMA-CD/CD DISC
1. Press OPEN/CLOSE to open the CD door.
2. Insert an MP3-CD/CD in the tray.
3. Press OPEN/CLOSE again to close the CD door.
4. The MP3-CD/CD-player starts and scans the contents list of the MP3/WMA-CD/CD.
FOR CD:
After a few seconds, the total playing time and number of tracks will appear on the display.
FOR MP3/WMA:
After a few seconds, the total number of tracks, albums and MP3 or WMA will appear on the
display.
5.2 PLAYING THE ENTIRE DISC
1. Press PLAY/PAUSE .
• Play starts with the first track.
• The display shows the current track number and its elapsed playing time.