2 V-4061DB VIDEO DOORBELL | DIGITAL MONITORING PRODUCTS
1. Log in to dealer.securecomwireless.com.
2. Select the appropriate system for the V-4061DB Video Doorbell.
3. On the System Information screen under Add-On Features, check the Video Doorbell box. This will
allow the doorbell to sync with the Virtual Keypad App.
ENABLE THE VIDEO DOORBELL IN DEALER ADMIN
4
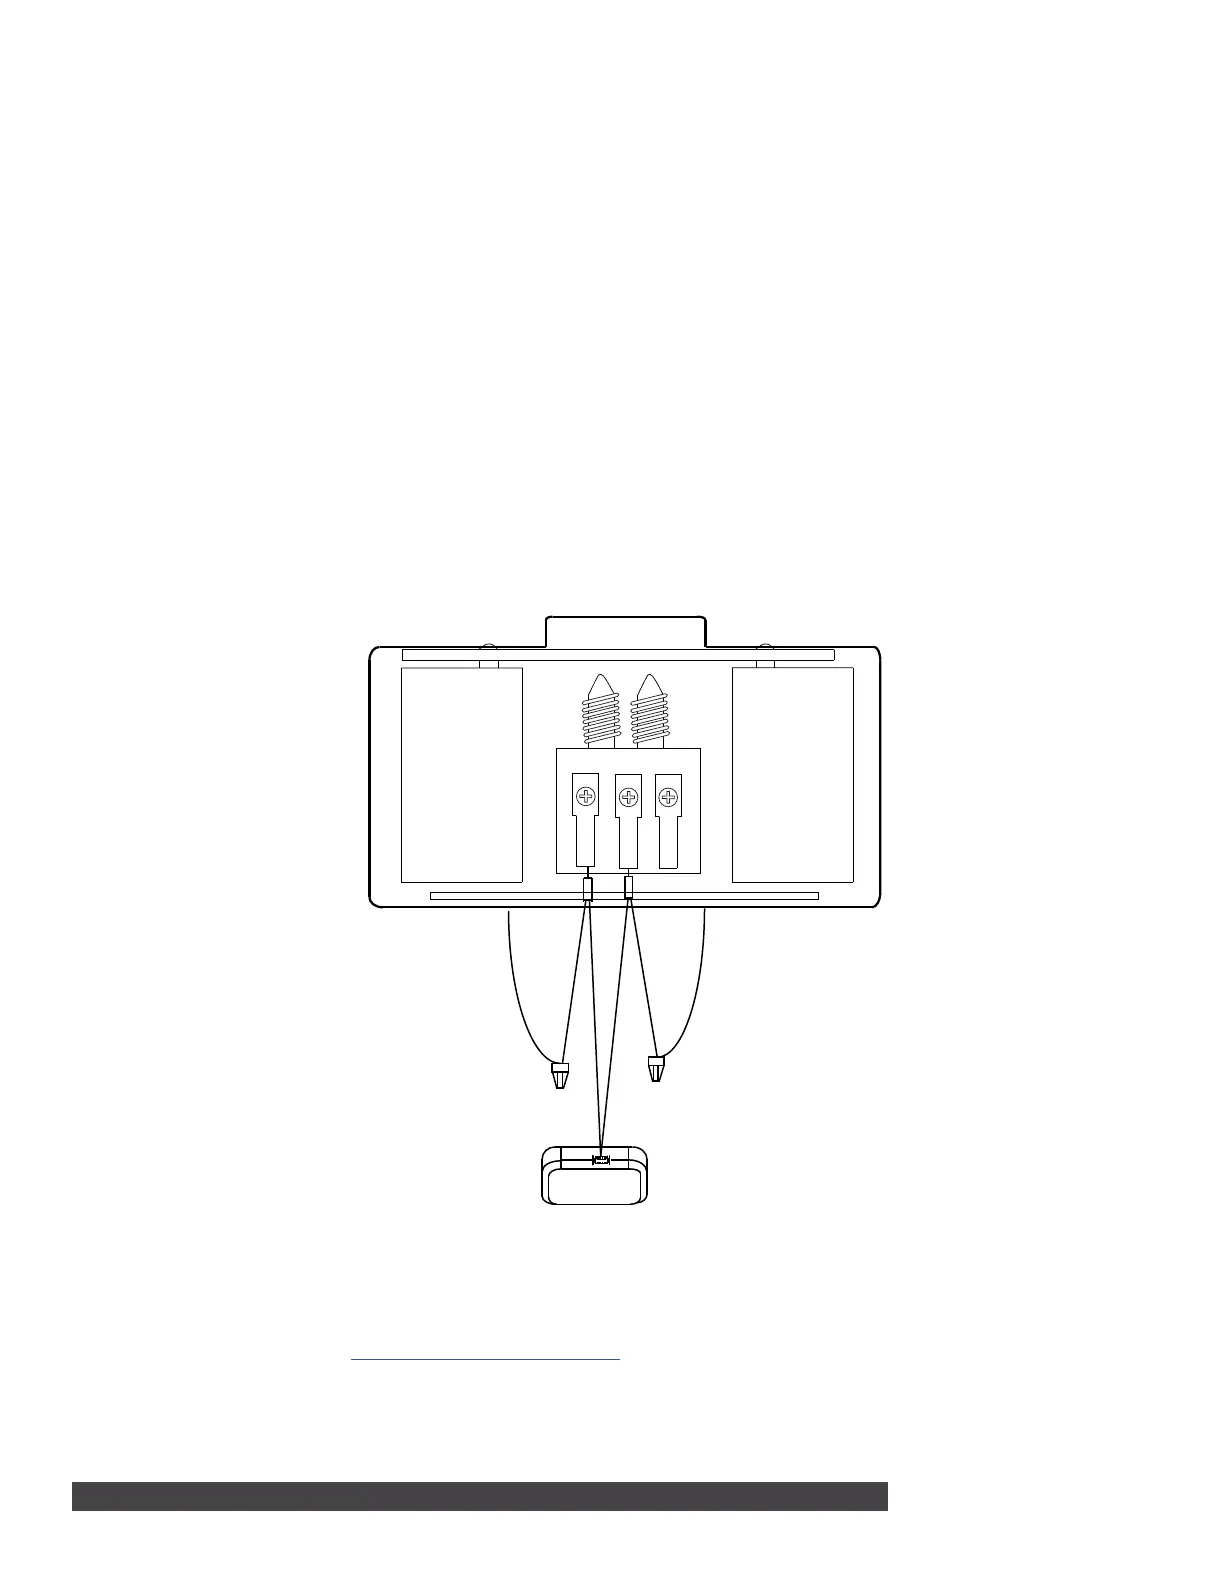
Front
Trans
Rear
Power Kit
Chime Wire
Chime Wire
Figure 3: Installing the Power
Kit
If you are not installing the doorbell with an existing mechanical chime, skip to section 4.
1. With the breaker supplying power to the mechanical chime still o, remove the cover from the
mechanical chime.
2. Loosen the TRANS terminal and connect the existing chime wire to the power kit wire using the
included wire nut.
3. Loosen the FRONT terminal and connect the existing chime wire to the power kit wire using the
included wire nut.
4. Connect the wire harness to the TRANS terminal and tighten it down.
5. Connect the other wire harness to the FRONT terminal and tighten it down.
6. Insert the white wire connector into the power kit.
7. Mount the power kit within the mechanical chime housing using the adhesive backing and replace the
cover.
8. Turn on the breaker to the part of the home where the video doorbell and mechanical chime are
installed.
3
INSTALLING THE POWER KIT
 Loading...