9
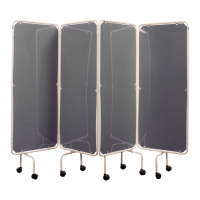
9. Repeat stages 5-8 for the remaining panels, noting the panel order to assemble
in figure 3. There are 2 types of clip arrangement, this is necessary as each panel
must be rotated 180° to its neighbour, as shown below. Turn the panels round
so that panels 1 and 4 have distance ‘A’ between the edge of the frame and centre
of the screw and panels 2 and 3 have distance B.
Fig 5: Panel orientation
10. If the panel(s) appear slightly bowed once installed, slacken the top screws slightly
and pull the panel upwards, while holding retighten the screws, the panel should
now be flat.
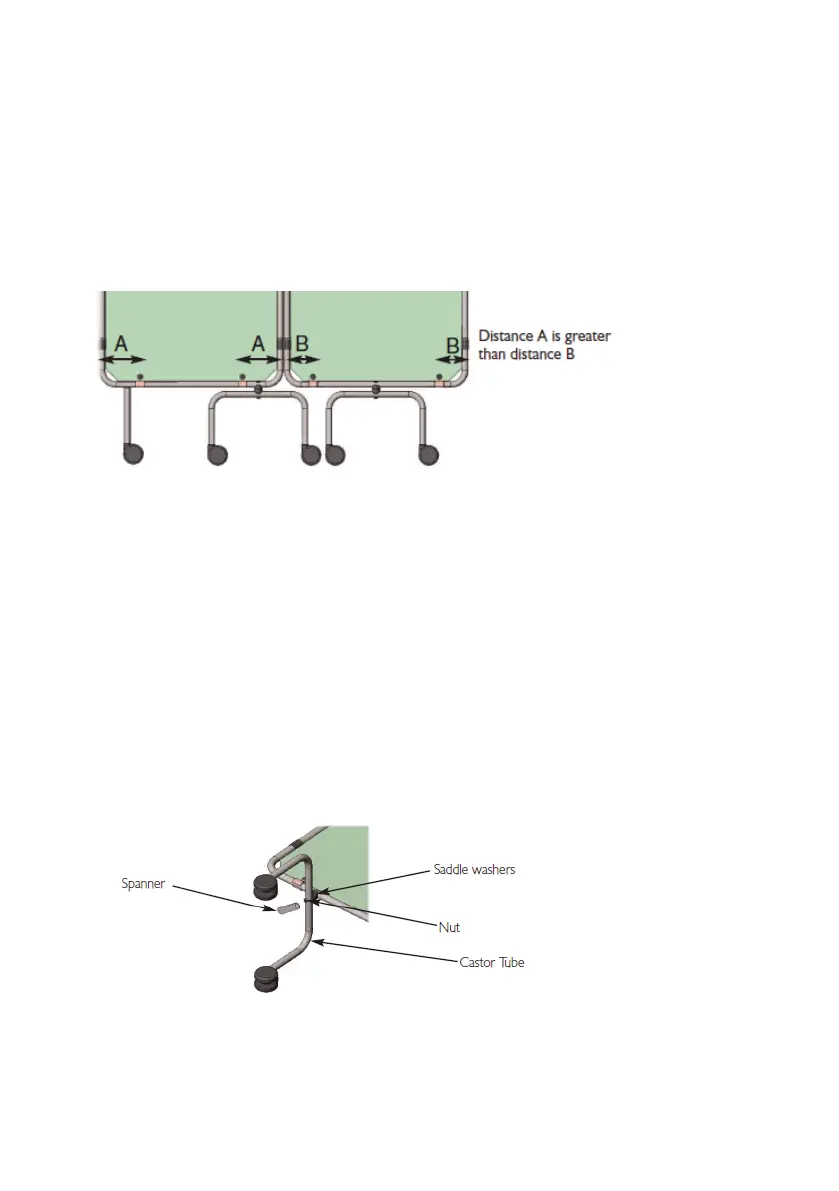
11. The castor tubes must now be rotated into position:
•Usingthespannerprovidedwiththescreenframe(notthepanelkit),loosenthe
nuts on the castor tubes.
•Turnthecastortubesthrough90°.
•Pressingtheboltdownwardstowardsthetube,re-tightenthenut.Tightening
fully may require the use of a 10mm socket and ratchet. Once tight ensure both
saddle clamps are seated correctly.
Fig 6: Orientating the castors
12. Your screen is now fully assembled. Carefully lift the screen onto its castors, this
may be easier if two able bodied people lift the screen together.
Please dispose of the packaging in a sensible and environmental fashion.