EasyManua.ls Logo

Doit Security+ 4200DI User Manual

Default Icon
40 pages
To Next Page IconTo Next Page
Page #1 background imageLoading...
Page #1 background image
GARAGE DOOR OPENER
Model 4200DI
1/2 HP
For Residential Use Only
Complies with UL 325
regulations effective
January 1, 1993
®
Owner’s Manual
Please read this manual and the enclosed safety materials carefully!
Fasten the manual near the garage door after installation.
The door WILL NOT CLOSE unless the Protector System
®
is connected
and properly aligned.
Periodic checks of the opener are required to ensure safe operation.
The model number label is located on the front end panel of your opener.
®
Made exclusively for
Do it Best Corp.
Fort Wayne, Indiana
Question and Answer IconNeed help?

Do you have a question about the Doit Security+ 4200DI and is the answer not in the manual?

Doit Security+ 4200DI Specifications

General IconGeneral
Model4200DI
SecurityRolling Code Technology
ManufacturerDoit
Remote Controls2
Drive SystemChain

Summary

Introduction

Safety Symbol and Signal Word Review

Explains safety symbols and signal words used in the manual.

Preparing Your Garage Door

Tools Needed for Installation

Lists the necessary hand tools for assembly and installation.

Planning Your Installation

Sectional Door Installation Considerations

Specific advice for installing openers on sectional garage doors.

One-Piece Door Installation Considerations

Specific advice for installing openers on one-piece garage doors.

Carton Inventory

Hardware Inventory

Assembly Step 1: T-Rail and Pulley Bracket

Assembly Step 2: Install the Trolley

Assembly Step 3: Fasten T-Rail to Motor Unit

Assembly Step 4: Install Chain/Cable and Sprocket Cover

Assembly Step 5: Tighten Chain and Cable

Installation Step 1: Determine Header Bracket Location

Sectional Door & Tracked One-Piece Door Mounting

Specific guidance for installing header brackets on these door types.

One-Piece Door Without Track Mounting

Specific guidance for installing header brackets on one-piece doors without tracks.

Installation Step 2: Install the Header Bracket

Wall Header Bracket Installation

Steps for mounting the bracket directly to the wall.

Ceiling Header Bracket Installation

Steps for mounting the bracket to the ceiling.

Installation Step 3: Attach T-Rail to Header Bracket

Installation Step 4: Position the Opener

Sectional Door or One-Piece with Track Positioning

Positioning for doors with tracks.

One-Piece Door Without Track Positioning

Positioning for doors without tracks.

Installation Step 5: Hang the Opener

Installation Step 6: Install the Door Control

Installation Step 7: Install Light and Lens

Installation Step 8: Attach Emergency Release Rope and Handle

Installation Step 9: Electrical Requirements

Installation Step 10: Install The Protector System®

Safety Reversing Sensor Overview

Explains the function and importance of the safety reversing sensor.

Bracket Installation Methods

Details different ways to install sensor brackets (track, wall, floor).

Mounting, Wiring, and Alignment of Safety Sensors

Guides on mounting, wiring, and aligning the safety sensors for proper operation.

Troubleshooting Safety Sensors

Provides solutions for common issues with the safety sensors.

Installation Step 11: Fasten the Door Bracket

Sectional Door Bracket Installation

Specific methods for sectional doors.

One-Piece Door Bracket Installation

Specific methods for one-piece doors.

Installation Step 12: Connect Door Arm to Trolley

Sectional Door Arm Connection

Connects arms for sectional doors.

One-Piece Door Arm Connection and Adjustment

Connects arms for one-piece doors and adjusts limits.

Adjustment Step 1: Travel Limits

How and When to Adjust Limits

Provides guidance on when and how to adjust travel limits.

Adjustment Step 2: Adjust the Force

How and When to Adjust Forces

Provides guidance on when and how to adjust force controls.

Adjustment Step 3: Test Safety Reversal System

Adjustment Step 4: Test the Protector System®

Operation

Important Safety Instructions

Critical safety guidelines for operating the opener.

Using Your Garage Door Opener

How to operate the opener with remotes and controls.

Wall-Mounted Door Control Operation

How to use the wired wall control.

Manual Door Opening

Procedures for opening the door manually without the opener.

Care of Your Opener

Limit and Force Adjustment Review

Reminds users to review limit and force adjustments.

Maintenance Schedule

Outlines routine maintenance tasks and their frequency.

Having a Problem?

Programming Your Opener

Add Remote Control

Steps to program new remote controls to the opener.

Erase All Codes

How to reset all programmed remotes and keyless entries.

Add or Change Keyless Entry PIN

Steps to set up or modify a keyless entry PIN.

Repair Parts

Rail Assembly Parts

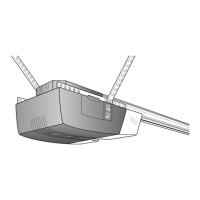
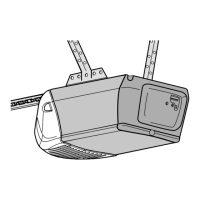
Identifies components of the opener's rail system.

Installation Parts

Identifies parts used during the installation process.

Motor Unit Assembly Parts

Accessories

Service and Support Information

One-Year Limited Warranty

Outlines the warranty terms for the garage door opener.

Motor Limited Warranty

Details the specific warranty period for the motor.

Related product manuals