EasyManua.ls Logo

Dometic BUTTNER MT iQ Solar Monitor III User Manual

Dometic BUTTNER MT iQ Solar Monitor III
160 pages
To Next Page IconTo Next Page
Page #1 background imageLoading...
Page #1 background image
MT iQ Solar Monitor III
Solar monitor
Installation and Operating Manual . . . . . . 5
Solar-Fernanzeige
Montage- und Bedienungsanleitung . . . 23
Moniteur solaire
Instructions de montage et de service . . 43
Display remoto solare
Istruzioni di montaggio e d’uso . . . . . . . . 62
Zonnemonitor
Montagehandleiding en
gebruiksaanwijzing . . . . . . . . . . . . . . . . . 82
Solcellemåleren
Monterings- og betjeningsvejledning . 102
Solarbildskärmen
Monterings- och bruksanvisning. . . . . . .121
Solcellemonitoren
Monterings- og bruksanvisning . . . . . . 140
EN
DE
FR
IT
NL
DA
SV
NO
POWER & CONTROL
ACCESSORIES

Table of Contents

Question and Answer IconNeed help?

Do you have a question about the Dometic BUTTNER MT iQ Solar Monitor III and is the answer not in the manual?

Dometic BUTTNER MT iQ Solar Monitor III Specifications

General IconGeneral
BrandDometic
ModelBUTTNER MT iQ Solar Monitor III
CategoryMonitor
LanguageEnglish

Summary

Explanation of symbols

Safety instructions

Installing the device safely

Electrocution hazard

Disconnect solar panels and solar charger fuse before installation or removal.

Risk of injury

Ensure monitor is securely fastened; secure cables to avoid trip hazard.

Damage hazard

Do not place near heat sources; set up in dry location; use ductwork for cables.

Safety precautions when handling batteries

Risk of injury

Do not wear metal objects; wear goggles and protective clothing.

Explosion hazard

Never charge frozen battery; do not smoke near battery; ensure proper ventilation.

Damage hazard

Only use rechargeable batteries; ensure correct polarity; follow manufacturer instructions.

Safety precautions when handling lithium batteries

Risk of injury

Only use batteries with integrated battery management system and cell balancing.

Scope of delivery

Accessories

Lists connection cable extension and wall-mounting box with screws.

Intended use

Technical description

Connecting and operating elements

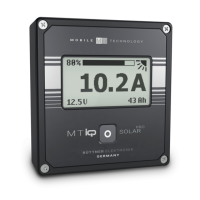
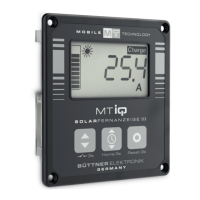
Details the numbering and description of buttons and display elements on the device.

Installing the solar monitor

Display elements

Describes the function of each numbered element on the device display.

Sun symbol

Explains the meaning of the sun symbol indicating the solar charger's operating status.

Installation location

Connecting the solar monitor

Connecting the solar monitor to consumers (optional)

Mounting the solar monitor

Mounting the solar monitor with the wall-mounting box (accessory)

Before first use

Calibrating the maximum solar power input

Guides on calibrating maximum solar power input based on system output for first-time use.

Setting the time and date

Instructions for setting the time and date after initial setup or power loss.

Using the solar monitor

Switching the solar monitor on and off

Procedure for turning the solar monitor on and switching it to standby mode.

Programming a start screen

Steps to set a desired value from the information menu as the device's start screen.

Activating the timer for time controlled switching output

Instructions for setting a start and end timer for automatic consumer activation.

Setting the start timer

Setting the end timer

Deactivating the timer for time controlled switching output

Setting the LED back light

Setting voltage controlled switching output

Activating or deactivating the switching output manually

Resetting the solar charge counter

Displaying the time and date

Displaying the solar system information

Cleaning and maintenance

Troubleshooting

Warranty

Disposal

Technical data

Related product manuals