EasyManua.ls Logo

Dometic VERANDA ROOM User Manual

Dometic VERANDA ROOM
33 pages
To Next Page IconTo Next Page
Page #1 background imageLoading...
Page #1 background image
INSTALLATION & OPERATING
INSTRUCTIONS
Read these instructions carefully. These
instructions MUST stay with this product.
SERVICE CENTER &
DEALER LOCATIONS
Please Visit:
www.eDometic.com
REVISION B
Form No. 3316484.000 4/17
English, French, Spanish
©2017 Dometic Corporation
LaGrange, IN 46761
USA
SERVICE OFFICE
Dometic Corporation
1120 North Main Street
Elkhart, IN 46514
CANADA
Dometic Corporation
46 Zatonski, Unit 3
Brantford, ON N3T 5L8
CANADA
RECORD THIS INFORMATION FOR FUTURE
REFERENCE:
Model Number
Serial Number
Date Purchased
Retailer / Qualied Installer
VERANDA ROOM
MODELS
935000.140 SIDE & DOOR ASSEMBLY - STANDARD
935000.150 SIDE & DOOR ASSEMBLY - TALL
935002.120 2' FRONT PANEL - STANDARD
935002.130 2' FRONT PANEL - TALL
935004.120 4' FRONT PANEL - STANDARD
935004.130 4' FRONT PANEL - TALL
935008.120 8' FRONT PANEL - STANDARD
935008.130 8' FRONT PANEL - TALL
Question and Answer IconNeed help?

Do you have a question about the Dometic VERANDA ROOM and is the answer not in the manual?

Dometic VERANDA ROOM Specifications

General IconGeneral
BrandDometic
ModelVERANDA ROOM
CategoryTent
LanguageEnglish

Summary

Introduction

Document Symbols

Important Safety Instructions

A. Recognize Safety Information

Explains the safety alert symbol and precautions for potential injury.

B. Understand Signal Words

Defines signal words like WARNING and CAUTION to indicate risk levels.

C. Supplemental Directives

Provides directives for safe installation, operation, and servicing.

Specifications

A. Standard Height Veranda Room

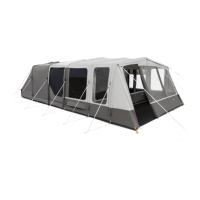
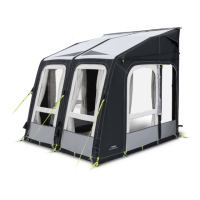
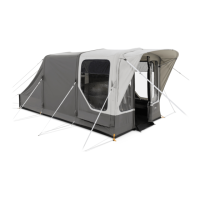
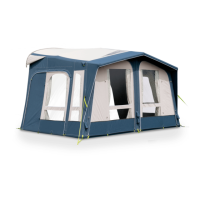
Details components included for the standard height Veranda Room.

B. Tall Height Veranda Room

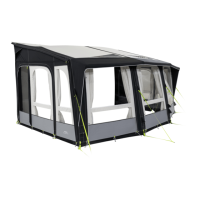
Details components included for the tall height Veranda Room.

General Information

A. Tools & Supplies Required for Installation

Lists all necessary tools and supplies for a correct installation.

Installation Instructions

Awning Height Adjustment

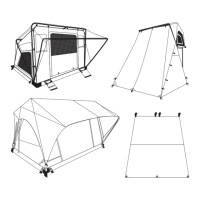
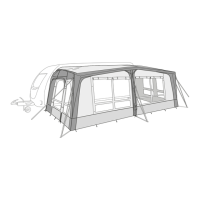
Adjust awning height to match the slope of the side panels.

Roller Tube Clamp Installation

Install roller tube clamps onto the left hand end cap.

Vertical Pole and Roller Tube Clamp

Extend vertical pole to roller tube clamp and insert metal pin.

Front Panel Attachment

Hang front panels from roller tube by inserting poly rope into accessory channel.

Pole Holder Installation

Measure and mark pole holder location, drill pilot hole, and apply sealant.

Rafter Pole Assembly

Assemble rafter poles by inserting metal pin into pole with rubber tip.

Side Panel Rafter Pole Placement

Slide assembled rafter pole through pockets on side panel.

Poly Rope Clip and Twist Fastener Installation

Install poly rope clips and twist fasteners on RV side wall.

Vehicle Skirt Preparation

Prepare vehicle skirting by measuring and cutting to fit the Veranda Room.

Step Flap Cutting

Cut lines for the step flap on the skirt fabric.

Wheel Well Skirt Installation

Install wheel well skirts by attaching hook and loop fasteners to RV.

Panel and Skirting Securing

Secure panels and skirting by driving tent stakes into the ground.

Operating Instructions

Ventilation with Privacy Panels

Ensure ventilation when using appliances with privacy panels closed.

Rain and Wind Precautions

Lower end furthest from door during rain; remove room if heavy weather.

Maintenance

Storage Procedure

Fold side panels and front panel for convenient storage.

Cleaning Instructions

Periodically clean fabric using mild detergent and soft brush.

Related product manuals