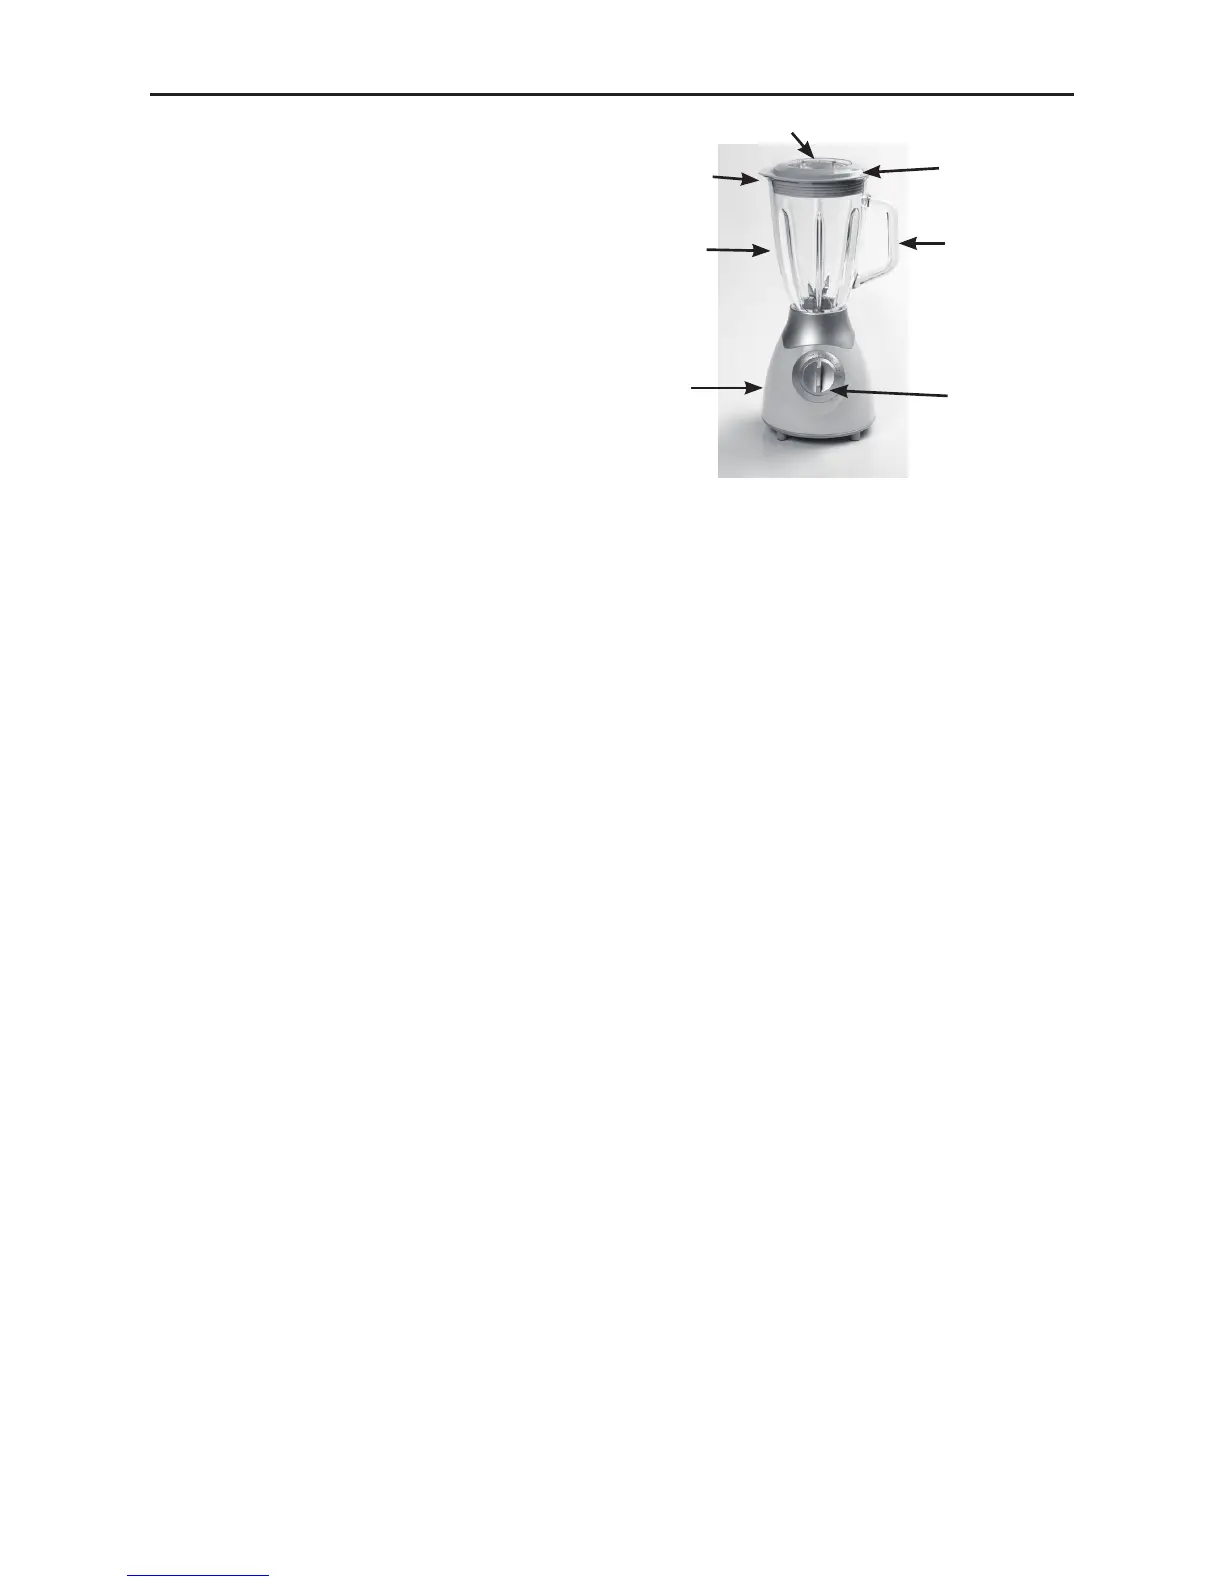
EasyManua.ls Logo

Domo DO419BL - Know Your Blender; Initial Use; Blending Fruit and Vegetable

Domo DO419BL
Print Icon
To Next Page IconTo Next Page
To Previous Page IconTo Previous Page
Loading...
DO419BL
KNOW YOUR BLENDER
1. Measuring cup
2. Spout
3. Glass jug
4. Motor unit
5. Working indicator
 
7. Handle
8. Speed selector
FOR THE INITIAL USE
1. Unpack the appliance and place all parts on a horizontal surface.
2. Immerse jug, top lid 
Never immerse motor unit in water for cleaning to prevent the risk of electric shock.
Caution:

Before assembling the jug, be sure the power cord is unplugged from the power
outlet and the speed selector is on the 0 position.
The jug is suitable for making mixture which the juice and pulp are mixed.
4. Place the jug into the motor unit. Note: make sure the jug is assembled into the

BLENDING FRUIT AND VEGETABLE:
1. Before attaching the power cord into the outlet, make sure the speed selector is in
the 0 position.
2. Peeled or cored the fruit or vegetables and then cut it into small dices, put the



Note:



hold it to pulse actuate motor for delicate chopping. Release it to return the 0 position.


aligns with the groove of top lid, put down and turn clockwise until it is locked.


17
1
2
3
4
5
6
7

Related product manuals