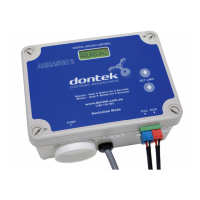
The Aquasun 2 is an entry-level automatic solar controller designed for pool heating systems, offering temperature adjustment, manual mode, and winter mode features. It is manufactured by Dontek Electronics Pty Ltd, an Australian company. The controller is designed to retain its mode of operation and temperature limit settings even after a power outage, ensuring consistent performance.
Function Description:
The primary function of the Aquasun 2 is to automatically control a solar pump to heat a pool based on solar gain. It monitors both the pool water temperature and the roof temperature (where solar collectors are located) to determine optimal heating times. When the sun is shining and the roof is sufficiently hot, the controller activates the pump to circulate pool water through the solar collectors, thereby heating the pool. Once the desired temperature is reached, the pump stops, and the controller enters an economy/sleep mode to prevent unnecessary energy consumption.
The controller supports several operational modes:
- Automatic Mode (Summer Mode): This is the default mode. In this mode, the controller automatically heats the pool to the user-defined desired temperature when solar conditions are favorable. If the pool reaches its temperature limit during a second heating cycle, it enters an economy/sleep mode for the rest of the day.
- Tropical Mode: This advanced mode allows the controller to both heat and cool the pool. If the pool temperature exceeds the set limit during heating, the controller will turn off the pump and wait for the roof to cool. It then dissipates heat from the pool to the colder roof (typically at night) to maintain the pool at the desired temperature limit. To activate Tropical Mode, both the UP and DOWN buttons are pushed and held until "TROPICAL" is displayed, then released, and the desired temperature is set using the UP or DOWN buttons.
- Manual Pump Mode: This mode allows users to manually turn the pump on or off. Holding the UP button (to go above 40°C) toggles the pump's status. This mode has a timeout of 30 minutes, after which it reverts to a default temperature limit of 30°C.
- Winter Mode: Designed for colder periods, this mode sets the unit into a specific operational cycle. Holding the DOWN button (to go below 20°C) activates Winter Mode. Upon selection, the pump runs for 3 minutes and repeats this cycle daily at the same time. In case of a power interruption, the controller performs a sensor check to ensure the roof sensor is at least 5°C warmer than the pipe sensor before starting the pump. If this condition is not met, it displays "waiting for roof to warm." After the pump starts, the controller waits 24 hours before performing another unconditional flush of the system.
Important Technical Specifications:
- Power Supply: The unit plugs directly into a general power outlet.
- Pump Connection: The solar pump plugs into a 240Vac socket marked "PUMP" on the controller.
- Maximum Output Load: The 240V socket has a maximum rated output load of 9.98 Amps / 2395 Watts.
- Sensor Cable Length: Sensor cables should ideally be less than 50m.
- Power Cable Length: The controller's power cable is 1.8m long.
- Ingress Protection: The device has a degree of protection against moisture rated at IP23.
- Clock Retention: After a power outage, the internal clock (if used) can keep time for up to 14 days.
Usage Features:
- Temperature Limit Adjustment: Users can easily adjust the desired pool temperature limit by pressing or holding the UP button to increase it or the DOWN button to decrease it. If the set limit is below the current pipe temperature, the pump automatically runs for 3 minutes to test the true pool water temperature.
- Mode Selection: The controller offers intuitive button combinations for selecting different operational modes:
- Holding the UP button for 5 seconds activates Manual Mode.
- Holding the DOWN button for 5 seconds activates Winter Mode.
- Pushing and holding both buttons until "TROPICAL" is displayed activates Tropical Mode.
- Pushing both buttons and releasing when "SUMMER" is displayed returns to Summer Mode.
- Power Outage Resilience: All configurable settings, including the mode of operation and temperature limit, are retained after a power outage.
- Error Display: In case of a sensor fault, the controller will display which sensor failed (POOL and/or ROOF) and the type of failure, aiding in troubleshooting.
Maintenance Features:
- Sensor Installation Guidelines:
- Pool Sensor: Must be fitted into the pump's suction line, as close to the pool as practical and out of direct sunlight. A 14.5mm hole is recommended for installation, using a Dontek PD01 grinding drill or a 14.0mm drill-bit spinning counter-clockwise. The blue/grey sensor barb is then inserted into the grommet, and the blue sensor plug is connected to the "POOL" socket.
- Roof Sensor: Must be fitted into a small piece of solar collector or equivalent and attached to the roof, ideally within an arm's length of the gutter's edge, unshaded, and on a roof with similar aspect to the main collector. It should not be placed on top of the solar collector or high points like Ridge Capping, as this can lead to false readings.
- Wiring Best Practices:
- Sensor wires should not be cable-tied or taped to mains power.
- A 30cm section of wire from the sensor to the pipe should be cable-tied and insulated to prevent ambient temperature differences from affecting readings.
- Sensor cables must not run parallel to power cables.
- Cable ties should be used to fasten sensor cables to the cold water inlet pipe, ensuring they are approximately 10mm from PVC fittings and tightened only firmly to avoid damaging the outer PVC.
- If running cable underground, a conduit must be used, and conduit ends must be sealed to prevent water ingress.
- No cable joins are permitted within underground conduits.
- Excess cable should be removed and refitted, ensuring wire ends are tinned with solder.
- The red trace on the sensor cable indicates the positive wire, typically fitted to the right-hand side of the plug when looking at the plug screws. Incorrect polarity can be displayed as a short circuit fault.
- Pump Troubleshooting: If the controller stops pumping and displays a higher temperature than expected, it may indicate a pump failing to prime. Users should check and, if necessary, prime the pump according to the manufacturer's instructions, then reset the controller by cycling its power.
- Warranty: The product comes with a limited 2-year warranty covering component failure or faulty workmanship from the date of installation. Damage due to misuse, power surges, lightning strikes, or non-compliant installation voids the warranty. The warranty does not cover on-site labor or travel costs. A faulty unit should be returned to the dealer from whom it was purchased. If the power cord is damaged, the controller should not be used and must be returned to the supplier for repair.