• The ash may fail to work for various reasons:
- Flash bulb defective ---> please replace it. (Availble from your specializing dealer.)
- Modelling light bulb defective ---> please replace it.
- Fuse must be replaced ---> See chapter 2 of this manual.
In case the flash or modelling light bulb must be replace you contact a
service agent or do it by yourself. Make sure to always use the original
DÖRR replacement bulb. Remove the bulb slowly towards the front
making sure that it won‘t get jammed. Then insert the fresh bulb.
6. Flash Failure
7. Exchange of Bulbs
8. Warnings
9. Setup in a Studio - Example
Note: The bulb can be hot. Let it cool down first!
Do not touch the bulb with your bare hands!
Use gloves or a soft and dry tissue.
1. Due to high voltage inside the flash do not open the unit or attempt to repair it. In case of damage please contact an authorized
service agent.
2. Avoid strong light directed to the photo sensor.
3. If the unit has been triggered continuously for 10 times or more in a short period, please interrupt the operation for about 2
minutes in order to avoid overstress.
4. Make sure to switch off the flash after use.
5. The modelling light is designed to illuminate the object while the camera settings are made. It is not suited as a permanent light
since it produces high temperatures which can harm flash accessories (danger of melting).
We do not take any liability for damages caused by improper use of the flash.
IMPORTANT
Once the flash kit has been set up, we recommend positioning
it at the right and left side of your main object.
DÖRR
Studio Flash Smart Light LCD 300 / 200
Instruction Manual
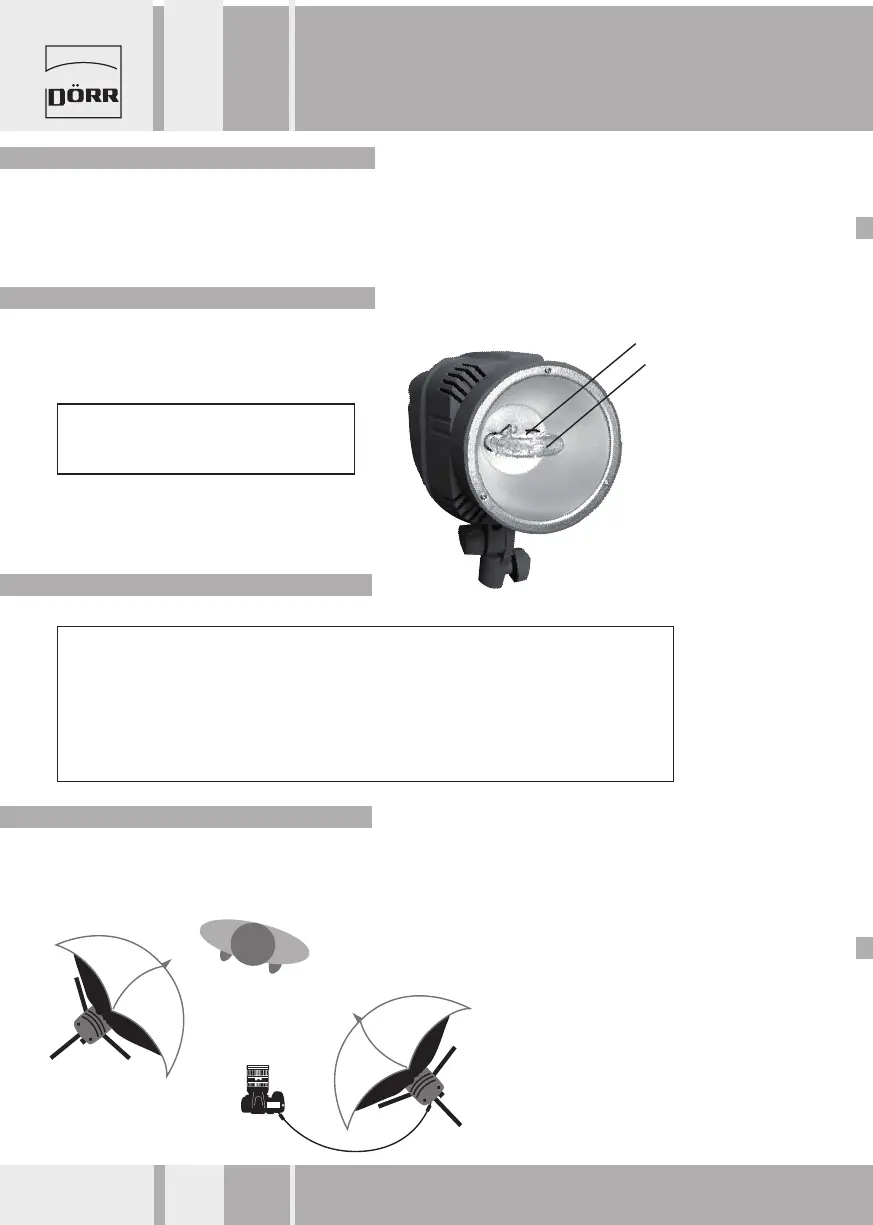
Modelling Light Bulb
Flash Bulb
8 www.doerrfoto.de