GETTING STARTED
Make sure that the safety precautions mentioned in this manual are
kept.
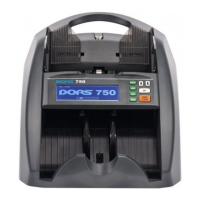
1 Install the banknote guides (Fig. 1, pos. 2) included in the delivery set:
2 Take one banknote guide and match the tabs of the guide (see Fig. 8) with
the slots of the banknote guide holder (see Fig. 9).
3 Push the guide into the holder (see Fig. 10).
4 To fasten the guide on the holder, move it down up to the stop (see Fig. 11).
5 Repeat points 2-4 for the second banknote guide.
6 To check that the banknote guides are installed properly, move the guides
manually aside, to the maximum and minimum; the movement should be
synchronous and without jamming.
To remove the guide (for instance, for transportation), take the upper part of
the guide, press it slightly and then pull it up.
98
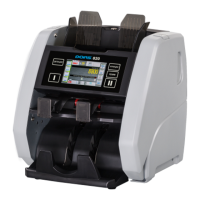
Fig. 7
10 Path sensors
11 Redirector
11
Fig. 8
Clamps
Tabs
Fig. 9
Banknote guideBanknote guide
holdersholders
Banknote guide
holders
Fig. 10 Fig. 11
7 Connect the counter to AC mains with the power cable.
OPERATION
1 Make sure that the safety precautions mentioned in this manual are kept.
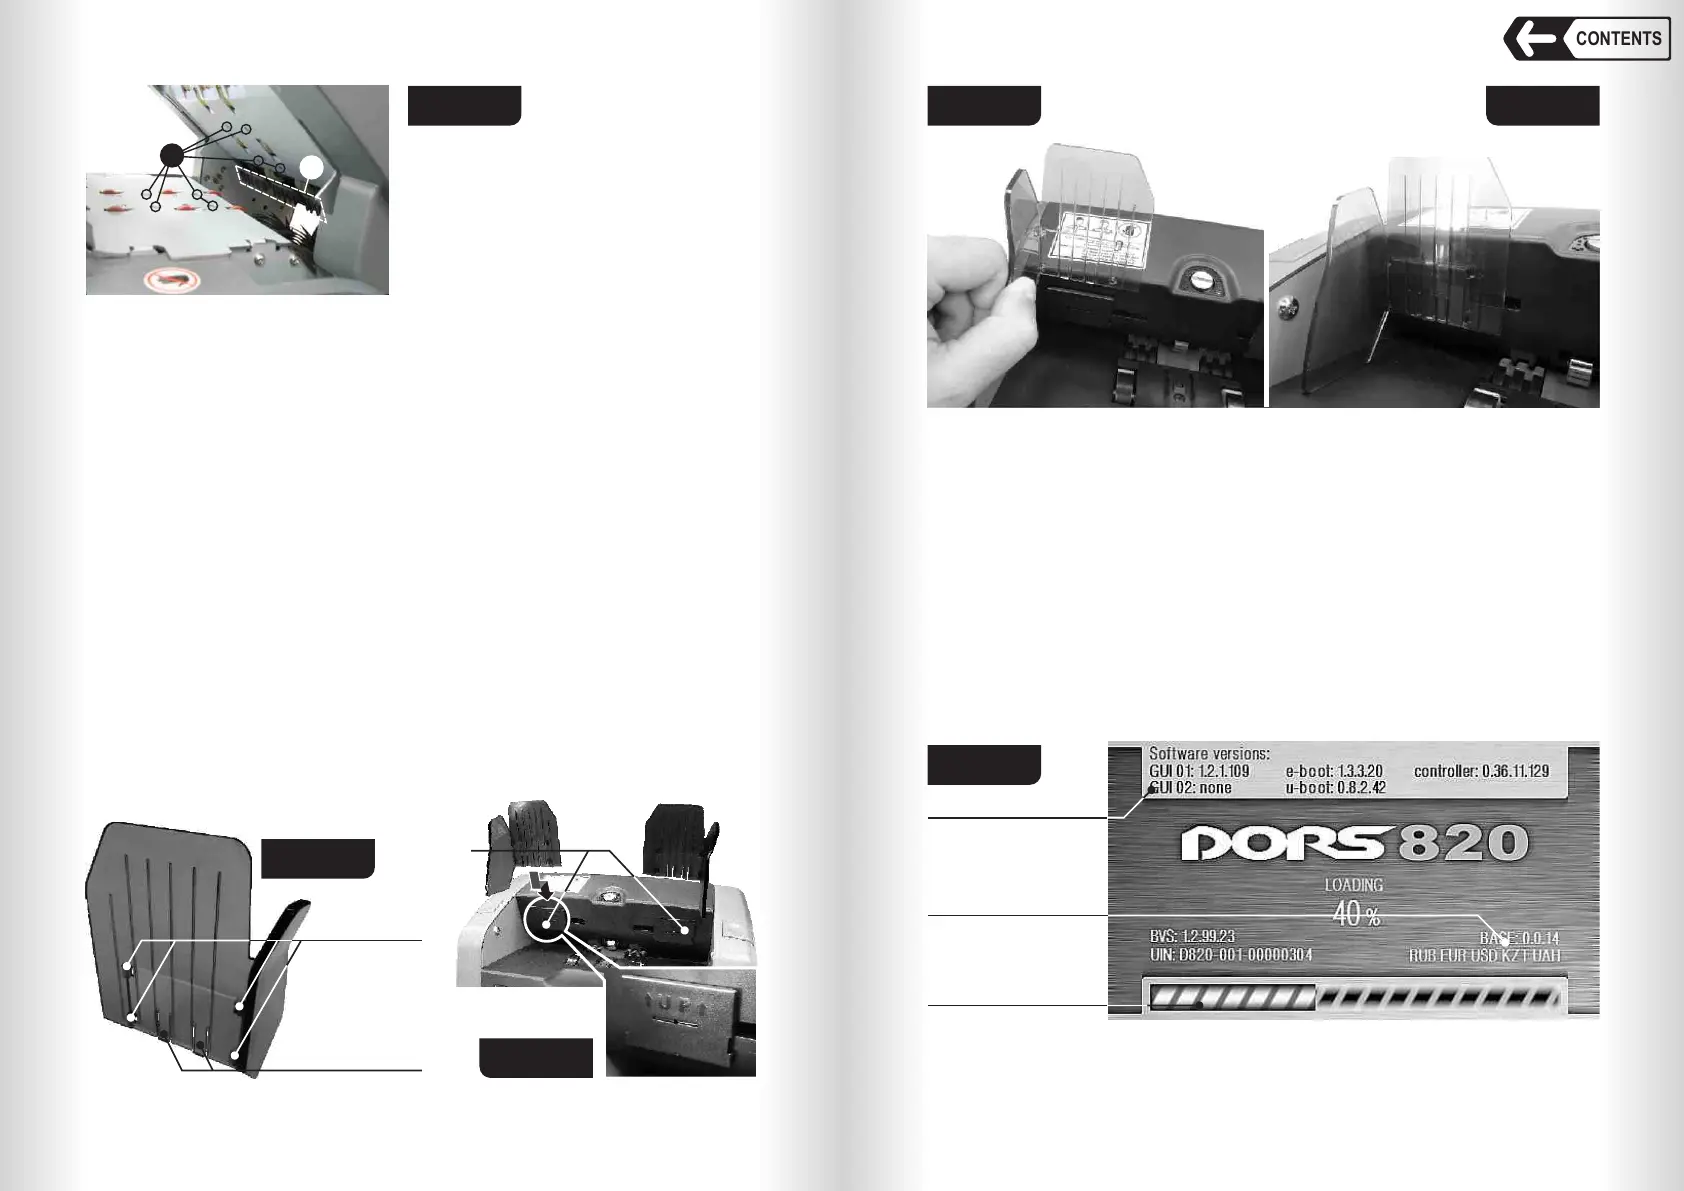
2 Switch the counter on by the power switch (Fig. 2, pos. 12). The counter will
start up and run self-test. An image (see Fig. 12) will appear in the display.
During self-test the loading progress bar will move, the stacker wheels
(Fig. 1, pos. 8) and the hopper rollers (Fig. 1, pos 3) will rotate.
Firmware version
Currency base
Loading
progress bar
Fig. 12
After the self-test the counter returns beep signal and the display will show
the main menu (Fig. 13):
10
CONTENTS
Banknote counter DORS 820 Banknote counter DORS 820
 Loading...