The instruments offer three calibration options:
1) [OFF]:Standard characteristic curve (e.g. Pt100-
resistance according DIN IEC 60751)
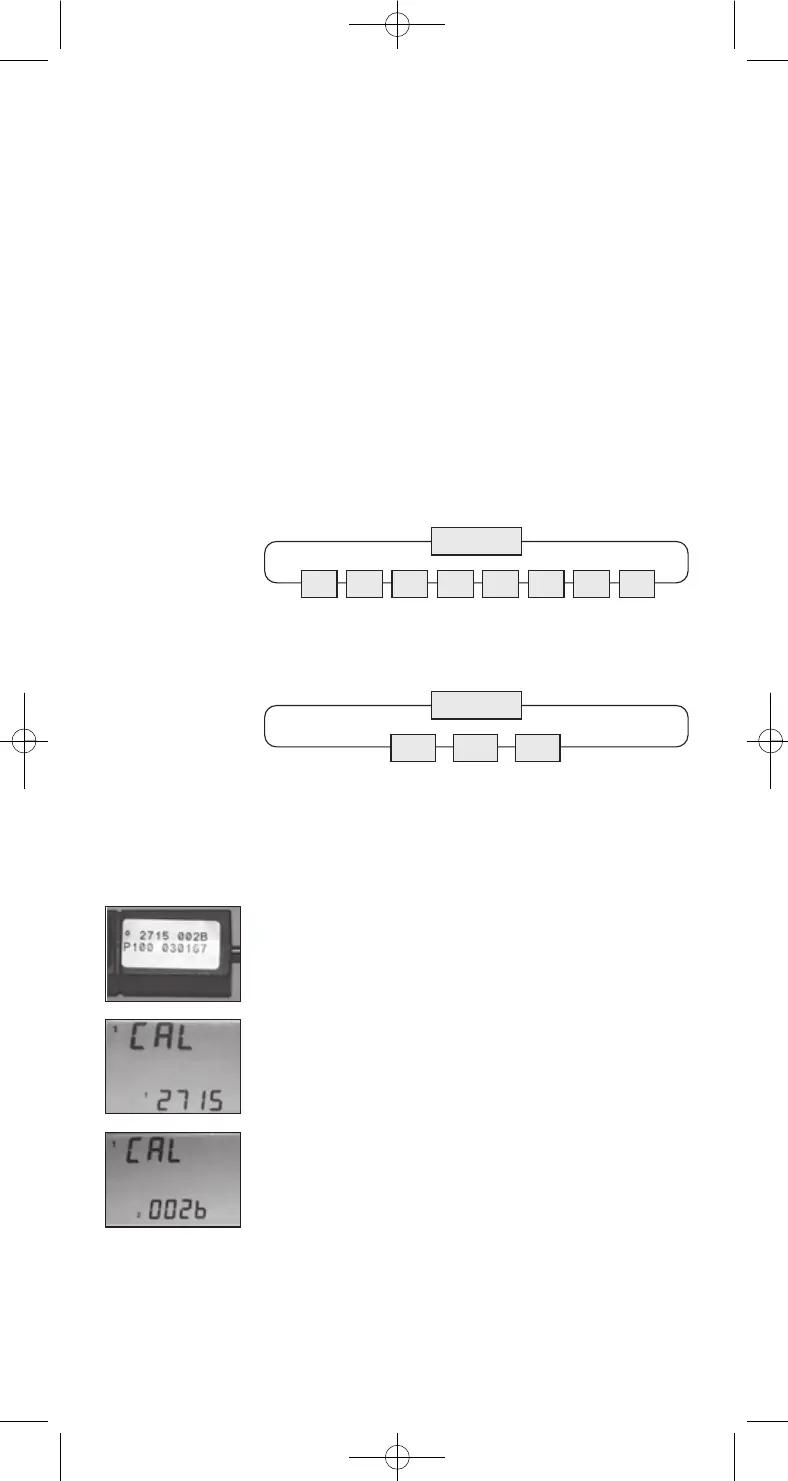
2) [OP1]:Calibration by code (2 x four digit code) is
equivalent to a 2-point calibration
The code is marked clearly by a label on each stan-
dard probe.
3) [OP2]:Calibration by physical standard references
(1-point, 2-point or 3-point calibration)
CAL = calibration
Push [ENTER/MENUE] to calibrate the instrument
with sensor. Use the up and down keys [
] to
select CAL. Push again [ENTER/MENUE]. On the
left corner of the display appears a small 1, which
indicates the selected channel. For changing the
channel use the up and down keys [
]. Push
[ENTER/MENUE] to confirm.
Use the up and down keys [
] to select the re-
quested calibration option. Push [ENTER/MENUE] to
confirm.
Standard linearization
according DIN IEC 60751 / [oFF
Use the up and down keys [
] to select [oFF.
Push [ENTER/MENUE] to confirm.
Push [ESC] to be back in the measuring mode.
Calibration by code / oP1
Use the up and down keys [
] to select oP1. Push
[ENTER/MENUE] to confirm.
On the bottom of the display appears a very small 1,
after this number a four-digit number (Hex-Code/0..F)
is displayed. For changing the number use the up
key [
]. For stepping to the next number use the
down key [
]. If the requested number is complete
then push [ENTER/MENUE] to confirm. Now on the
bottom of the display appears a very small 2, after
this number a second four-digit number is displayed.
For changing the number please follow the manual
as before. Push [ESC] to be back in the measuring
mode.
Note: After confirming oP1 by pushing [ENTER/
MENUE] the function oP1 (calibration by code) is
activated, even though you leave the menu by press-
ing [ESC].
CAL
oFF oP1 oP2
Important!
8
Unit
MENUE
Prob Lin2 CAL PrEn Chnl ArEA Lo6
DE P700 Anleitung engl. 12/11 06.12.2011 10:04 Uhr Seite 8
 Loading...