DT803X
7
The meter shows a voltage value > 1 V Never perform the meas-
urement of current if open circuit voltage to earth exceeds 600 V.
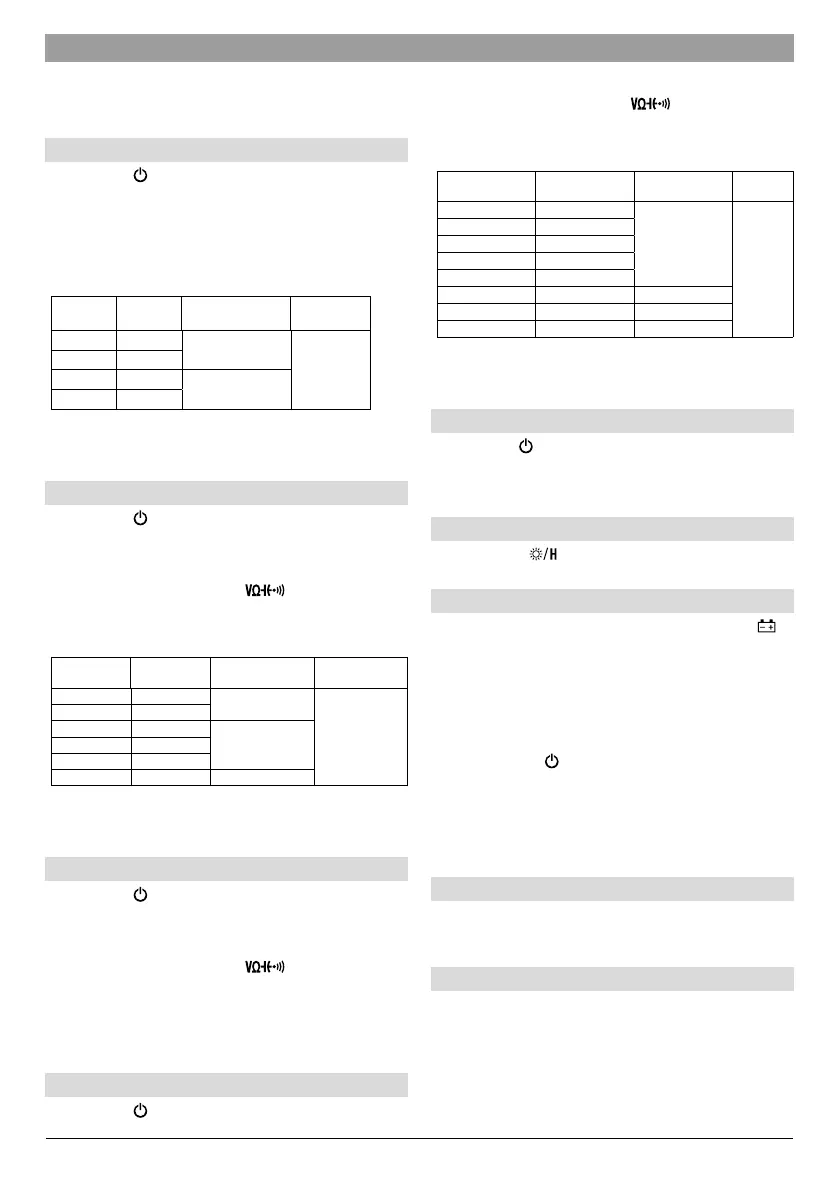
AC/DC amperage measurement
1. Press and hold button .
2. Connect the red testing cable to 10A socket , and the black cable to
COM socket .
3. Nacisnąć 3 razy przycisk SELECT .
4. Open the circuit, in which amperage will be measured and attach gauging
cables to the gauged circuit.
5. Read amperage value from the display .
Range Resolution Accuracy Max
Frequency:
40-1000 Hz
DC 1 A 1 mA
±1.0% + 5 digits
10 A
DC 10 A 10 mA
AC 1 A 1 mA
±1.2% + 6 digits
AC 10 A 10 mA
Amperage measurements > 2 A - measurement time < 3 s (min. 15
min interval).
Resistance measurement
1. Press and hold button .
2. Hold down the SELECT button for min. 2 s to turn on the auto range
function. The display will show "AUTO". The meter will automatically adjust
the type of measurement to resistance.
3. Connect the red testing cable to socket , and the black cable to
COM socket .
4. Attach gauging cables to resistor that will be measured.
5. Read current’s amperage from the display .
range
Resolution Accuracy Max
600 0.1
±1.3%+5 digits
60 M
6 k 1
60 k 10
±1.0%+5 digits
600 k 100
6 M 1 k
60 M 10 k
±1.5%+5 digits
Prior to resistance measurement the circuit’s power supply must be
switched off and all capacitors discharged.
Circuit continuity test
1. Press and hold button .
2. Hold down the SELECT button for min. 2 s to turn on the auto range
function. The display will show "AUTO". The meter will automatically adjust
the type of measurement to the circuit continuity test.
3. Connect the red testing cable to socket , and the black cable to
COM socket .
4. Attach gauging cables to capacitor paying attention to polarization.
Continuity of the circuit shall be flagged with an audio signal when
resistance is < 50 .
Capacitance measurement
1. Press and hold button .
2. Press the SELECT button twice to select the nF function.
3. Connect the red testing cable to socket , and the black cable to
COM socket .
4. Attach gauging cables to capacitor paying attention to polarization.
5. Read capacity value on display .
Range Resolution Accuracy Max
6 nF 1 pF
±3.0%+5 digits
60 mF
60 nF 10 pF
600 nF
100 pF
6 F
1 nF
60 F
1 0nF
600 F
100 nF ±3.5%+5 digits
6 mF
1
F
±5.0%+6 digits
60 mF
10
F
±10.0%+8 digits
The tested capacitor should be discharged before the testing pro-
cedure.
Voltage detector NCV
1. Press and hold button .
2. Press the SELECT button to select the EF function.
3. When the voltage is detected in the range of AC 30-1000 V, a sound will be
emitted and the display will show dashes "- - - -"
Flashlight / Display backlight
Press and hold the button to switch the ashlight and back-
light on or off.
Battery replacement
Replace the battery with a new one when the low battery symbol
appears on the LCD display. Low battery level can cause erroneous meas-
urements.
1. Remove the back cover of the multimeter.
2. Place new 2 x AAA batteries, paying attention to proper polarization.
Before removing the back cover, disconnect all test leads from the
meter and the measured circuit and the switch and the meter by
holding down the
button It is recommended to use batter-
ies and fuses consistent with device’s specification . Used batter-
ies as hazardous waste should be disposed of in a specially marked
container in or sent to a selective collection point Do not throw
batteries into a rubbish bin Do not use new and used batteries at
the same time.
Warranty
The warranty terms are available at http://www.dpm.eu/gwarancja
Allgemeines
Multimeter mit automatischer Bereichswahl und berührungsloser Spannungs-
detektor (NCV) Messungen: AC/DC Bereich und Spannung, Widerstand, Kon-
desatore Dioden Test Stromkreisdurchgangstest true RMS Messung
LCD-Display (4 Ziffern) Hintergrundbeleuchtung + Taschenlampe automa-
tische Abschaltung (15 min) Anzeige der leeren Batterie berspannungs-
chutz Versorgung: 2 x AAA Batterie.
 Loading...