4
ASSEMBLY
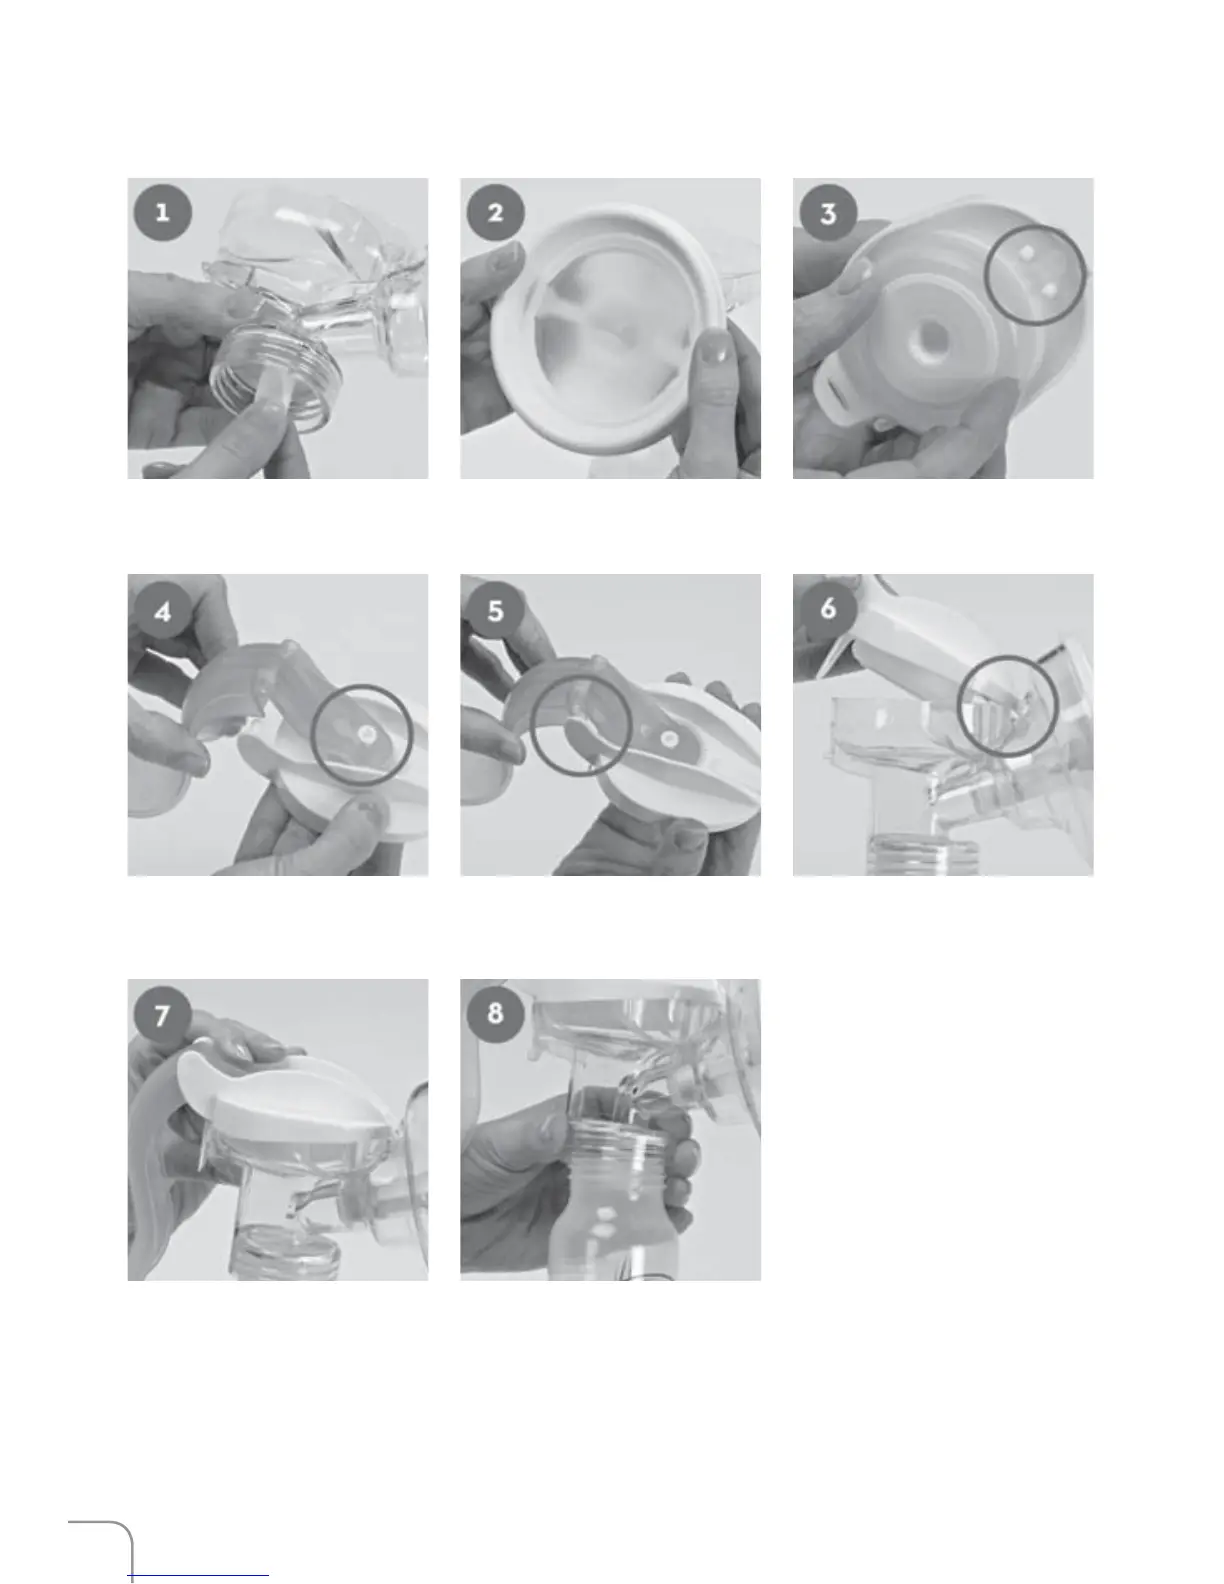
After cleaning, follow these steps to assemble your pump. Make sure all parts are
completely dry from cleaning before any assembly.
Insert the white Valve to the
underside of the Connector.
Snap the Breastcup on to the
Connector. Press edges firmly to
make sure it’s secure all around.
Install Cap Insert on to the Cap,
aligning the two pegs in the holes.
Press the parts firmly together.
Attach Handle by pressing upward
on the Cap Insert to extend the
stem.
Latch the hole in the Handle on to
the Stem while sliding the Handle
on to the two white handle pegs.
Hinge the front of the Cap
assembly on to the clear hinge
tab on the Connector.
Press the Cap assembly on to the
Connector until you hear a snap.
Screw the Collection Bottle on to
the Connector. Tighten gently.
Note: For your pump to work as designed, all parts must be properly assembled. Make sure all parts
are snugly fit so you have an air tight pump.
 Loading...