Operation Instructions
Before Use
a) Open the battery cap and install the battery.
b) If the electrode has been changed, the instrument must be recalibrated.
c) We recommend recalibrating the unit once a month.
3 Point Calibration
In the measuring mode, press and hold the button for 3s.
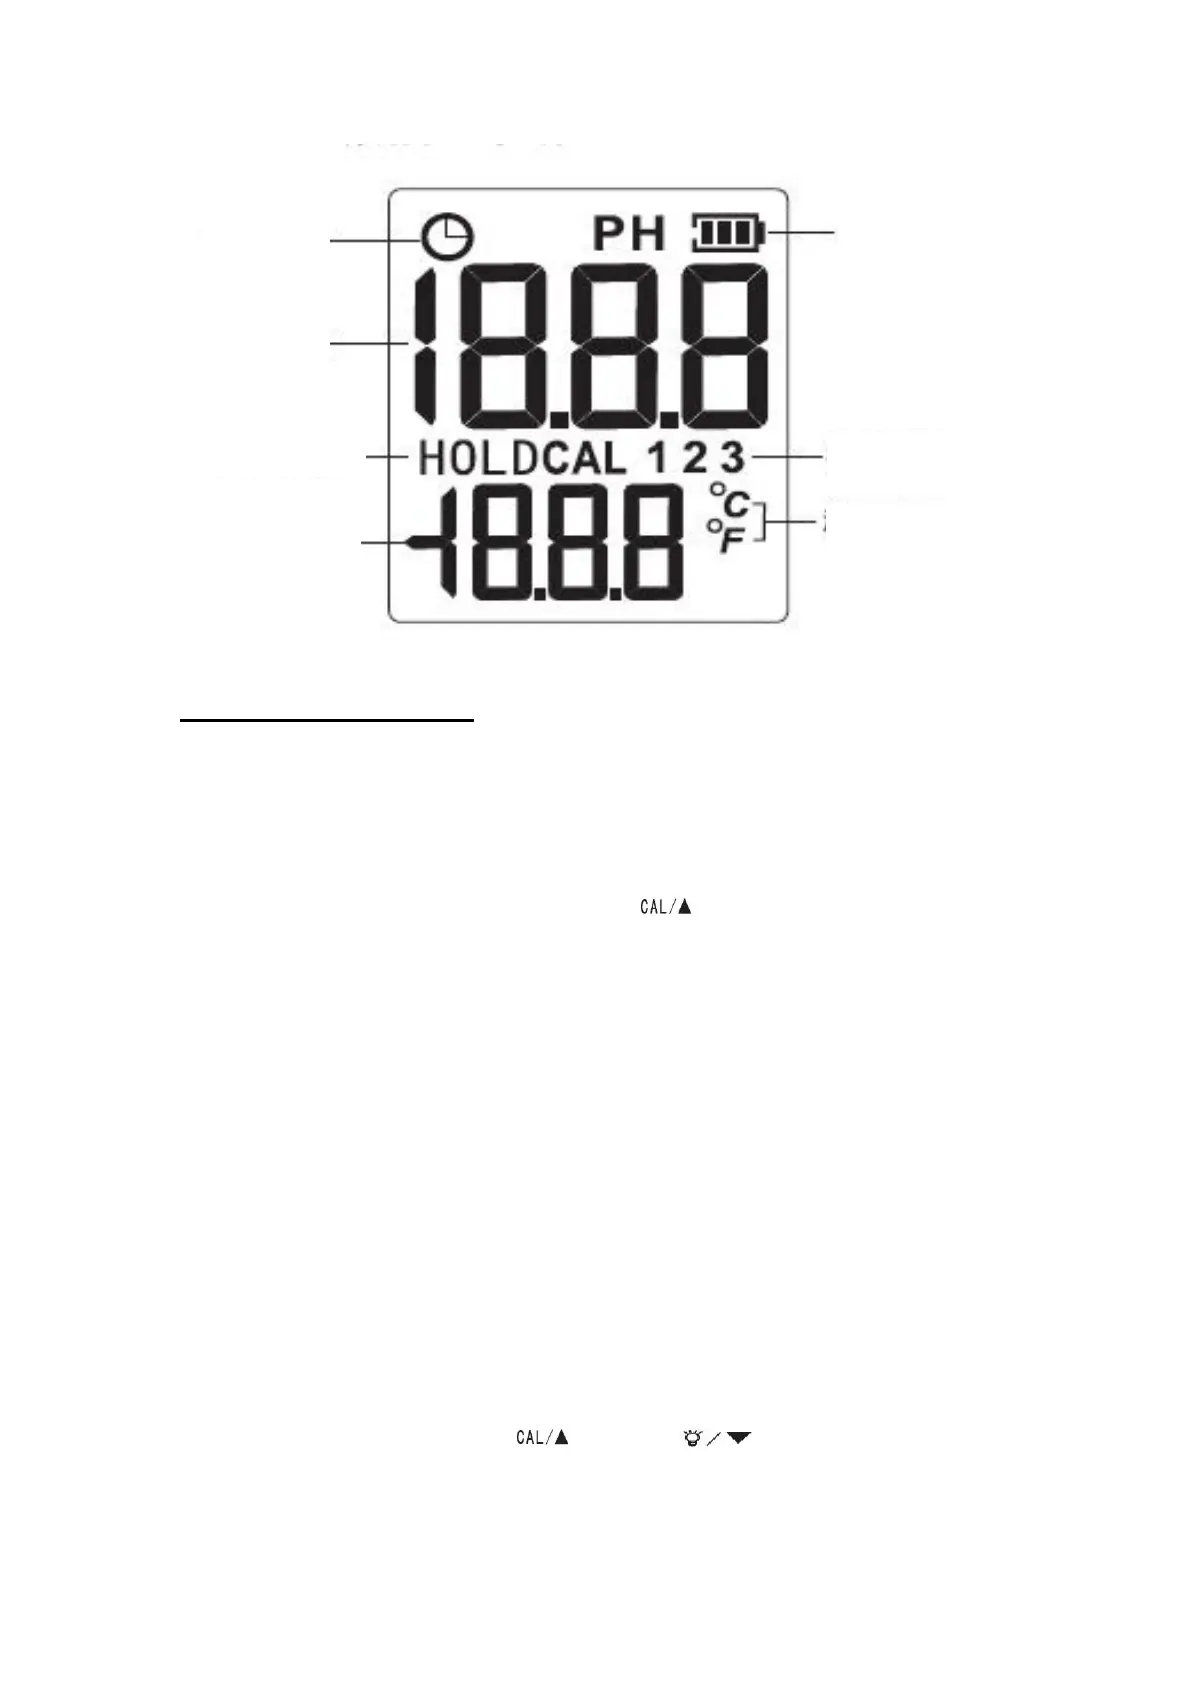
a) The LCD display will show a flashing [CAL 1] icon and the number 4.00
will appear. Rinse the electrode with distilled water and put it into a pH4.00
solution. When the reading is stable, the LCD display will display “PAS”,
which means the first calibration point has succeeded. Then the device will
proceed to the second calibration point --- the [CAL 2] icon will flash and the
number 6.86 will appear.
b) Rinse the electrode with distilled water and put it into the pH6.86 solution.
When the reading is stable, the LCD display will display “PAS”, which
means the second calibration point has succeeded. Then the device will
proceed to the third calibration point --- the [CAL 3] icon will flash and the
number 9.18 will appear.
c) Rinse the electrode with distilled water and put it into the pH9.18 solution.
When the reading is stable, the LCD display will read “PAS”, which means
the entire calibration has succeeded. Then the device will enter measuring
mode.
d) If the buffer value doesn’t match the preset value, you can correct the value
manually by pressing the button or button.
e) If [Err] appears in the LCD display, the calibration did not succeeed, which
means the standard buffer solution outranges the calibration point.