12 DR
®
HORIZONTAL/VERTICAL LOG SPLITTER
Installing the Engine
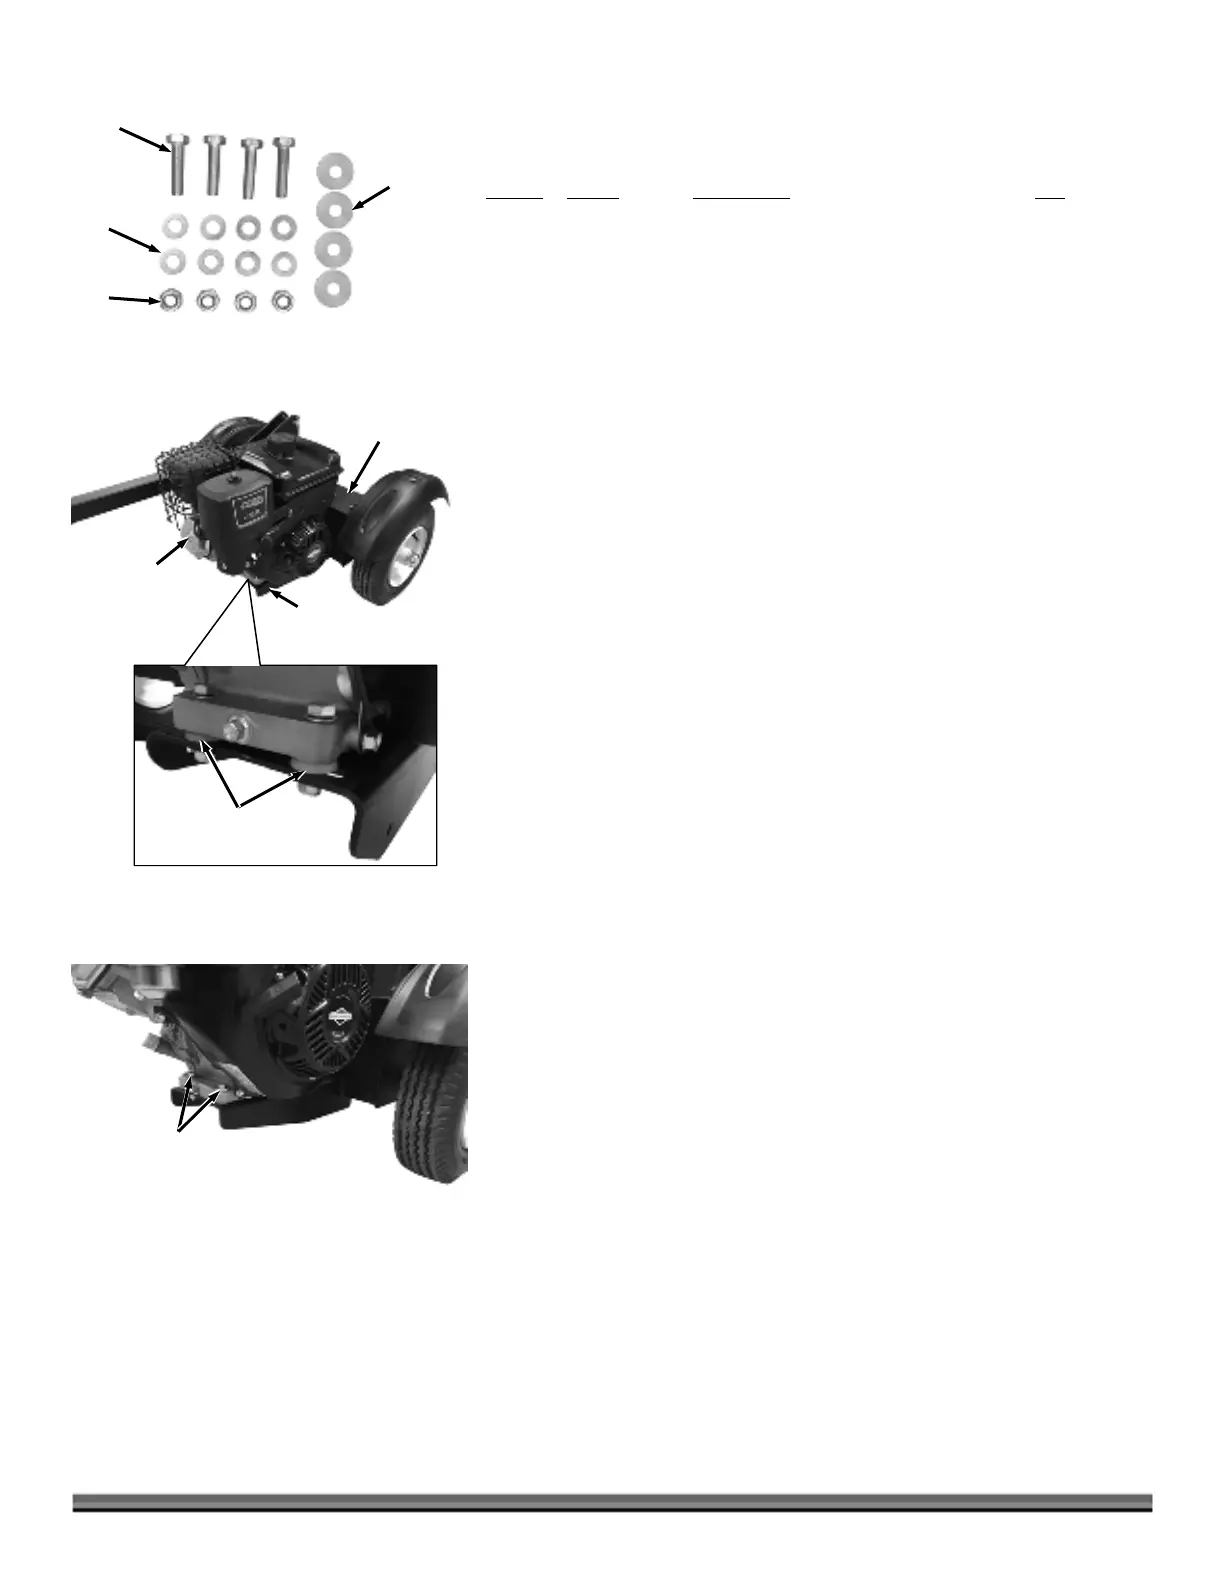
Parts Supplied in Hardware Kit #5 (Figure 15):
Item #
Part # Description Qty
1 ............. 33702 .............. Bolt, Hex, M8 X 40 (22 and 28 Ton) ........... 4
36110 .............. Bolt, Hex, M10 X 40 (34 Ton) ..................... 4
2 ............. 30247 .............. Washer, Flat, M8 (22 and 28 Ton) .............. 8
30250 .............. Washer, Flat, M10 (34 Ton) ........................ 8
3 ............. 30246 .............. Nut, Nylon Lock, M8 (22 and 28 Ton) ....... 4
30249 .............. Nut, Nylon Lock, M10 (34 Ton) ................. 4
4 ............. 37768 .............. Isolator, Vibration (22 and 28 Ton) ............ 4
37691 .............. Isolator, Vibration (34 Ton) ........................ 4
Compare the contents of the Hardware Kit #5 with the “Parts Supplied” list
above. If you have any questions please contact us at www.DRpower.com or call
1-800-DR-OWNER (376-9637) for assistance.
Note: When installing the Bolts, Washers, and Locknuts, install the Washers so that
one Washer is against the head of the Bolt, and the other Washer is against the
Locknut.
1. Position the Engine with Pump Assembly onto the Engine Mount as Shown
(Figure 16). Insert a Vibration Isolator between the Engine and Mount at the
four mounting hole locations.
Note: The Kohler engines use M8 hardware and the Briggs and Stratton engines use
M10. The Kohler engines mount to the smaller 4-hole pattern. The Briggs and
Stratton engines mount to the larger 4-hole pattern.
2. Secure the engine with four bolts, eight flat washers, and four Locknuts
(Figure 17). For the 22 Ton and 28 Ton models, tighten the hardware using
two 13mm Wrenches. For the 34 Ton models, tighten the hardware using a
16mm Wrench on the Bolt and a 17mm Wrench on the Locknut.
Reservoir
ssembly
Engine
Engine
Mount
Figure 16
Four Places
Bolts, Flat
Washers, and
Locknuts (2 on
other side)
Figure 17
1
2
3
Figure 15
4
 Loading...