CAUTION: Drain waste water may contain chemical residue and unsanitary contaminants which
could be a hazard to health or the environment. Drain to specified sanitary sewer only.
WARNING: DO NOT SUPPLY POWER TO AN EMPTY SPA!
LOCATION OF ELECTRICAL CORD & DRAIN
The spa equipment requires a 15 amp outlet, dedicated to the spa. The use of any extension cord will void your warranty.
Carefully read all of the safety requirements before plugging in the spa.
EACH TIME BEFORE FILLING THE SPA
1. Check to be sure that the shut off valve is closed (turn handle
clockwise until it stops).
2. Safety cap is securely in place.
3. If the drain valve is facing a wall, leave enough space between
valve and wall (6” minimum) in order to have enough space to
connect a garden hose.
TO DRAIN THE SPA
1. Turn Power Off
Turn power off at the spa consoles and deactivate disconnect
switches at the G.F.C.I. plug or load center.
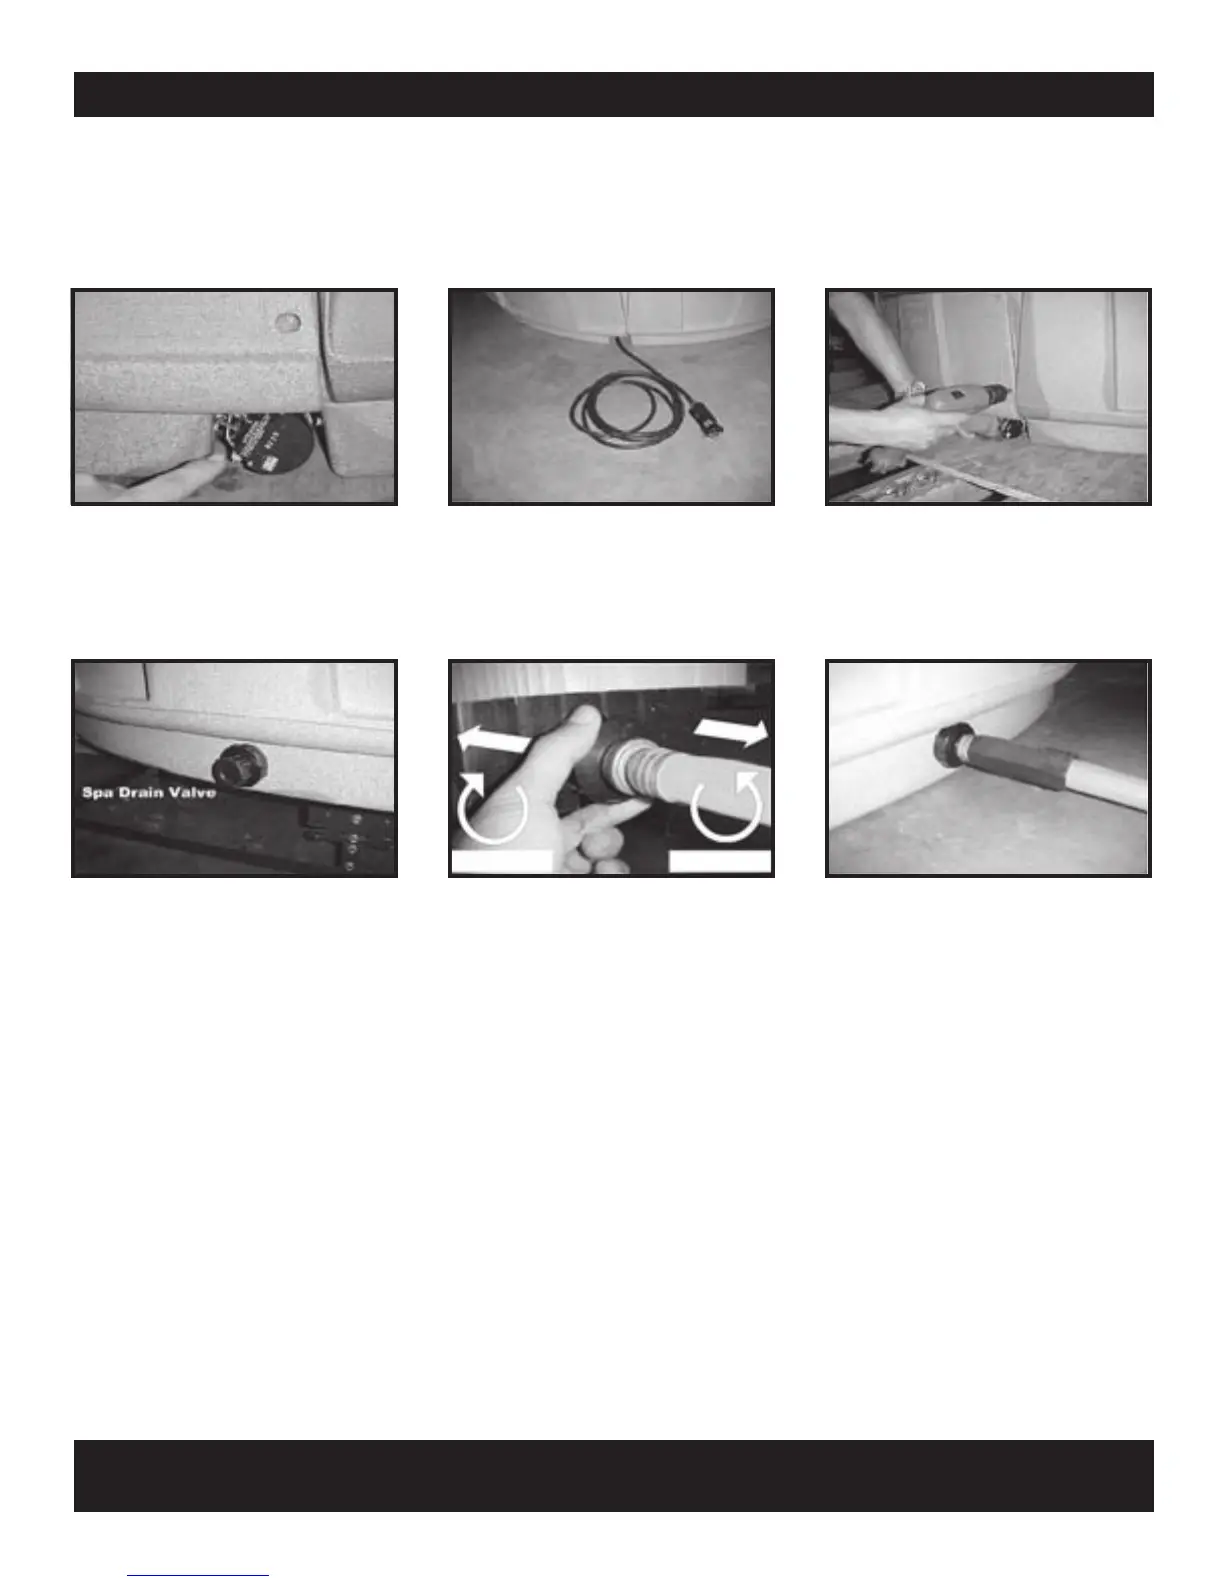
2. Locate Spa Drain Valve
Located outside at the bottom of the spa. See figures 1, 2 and 3 for
reference.
Drain Every Three Months
Draining your spa on a regular basis rids the spa of dissolved solids
and protects your spa equipment from the effects of residual calcium
hardness and total alkalinity problems.
3. Remove Drain Valve Safety Cap
Remove safety drain cap (see figure 1) and store for use when
refilling your spa. Attach a standard garden hose to the drain valve.
4. Attach Hose & Select Safe Suitable Drain
Route the hose to a sewer drain capable of safely assimilating 300
plus gallons of water which may contain both unsanitary
contaminants and chemical residue. To open drain valve twist
counter clockwise and pull (see figure 2).
Find G.F.C.I. power plug located below the right
corner of the equipment access door and cut
the white tie.
Pull G.F.C.I. along with power cord and inspect
the full length of the cord for any damage before
each use. If cord get’s tangled, remove
equipment access door. (see next picture)
Remove & save access panel screws. Use
caution when reinstalling the screws. Do not
overtighten.
The spa drain valve assembly consists of a garden hose connector with a twist on/off valve and a safety drain cap. It is located outside at the bottom of
the spa.
9
Figure 2
T
O CLOSE
TO OPEN
TURN
TURN
PUSH
PULL
Figure 1 Figure 3
 Loading...