Do you have a question about the DREAM MULTIMEDIA DM 500 S C T and is the answer not in the manual?
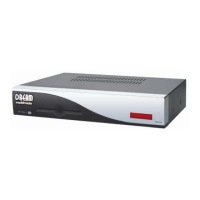
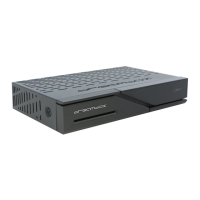
Illustrates the front panel and rear panel connections for DM 500-C/T and DM 500-S.
Explains the Smartcard Reader, Standby LED, RC LED, and Standby button.
Details all rear panel inputs and outputs like Antenna, LNB, Scart, Serial, Audio, Network.
Basic safety guidelines, electrical safety, and warnings on modifications.
Instructions for powering down and safety during connections/disconnections.
Guidelines on environmental exposure, grounding, and cleaning.
Information on recycling packaging and responsible unit disposal.
Lists package items and covers initial setup steps and wizard.
Identifies all buttons on the Dreambox remote control and their primary functions.
How to navigate menus using colored dots, Option-Buttons, and Navigation-Buttons.
Explains MENU, Standby, Numeric Keypad, and MUTE buttons for device operation.
Describes Arrow, Channel, Volume, INFO, OK, AUDIO, and EXIT buttons.
How to use the Standby button and access the shutdown/standby menu.
Using Menu-Button, Navigation-Buttons, and Numeric Keypad for menu access.
Explains the meaning of icons for various menu options like TV, Setup, Timer.
Details information shown in the Infobar and its status indicators.
How to access EPG information using various buttons.
Setting timers within EPG and configuring NGrab for recording.
How to view and select sub services and use Quickzap.
How to select audio tracks and access plugins like Teletext.
Steps to navigate to and change the OSD language.
Navigating to time zone settings and selecting a time zone.
Manually adjusting the Dreambox's current time and date.
Accessing the Signalfind tool for antenna alignment.
Adjusting the dish using SNR and AGC values for optimal signal.
Enabling or disabling the 5V antenna power supply.
Steps to start an automatic scan for satellite channels.
Choosing the correct region for accurate satellite scanning.
Understanding scan parameters like SNR, AGC, BER and the 'only Free' option.
Monitoring the progress bar and estimated time during a scan.
Steps to manually scan a specific transponder for satellite reception.
Inputting frequency, polarization, FEC, and symbol rate for the scan.
Steps to start an automatic scan for cable channels.
Selecting the appropriate cable provider for the scan.
Understanding scan parameters and the 'only Free' option for cable scans.
Monitoring the progress bar and estimated time during a cable scan.
Steps to manually scan a specific transponder for cable.
Inputting frequency, modulation, and symbol rate for cable scans.
Navigating to the Satfinder function for dish alignment.
Adjusting the dish using signal strength and quality indicators.
Steps to navigate to the satellite configuration settings.
Setting up reception for one satellite with a Universal LNB.
Choosing the desired satellite and saving the configuration.
Setting up reception for two satellites using a Toneburst switch.
Assigning satellites to Toneburst switch inputs.
Setting up reception for two satellites using a 22kHz switch.
Assigning satellites to 22kHz switch inputs.
Setting up reception for two satellites using a DiSEqC A/B switch.
Assigning satellites to DiSEqC ports A and B.
Setting up reception for four satellites using a DiSEqC OPT A/B switch.
Assigning satellites to DiSEqC ports AA, AB, BA, BB.
Setting up reception for multiple satellites using a DiSEqC Rotor.
Editing the list of satellites managed by the DiSEqC Rotor.
Basic LNB settings, including optional higher voltage.
Configuring the DiSEqC mode, e.g., Version 1.2, and adding satellites.
Setting longitude, latitude, and rotor speed for dish movement.
Provides an example table for DiSEqC 1.2 Rotor satellite positions and saving.
Steps to start an automatic scan for a single satellite.
Choosing a satellite from the list for the scan.
Understanding scan parameters like SNR, AGC, BER and the 'only Free' option.
Monitoring the progress bar and estimated time during a scan.
Prompt after scan completion to scan additional satellites.
Steps to start scanning multiple satellites simultaneously.
Choosing scan options like 'nothing', 'only free', or 'all'.
Using the OK-Button to cycle through available scan options.
Pressing the green Options-Button to initiate the scan.
Displaying scan progress for individual scanned satellites.
Displaying a summary of found services after the scan.
Prompt after scan completion to scan additional transponders.
Steps to manually scan a specific transponder for satellite reception.
Inputting frequency, polarization, FEC, and symbol rate for the scan.
Navigating to the Transponder Edit function.
Options to delete, add, or edit satellite and transponder data.
Options like network search, extended search, and BAT usage.
Navigating to the 'add' option to input new transponder details.
Inputting frequency and symbol rate for new transponders.
Saving changes and returning to the transponder scan menu.
Navigating to the 'Create new bouquet' option.
Choosing the type of bouquet to be created.
Entering a name for the newly created bouquet.
Navigating to the 'Add services to bouquet' option.
Choosing services from provider or service lists to add to a bouquet.
Selecting a provider and marking specific services to add.
Navigating to the 'Edit bouquets' option.
Choosing the specific bouquet that needs editing.
Options to delete, move, rename services, or add markers.
Navigating to the 'Parental lock' menu.
Overview of how locks prevent unauthorized access using a PIN.
Checking the Parental lock box and setting a new four-digit PIN.
Entering and re-entering the PIN to confirm the change.
Confirmation messages for successful PIN changes and error handling for mismatches.
Unchecking the Parental lock box and entering the current PIN to disable.
Checking the Setup lock box and setting a new four-digit PIN.
Entering and re-entering the PIN to confirm setup lock activation.
Confirmation for setup PIN change and error handling for mismatches.
Unchecking the Setup lock box and entering the current PIN to disable.
Opening the service list to select a service for locking.
Navigating to the 'Lock' option and entering the PIN to restrict access.
Opening the service list to select a service for unlocking.
Navigating to the 'Unlock' option and entering the PIN to remove restrictions.
Navigating to the A/V settings section.
Adjusting color format, aspect ratio, and TV system settings.
Using the testscreen and configuring WSS and AC3 audio output.
Navigating to the Keyboard Setup menu.
Choosing a keyboard layout and saving the configuration.
Navigating to the OSD Settings section.
Modifying OSD appearance parameters like Alpha, Brightness, and Contrast.
Options for main menu display, skin changes, and TuxText position.
Choosing a preferred skin and activating it for the OSD.
Visual examples and names of various available OSD skins.
Navigating to the TuxText position adjustment menu.
Moving rectangles to position the TuxText display on screen.
Saving the configured position for the TuxText display.
How to activate and use the Teletext plugin.
Using remote buttons for Teletext navigation and modes.
Settings for teletext aspect ratio, brightness, and codepage.
Navigating to the Expert Setup section.
Details on help buttons, sat position, fast zapping, and skip confirmations.
Options for error windows, infobar display, remaining time, and authentication.
Settings for serial interface, auto bouquet change, and teletext caching.
Navigating to the Communication Setup menu.
Setting IP address, DHCP, subnet mask, and network type.
Configuring DNS, gateway, and HTTP port for network access.
Configuring NFS share details and enabling automatic mounting.
Navigating to the NGrab-Streaming configuration.
Setting server IP, port, and MAC address for NGrab.
Navigating to the Software update section.
Steps and requirements for updating software manually.
Navigating to the Remote control setup menu.
Adjusting repeat rate and delay for remote buttons.
Navigating to the Factory reset menu and confirming the action.
Overview of the timer list and managing scheduled events.
Navigating to and understanding service data, encryption, and technical details.
Navigating to the 'About...' section for system details.
Viewing processor, software version, and tuner type.
Details on processor, OS, memory, interfaces, and size.
Information on video compression, formats, and audio codecs.
Details on analog/digital output levels and serial interface.
Specifics on tuner frequencies, LNB power, and satellite position control.
Support contact information, hotlines, website, and forum links.
Fields for customer and reseller details for warranty purposes.
Information on copyright, software licenses, and GNU GPL.
Explains the preamble and goals of the GNU General Public License.
Detailed conditions for copying, distributing, and modifying GPL software.
Specific requirements for distributing modified works and license acceptance.
Clauses regarding warranty disclaimers and limitations of liability.
| Operating System | Linux |
|---|---|
| RAM | 64 MB |
| Flash Memory | 8 MB |
| Type | Digital Satellite Receiver |
| Tuner Type | DVB-S |
| Processor | 250 MHz |
| Video Output | Composite |
| Audio Output | Stereo RCA |
| Data Ports | RS-232 |
| Inputs | LNB In |
| Outputs | Stereo RCA |
| Supported Video Formats | MPEG-2 |
| Supported Audio Formats | MPEG-2 |