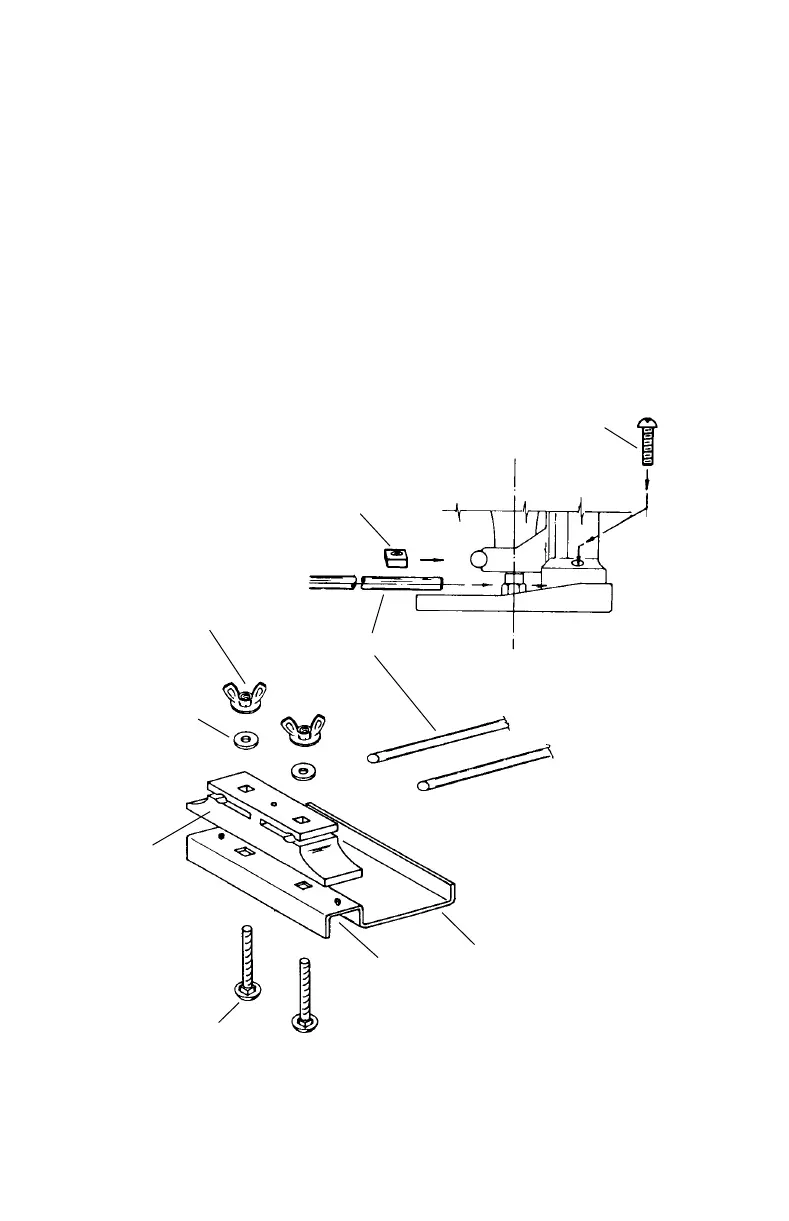
8. For EDGE GUIDE use, assemble GUIDE
RODS into height adjusting bracket and
secure using (2) #10-24 SQUARE NUTS and
(2) #10-24 x 3/4" phillip drive SCREWS.
Square nut will slide in slots above the guide
rods. Screws are assembled from the top
through holes down through nuts, and
against the rods. Fasten edge guide to edge
guide CARRIAGE BOLTS. Assemble
carriage bolts through square holes in EDGE
GUIDE and through EDGE GUIDE
BRACKET and secure using WASHER and
WING NUTS. (Be sure small DOWELS at the
ends of edge guide bracket locate in
corresponding holes in edge guide.) Slide
edge guide assembly on guide rods as
shown. Set edge guide at DESIRED
DISTANCE from cutter and tighten wing
nuts. (See Fig. 1 )
NOTE: Use the flat on the front of the router
base for edging or straight line routing.
9. When edge guide settings are needed
at more than 1 3/4" from cutter, remove
edge guide assembly from guide rods. Turn
assembly around and assemble edge guide
bracket to guide rod from the opposite side.
You can now set edge guide at any distance
from cutter between 1 1/4" to 4". (See Fig. 2)
-6-
SQUARE NUTS
SCREWS
CARRIAGE BOLTS
WING NUTS
WASHERS
EDGE
GUIDE
BRACKET
GUIDE RODS
DOWELS
EDGE GUIDE
DM 2615302558 8/98 1/11/99 1:48 PM Page 6