14
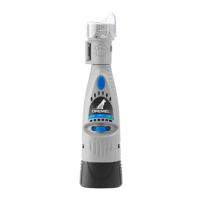
TO MOUNT SANDING DISC
7
Pull spring-loaded sleeve T DOWN towards tool with one hand and hold.
With the other hand, align interface U on mandrel with interface W on bottom of
sanding disc V.
Place sanding disc on the mandrel to a point just below interface U and twist
Release sleeve T. Sanding disc V should lock in place.
! Incorrect seating of sanding disc on mandrel may lead to personal injury or
property damage.
To check for proper seating, hold shaft-lock button A and twist the sanding disc V.
The sanding disc V will not be able to rotate on mandrel.
To remove sanding disc, pull spring-loaded sleeve T DOWN towards tool with one
sanding disc.
TO ATTACH NAIL GUARD ATTACHMENT
8
! Make sure that the mandrel and the sanding disc are mounted properly before
mounting the attachment.
1. Detach clear cap K from the attachment by running the small knobs O on the
inside of the clear cap up along height adjustment slot P until they reach the
guided opening.
2.
3. Open the attachment.
4. Position the attachment around the threaded nose of the tool and close the
5. Turn the whole attachment J clockwise to screw it into place on the threaded
nose (make sure that it is securely tightened so that it will not shift positions
during use).
Re-attach clear cap K (simply perform step 1 in reverse order).
Turn the clear cap so that the small knobs are all the way to the end of slot P (next
installed.
Do not force the clear cap out of the guides.
USE
GETTING STARTED
pet and pet owner.
By starting early and considering grooming to be part of your pet’s training, your pet
will grow used to the experience.
First, train your pet to feel comfortable with their paws being touched and handled
before exposing them to the rotary tool. One way to do this is to massage their legs,
paws, and individual toes for a few minutes at least once a day. Afterwards, create a
positive association with this experience by rewarding your pet with its favorite snack.
Next
the tool while it is turned off. Then, while keeping the tool in your hand, let your pet
listen to the sound the tool makes when it is turned on.
Gradually work up to having your pet’s toenails touch the rotating sanding disc for less
than a second. Do not grind the nails yet; simply let your pet become familiar with the
tool. Throughout the acclimation process, continue to praise your pet and reward good
behavior with a snack. This process may take a couple of days or weeks.
NAIL ANATOMY
9
Before trimming your pet’s nails, you will need to identify the quick.
has no feeling because it has no nerve endings. The core of the nail is the quick. It
is made up of tiny blood vessels and nerve endings and is very sensitive. The quick
is a vein that “feeds” the toenail. Should you cut the quick while trimming a nail, the
nail will start to bleed.
core. Dark-colored nails may not allow you to see where the quick is located. Pets
may have both light and dark colored nails that allow you to estimate the length of
the quick.
A rule of thumb for the proper angle is 45 degrees upwards from the bottom of the paw.