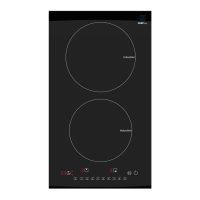
The document describes the DP-CHEFTOP-2V Dual Vertical Induction Cooktop Hob, a kitchen appliance designed for domestic use.
Function Description
This induction cooktop uses electromagnetic induction to heat cookware directly, offering efficient and precise cooking. It features two vertical cooking zones, each with its own control panel. The appliance is designed solely for cooking food and is not intended for other uses like heating rooms.
Important Technical Specifications
- Model: DP-CHEFTOP-2V
- Dimensions: 20" x 11.6"
- Voltage: 120V~ 60 Hz
- Max. Power: 1800W
- Cooking Zones: Two vertical induction zones.
- Cookware Compatibility: Requires pots and pans suitable for induction, specifically those that are magnetically detectable and bear the "INDUCTION SYSTEM" symbol. Enameled pots are also suitable.
- Minimum Pot Diameter: The bottom diameter of pots or pans should be at least 10cm.
- Automatic Shut-off: The hob automatically switches off if no heating zone is selected within 120 seconds of switching on, or if no cooking time is set and the hob is not operated for 120 minutes.
- Residual Heat Indicator ("H"): Alerts the user when cooking zones are still hot after use.
- Error Code "E0": Indicates that a pot is not suitable, not correctly positioned, or not detected within 180 seconds.
- Timer: Can be set for a maximum of 99 minutes (1 hour and 39 minutes) for all cooking zones.
- Child Lock: A safety feature to prevent accidental activation of the hob.
Usage Features
The cooktop is operated via a touch control panel.
Switching On/Off:
- To switch on, press the power button. The cooking zone displays will light up.
- To switch off, press the same button until the displays switch off. All cooking zones are deactivated.
- If the hob has been in use, the residual heat indicator "H" will remain lit until the cooking zones cool down.
Adjusting Cooking Zones:
- Once the hob is on and a pan is placed, select the desired zone using its corresponding button. The display will show level "0".
- Each cooking zone has various power levels, adjustable from "1" (minimum) to "9" (maximum) using the numbered buttons.
- A "specifically function" allows for quick access to a high power level by pressing a number level button twice. Pressing it again restores the previous level.
- To deactivate a cooking zone, select it and press the "0" button. The zone will switch off, and the "H" indicator will light up if it's still hot.
Child Lock:
- To activate, switch on the hob and hold the child lock button for three seconds; the timer will show "Lo". The control panel will then be locked.
- To deactivate, repeat the activation procedure. "Lo" will turn off, and the hob will be active again.
Timer Function:
- Select the cooking zone to be used with the timer.
- Press the button with the clock symbol.
- Set the desired cooking time using the numbered buttons (0-9) of the timer function.
- The timer will begin counting down after a few seconds.
- An acoustic signal will sound, and the hob will switch off automatically once the set time elapses.
- To deactivate the timer, press the "0" button to set the display to "00" or hold the clock symbol button for at least 4 seconds.
Cookware Guidelines:
- Only use pots and pans with smooth, flat bottoms to avoid scratching the hob.
- Avoid placing hot pots or pans on the control panel surface.
- Do not use pots with bottoms that are not perfectly flat or metal pots with enameled bottoms, as this can permanently damage the glass-ceramic top.
- For optimum results and energy saving, use pots and pans with a bottom width equal to that of the cooking zone, keep pot lids on during cooking, and place the pot in the middle of the cooking zone.
Temperature Level Table (Guidance):
The manual provides a table correlating temperature levels (0/H to 9) with typical cooking tasks and habits, from support surface/stand-by to frying/boiling. It notes that the relationship between heat setting and power consumption is not linear, and power can vary with cookware material and dimensions.
Maintenance Features
Cleaning:
- Always ensure cooking zones are switched off and the residual heat indicator "H" is not displayed before cleaning.
- Do not use steam cleaners.
- Avoid abrasive sponges or scouring pads, as they can ruin the glass surface.
- Clean the hob after each use (when cool) to remove deposits and stains.
- Immediately remove sugar or high-sugar content foods to prevent damage.
- Be aware that salt, sugar, and sand can scratch the glass.
- Use a soft cloth, absorbent kitchen paper, or a specific hob cleaner following the manufacturer's instructions.
- If the cooktop is broken, cleaning solutions and spills may penetrate and create a risk of electric shock.
- When cleaning a hot cooking area with a wet sponge or cloth, be careful to avoid steam burns.
Troubleshooting:
- Refer to the "Instructions for use" section.
- Check if the electricity supply is on.
- Ensure the hob is thoroughly dry after cleaning.
- Consult the troubleshooting table for alphanumeric error codes (E0, E2, E3, E4) and their remedies (e.g., "Put on the pan" for E0, "Call the after-sales service" for E2, E3, E4).
- If the hob cannot be switched off, disconnect it from the power supply.
Noises:
- Whistling or crackling sounds during normal operation are normal and result from cookware characteristics (e.g., multi-layered or uneven bottoms). These are not indicative of a defect.
- The internal cooling system's fan noise is normal during operation and for several minutes after the hob is switched off, essential for proper functioning.
After-Sales Service:
- Before contacting service, try troubleshooting using the guide and restarting the appliance.
- If the problem persists, provide a brief description of the fault, product type and model, full address, and telephone number.
- Contact an authorized After-Sales Service Centre for repairs to ensure original spare parts and correct repairs.
Warranty:
- Manufacturer Warranty is valid for 1 year from the date of purchase. Proof of purchase is required.