PHONE: 858-430-4000 WWW.DRIVECAM.COM SUPPORT@DRIVECAM.COM
DRC201 2006-09-27
Page 9 Installing and Testing the DriveCam Event Recorder
REMOVING A EVENT RECORDER
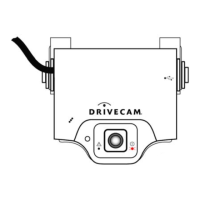
Use the following procedures to uninstall an event recorder from your vehicle. You’ll need the Torx
wrench that was shipped with your first event recorder to remove the unit from the bracket and a 3M Tape
Removal Tool (or a thin putty knife) to remove the bracket from the windshield. These items can be
ordered directly through DriveCam.
CAUTION: Do not try to pull or pry the bracket off the windshield. It will destroy the
bracket and may break the windshield.
To remove the event recorder:
Step 1 Remove the left Torx screw completely.
Step 2 Gently pull down on the left side of the unit (try not to trigger the unit) to access the power
cable.
Step 3 Unplug the power cable only when a solid red or solid green light is showing
(i.e. wait for the status lights to stop flashing before disconnecting the power cable).
NOTE: A warning file or log entry will be created when the unit is unplugged.
This is a standard security feature.
Step 4 Remove the right Torx screw and the unit.
To remove the mounting bracket from the windshield:
Step 5 Use the 3M Tape Removal Tool or a broad, very thin putty knife.
Step 6 Apply a small amount of lubricant (e.g. WD-40) to both sides of the blade.
Step 7 Slide the blade between the bracket and the window and gently
rock the blade back and
forth while pushing forward until the bracket is completely removed.