• 9 •
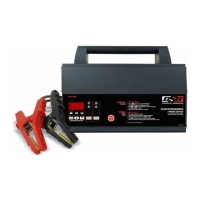
100A Flash Reprogramming
NOTE: Do not attempt to Flash Reprogram a vehicle that has a discharged or defective
battery. Make sure that the vehicle battery is in good condition and fully charged before
proceeding. In Flash Reprogramming Mode, the charger is able to deliver 70A charging
current continuously, and to deliver up to 100A for three minutes.
1. Set MODE to FLASH REPROGRAM. (The VOLTS LED will start blinking.)
2. Use and to adjust voltage to the voltage needed for the vehicle being
programmed (refer to OEM specications). Voltage selected is shown on the digital
display. The unit has a voltage range of 13 to 14.8, with a default of 14.2.
NOTE: When the VOLTS LED stops blinking, the display shows the selected voltage.
3. Press to turn on the output.
4. When nished with Flash Reprogramming, press to exit this mode.
Using the Battery Voltage Tester
Overview
This battery charger has a built-in voltmeter to measure your battery’s voltage. The charger
does not have a built in load tester. As such, a recently charged battery could have a
temporarily high voltage due to what is known as “surface charge”. The voltage of such
a battery will gradually drop during the period immediately after the charging system is
disengaged. Consequently, the tester could display inconsistent values for such a battery.
For a more accurate reading, the surface charge should be removed by temporarily
creating a load on the battery, such as by turning on lights or other accessories for a
couple of minutes before you read the display. Read it a couple of minutes after you have
shut the headlights off.
Testing Sequence: There are seven basic steps required to test the battery state of charge:
NOTE: You cannot test the battery voltage while charging.
1. With the charger unplugged from the AC outlet, connect the charger to the battery
following the instructions given in Sections 6 and 7.
2. Plug the charger AC power cord into the AC outlet.
3. The CONNECTED (yellow) LED will light if a properly connected battery is detected.
4. Conrm the CHARGING (yellow) LED is off.
5. Set the DISPLAY to VOLTS.
6. If the output is on, press . If the output is already off, do not press .
7. Read the voltage on the digital display.
General Charging Notes
Fans
The charger is designed to control its cooling fans for efcient operation. Consequentially,
it is normal for the fans to start and stop when maintaining a fully charged battery. Keep the
area near the charger clear of obstructions to allow the fans to operate efciently. NOTE: The
charger has thermal protection, and it will shut down if it gets too hot.
Voltage
The voltage displayed during charging is the charging voltage and is usually higher than the
battery’s resting voltage.
 Loading...