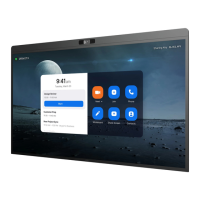
Smart Connect
Model:DB71455
OR
USB-C to USB-A (Not-Included)
By Default
USB-C (Included)
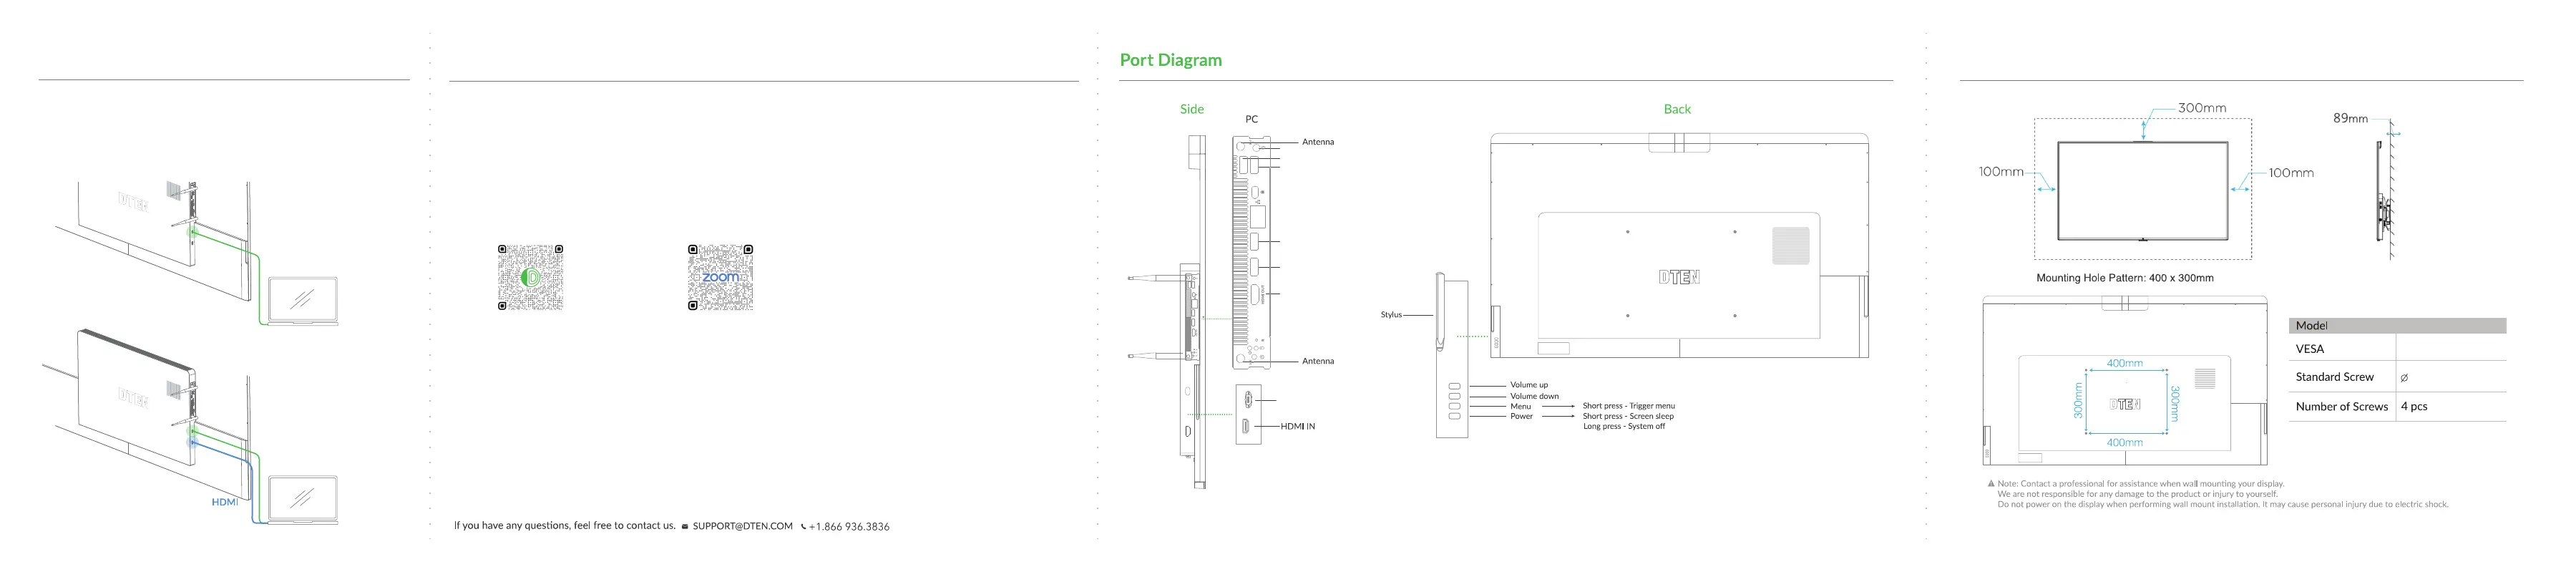
USB 3.1
USB 3.1
USB 3.1
HDMI Out
USB 3.1
Mounng Instrucons
(Not Included)
BYOD Funcon with DTEN Smart Connect
Access the DTEN D7X camera system, microphone
array, speakers and touchscreen as peripherals from an
aached computer
1. The DTEN D7X may need to update to the latest version for the first-me startup. Please ensure the
internet connecon is stable during startup and update process. An ethernet connecon is recommended.
2. Acvate and register the DTEN D7X on DTEN Orbit for device and user management services.
3. Ensure the local area network allows the DTEN D7X to be connected. Check with your network security
team for instrucons. Scan the QR code below for DTEN Network Whitelist Requirements.
4. The D7X requires an acve soware license to connect to Zoom Rooms, Microso Teams or other VC
providers’ soware. For more informaon, visit the service provider’s website.
Tips
1. An ethernet connecon is preferred for the best meeng experience.
2. Please do not disconnect the power without first properly shung down the D7X.
3. Do not aempt to disassemble the DTEN D7X without the instrucon of a cerfied DTEN service provider.
Unauthorized disassembly or service may void your warranty.
4. The D7X is compable with many meeng room controllers, document cameras, audiovisual systems and
other 3rd party peripherals. Consult the respecve manufacturer instrucons for setup and pairing informaon.
Zoom Rooms Overview
DTEN Network
Whitelist Requirements
Setup and Enrollment with DTEN Orbit
D7X 55”
300 mm x 400 mm
6 mm x 12 mm
Specificaons
 Loading...