Do you have a question about the DTEN D7X and is the answer not in the manual?
Attach the AV bar to the display for initial setup.
Connect the antennas to the DTEN D7X for wireless functionality.
Plug in the power cord; the display will turn on automatically.
Follow on-screen prompts for network configuration.
Key advice for seamless setup, network integration, and warranty.
Details of physical connection ports on the device's sides and back.
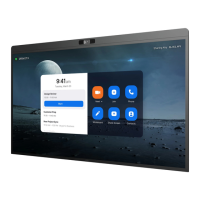
The DTEN D7X 55" Windows Edition is a versatile interactive display designed for modern meeting environments, offering a comprehensive solution for collaboration, communication, and content sharing. It integrates a camera system, microphone array, speakers, and a touchscreen, functioning as a central hub for various meeting activities.
One of its primary functions is to facilitate BYOD (Bring Your Own Device) capabilities through DTEN Smart Connect. Users can access the DTEN D7X's integrated camera system, microphone array, speakers, and touchscreen as peripherals from an attached computer. This is achieved by connecting the computer to the DTEN D7X using a USB-C cable, which is included with the device. Alternatively, users can connect via HDMI (not included) for video and audio, and a USB-C to USB-A cable (not included) for touchscreen functionality, depending on their computer's available ports. This flexibility allows users to leverage their preferred computing devices while benefiting from the D7X's high-quality audio, video, and interactive features.
The DTEN D7X is designed for seamless setup and enrollment with DTEN Orbit, a platform for device and user management services. Upon initial startup, the device may require a software update to the latest version. For this, a stable internet connection, preferably an Ethernet connection, is recommended to ensure a smooth update process. After updating, users need to activate and register the DTEN D7X on DTEN Orbit. It's crucial to ensure that the local area network allows the DTEN D7X to connect, and users are advised to consult their network security team for any necessary whitelist requirements. The D7X also requires an active software license to connect with various video conferencing providers such as Zoom Rooms or Microsoft Teams, enabling its full functionality for virtual meetings.
The physical design of the DTEN D7X incorporates several ports and features for connectivity and interaction. On the side, it includes multiple USB 3.1 ports, an HDMI Out port, and a Smart Connect port, along with antenna connections. The back of the device features additional ports and controls, including volume up/down buttons, a menu button, and a power button. The menu button allows for short presses to trigger the menu, while the power button can be short-pressed for screen sleep or long-pressed to power the system off. The device also includes an AV bar that needs to be installed, and antennas for wireless connectivity.
Installation of the DTEN D7X involves a few straightforward steps. First, the AV bar needs to be installed. Next, the antennas are to be installed. Once these are in place, the power cord can be plugged into an outlet, which will turn on the display. The final step involves following the on-screen instructions to set up the network, with an Ethernet connection being the preferred method for optimal performance.
For mounting, the DTEN D7X supports a VESA standard of 300 mm x 400 mm. It comes with wall mount brackets, which are stored at the bottom of the box beneath the foam. The mounting hole pattern is 400 mm x 300 mm. When wall mounting the display, it is strongly advised to seek assistance from a professional to prevent any damage to the product or personal injury. It is also critical not to power on the display during wall mount installation to avoid electric shock.
Maintenance and care for the DTEN D7X are important to ensure its longevity and proper functioning. Users are advised not to disassemble the D7X without the supervision of a DTEN technician, as improper use may void the warranty. Similarly, unauthorized disassembly or service can void the warranty. It is crucial to properly shut down the D7X before disconnecting the power to prevent potential issues. The device is compatible with various third-party peripherals such as meeting room controllers, document cameras, and audiovisual systems. Users should consult the respective manufacturer instructions for setting up and pairing these accessories.
In summary, the DTEN D7X 55" Windows Edition is a robust and user-friendly interactive display designed to enhance collaborative experiences in professional settings. Its integrated features, flexible connectivity options, and straightforward setup process make it a valuable tool for modern communication and content sharing. Adhering to the recommended installation and maintenance guidelines will ensure optimal performance and extend the lifespan of the device.
| Resolution | 3840 x 2160 (4K UHD) |
|---|---|
| Bluetooth | Bluetooth 5.0 |
| Touchscreen | Yes |
| Audio | Integrated stereo speakers |
| Operating System | Android |
| Integrated Camera | Yes |
| Integrated Microphones | Yes |
| Display Size | 55 inches |
| Screen Size | 55 inches |
| Ports | HDMI, USB-C, USB-A, Ethernet |