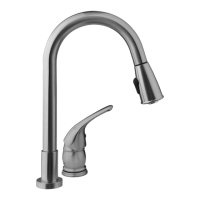
Dura Faucet Limited Lifetime Warranty
Dura Faucet warrants its RV faucets to be leak and drip free during normal use for as long as
the original consumer purchaser owns a Dura Faucet. | If the faucet should leak or drip during
normal use, Dura Faucet will, free of charge, mail to the purchaser the cartridge necessary to
put the faucet in good working condition. This warranty applies only to Dura Faucets installed in
the United States of America, Canada or Mexico (North America). | Dura Faucet also warrants
all other aspects of the faucet or accessories to be free of defects in material and workmanship
during normal usage in a recreational vehicle for as long as the original consumer purchaser
V^UZOPZVYOLY+\YH-H\JL[7SH[LKTL[HSHUKWSH[LKWSHZ[PJÄUPZOLZHYL^HYYHU[LKMVY
year. | If a defect is found during normal use, Dura Faucet will, at its election, repair, provide
a replacement part or product, or make appropriate adjustment. Damage to a product caused
by accident, misuse, or abuse is not covered by this warranty. Improper care and cleaning will
void the warranty. Proof of purchase (original sales receipt) must be provided to Dura Faucet
with all warranty claims. Dura Faucet is not responsible for labor charges, installation, or other
incidental or consequential costs. In no event shall the liability of Dura Faucet exceed the pur-
chase price of the faucet. | If you believe that you have a warranty claim, contact Dura Faucet
through our online contact form. Please be sure to provide all pertinent information regarding
your claim, including a complete description of the problem, the product, model number, color,
ÄUPZO[OLKH[L[OLWYVK\J[^HZW\YJOHZLKHUKMYVT^OVT[OLWYVK\J[^HZW\YJOHZLK(SZV
include your original invoice. | DURA FAUCET AND/OR SELLER DISCLAIM ANY LIABILITY
FOR SPECIAL, INCIDENTAL OR DONSEQUENTIAL DAMAGES. | Some states/provinces do
not allow limitations of how long an implied warranty lasts or the exclusion of limitation of such
damages, so these limitations and exclusions may not apply to you. This warranty gives the
JVUZ\TLYZWLJPÄJSLNHSYPNO[Z@V\TH`HSZVOH]LV[OLYYPNO[Z[OH[]HY`MYVTZ[H[LWYV]PUJL[V
state/province.
* Never use cleaners containing abrasive cleansers, ammonia, bleach, acids, waxes, alcohol,
ZVS]LU[ZVYV[OLYWYVK\J[ZUV[YLJVTTLUKLKMVYWSH[LKTL[HSVYWSHZ[PJÄUPZOLZ;OPZ^PSS]VPK
the warranty.
:,[O:[:[L
*HTHZ>(
;LS-H_!
www.durafaucet.com
DF-NMK503
Pull-Down
RV Kitchen Faucet
10
11
12
13
14
15
16
17
18
19
20
21
22
23
24
25
26
27
28
29
,9A
*9A
*)
+9A
+9A
* 9A
*A5
*)
*9A
+9A
*)
*)
+9A
*9A
* 9A
*A5
+9A
,*7
,;3)
,0=
1
2
3
4
5
6
7
8
9
,0*)
*9A
*)
*9A
+ 9A
* 9A
*)
+9A
* 9A

 Loading...